

This article provides step by step instructions to build your first AI agent on HPEs Private Cloud AI. To simplify things Langflow will be used, which is a tool to provide a no-code UI experience. It can be adapted to other UI-based tools like for example N8N.
HPE Private Cloud AI
HPE Private Cloud AI (HPE PCAI) offers a comprehensive, turnkey AI solution designed to address key enterprise challenges, from selecting the appropriate LLMs to efficiently hosting and deploying them. Beyond these core functions, HPE Private Cloud AI empowers organizations to take full control of their AI adoption journey by offering a curated set of pre-integrated NVIDIA Inference Microservices (NIM) LLMs, along with a powerful suite of AI tools and frameworks for data engineering, analytics, and data science.
HPE Machine Learning Inference Software (MLIS) is an enterprise-grade solution designed to simplify the deployment, management, and monitoring of machine learning (ML) models at scale. It specifically targets the complexities of moving models from development into production, with a particular focus on large language models.
HPE AI Essentials (AIE) Software is the integrated software layer that provides the tools for building, deploying, and managing generative AI applications, including HPE MLIS. It provides a flexible Import Framework that enables organizations to deploy their own applications or third-party solutions, like Langflow.
Use Case
An AI Agent can autonomously act leveraging tools provided. In our example the AI Agent gets triggered by a users chat message. As tools regular RAG (Retrieval Augmented Generation) will be provided for retrieving information out of a PDF and the ezPresto MCP (Model Context Protocol) Server that has tools available to retrieve information from a Database. There are two sets of sample data to choose from, one for a flight support agent to answer questions regarding refunds, and one for citizen passport queries, to answer questions around requested passports. In this tutorial we will take the flight support agent example. In order to use the Citizen Passport queries use the according dataset.
Prerequisites
This tutorial requires a feature avialble in newer Private Cloud AI versions—specifically the ezPresto MCP Server, supported since AIE 1.12.
You will need at least 1 free GPU in your platform or a model with tool calling enabled, that's already deployed. If you only have one free GPU you will need to switch to a CPU only embedding model, the one included in this instruction is using a GPU.
You also need a HuggingFace account to deploy the LLM.
Import additional Frameworks
Two additional Frameworks are required for this tutorial: Langflow and Qdrant. As mentioned Langflow is a low-code/no-code interface used to build our agent. Qdrant is the vectordatabase used. Langflow supports also other vectordatabases, feel free to swap it to a different one.
When importing additional Frameworks into the platform a Helm Chart is required. A Helm Chart is a deployment method for Kubernetes Clusters, which AIE basically is. You can find a repository of prepared helm charts here. If you have another application you would like to bring into AIE follow these instructions. Please keep in mind, with additional software you might bring additional vulnerabilities into your platform, so be mindful about what you're importing.
In order to import additional Frameworks navigate within AIE to 'Tools & Frameworks' and find the green button Import Framework on the top right.

Import Langflow
Leverage the icon and Helmchart you can find here, with different versions available use the newest version, which is langflow-0.1.4-1.7.3.tgz while I am writing this blogpost. Follow the instruction in the import Framework Wizard. Use the namespace 'langflow'.
Import Qdrant
Leverage the icon and Helmchart you can find here. Use the namespace 'qdrant'. Follow the instruction in the import Framework Wizard. If you decide for a different namespace, please remember that namespace.
Deploy Models in Private Cloud AI
Two models are leveraged in this use case: an Embedding Model for the RAG tool and a LLM as agent.
You can decide to use other models than the once described here. As an example let's deploy the nvidia/nv-embedqa-e5-v5 as Embedding Model and Qwen/Qwen3-8B-Instruct as LLM. You could also use Nemotron for example.
Deploy NVIDIA Embedding Model
For Model Deployment a Packaged Model is required so it appears unter our GenAI>Model Catalog. Luckily the Embedding Model we want to use comes as part of the pre-selected NVIDIA NIMs configured ready to deploy. Therefore let's navigate to GenAI-Model Catalog. Identify the NVIDIA Embedding Model and click 'Deploy'.
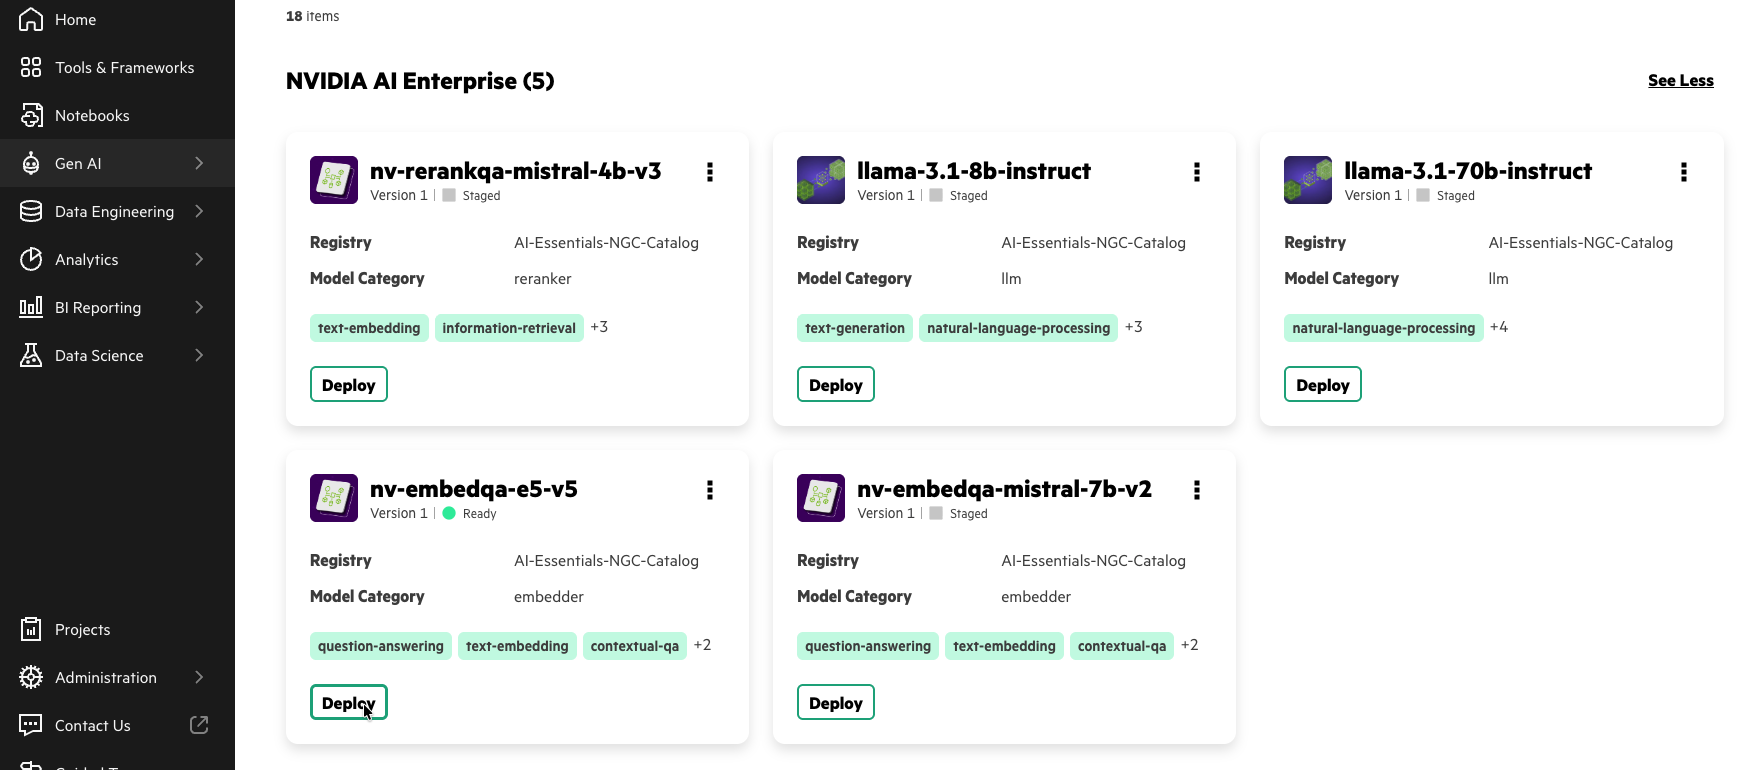
As a Autoscaling Policy for now select 'Fixed 1'. Autoscaling policies are a very cool feature to dynamically adapt the models to the demand of end-users, if you are interested in learning more about it check this out.
Deploy Qwen as LLM
In order to deploy a model that is not yet found within the Model Catalog, creating a Packaged Model is required. In order to do so navigate to Tools & Frameworks > MLIS. Within MLIS you can create registries pointing to HuggingFace, NVIDIA NGC or also a S3 storage.
To create your Packaged Model, use the following configuration (skip registry creation for now):
- Name: qwen3-8b
- Registry: None
- Model format: Custom
- Image: vllm/vllm-openai:v0.9.0
- (for 1.9 and greater) Model category: llm
- (for 1.9 and greater) Enable local caching
- Resource Template: Custom
- CPU: 1-> 8
- Memory: 8Gi -> 32Gi
- GPU: 1 -> 1
- Advanced Environment Variables: HUGGING_FACE_HUB_TOKEN your HuggingfaceToken
- Arguments: --model Qwen/Qwen3-8B --enable-reasoning --reasoning-parser qwen3 --enable-auto-tool-choice --tool-call-parser hermes --port 8080
Data Source Setup
Upload CSV File
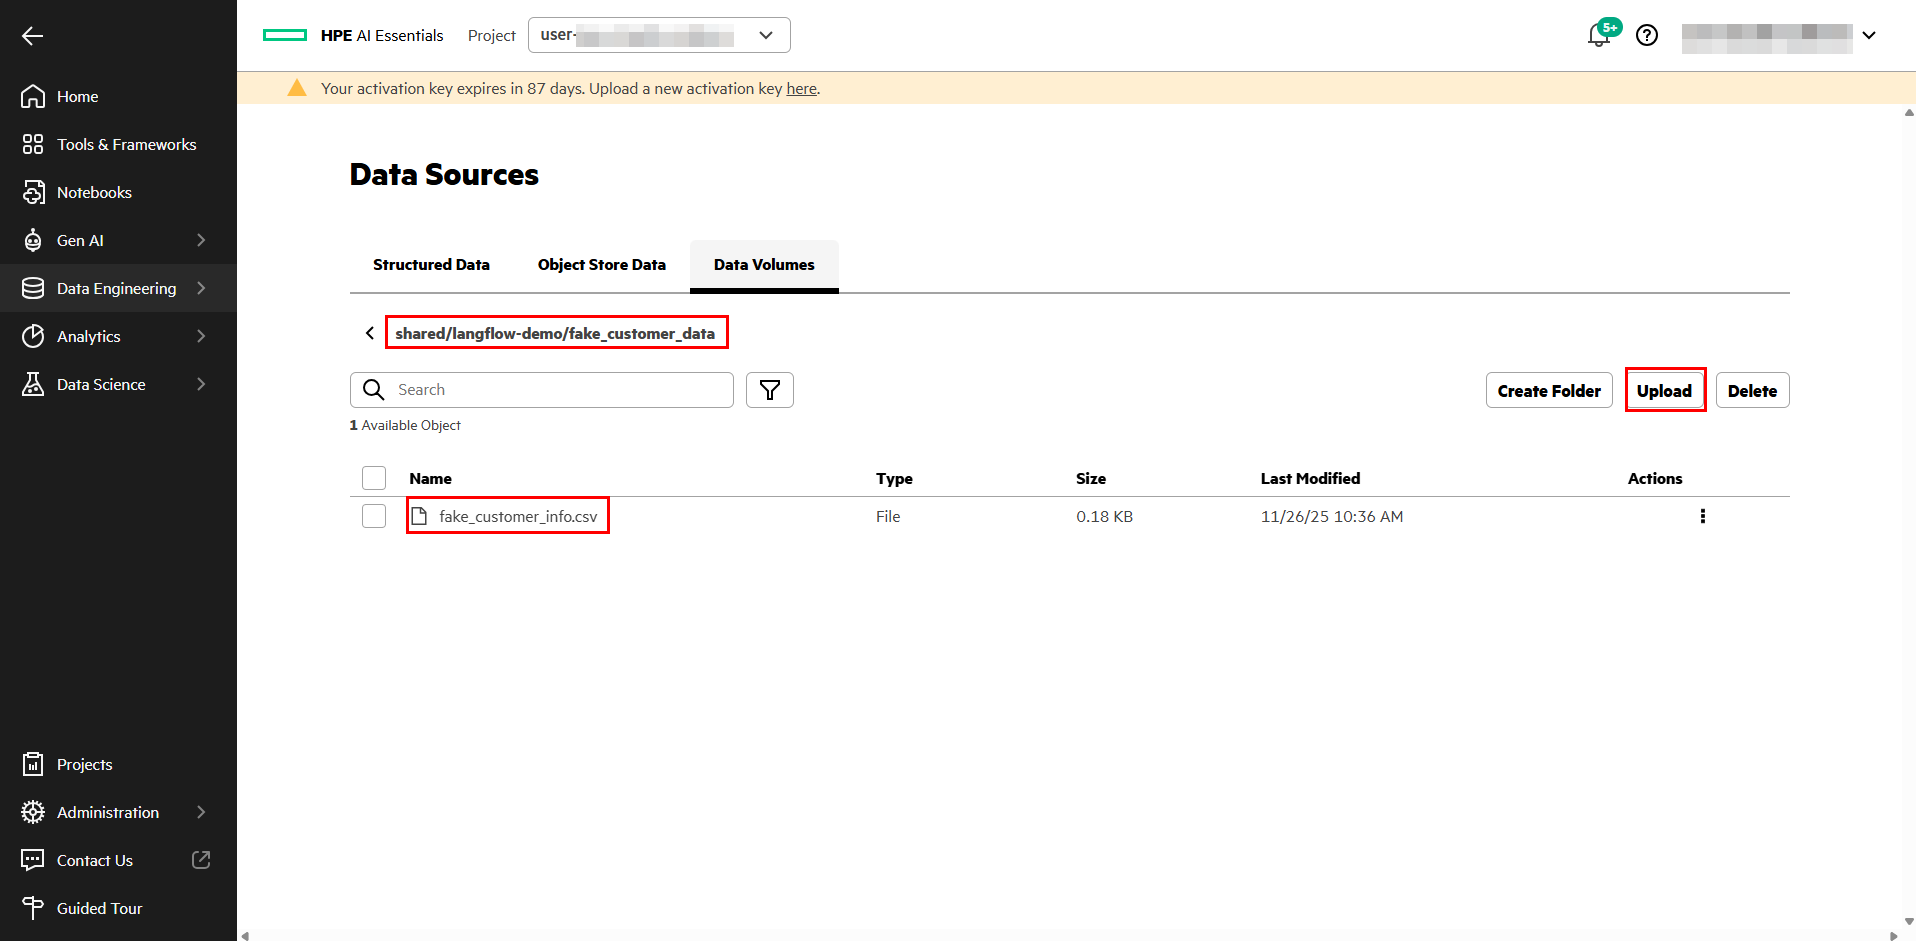
Navigate to Data Engineering > Data Sources > Data Volumes, where you will upload a CSV File. Therefore download the sample CSV file here . Navigate to 'shared' and create a new folder called 'langflow-demo'. Navigate into this folder by clicking on it. Create a sub-directory within that folder and name it 'fake_customer_data'. Navigate by clicking on it, click the Upload Button and upload the CSV file.
You can name the folders differently, but then you will need to adapt the Adding Datasource instructions.
Add as datasource
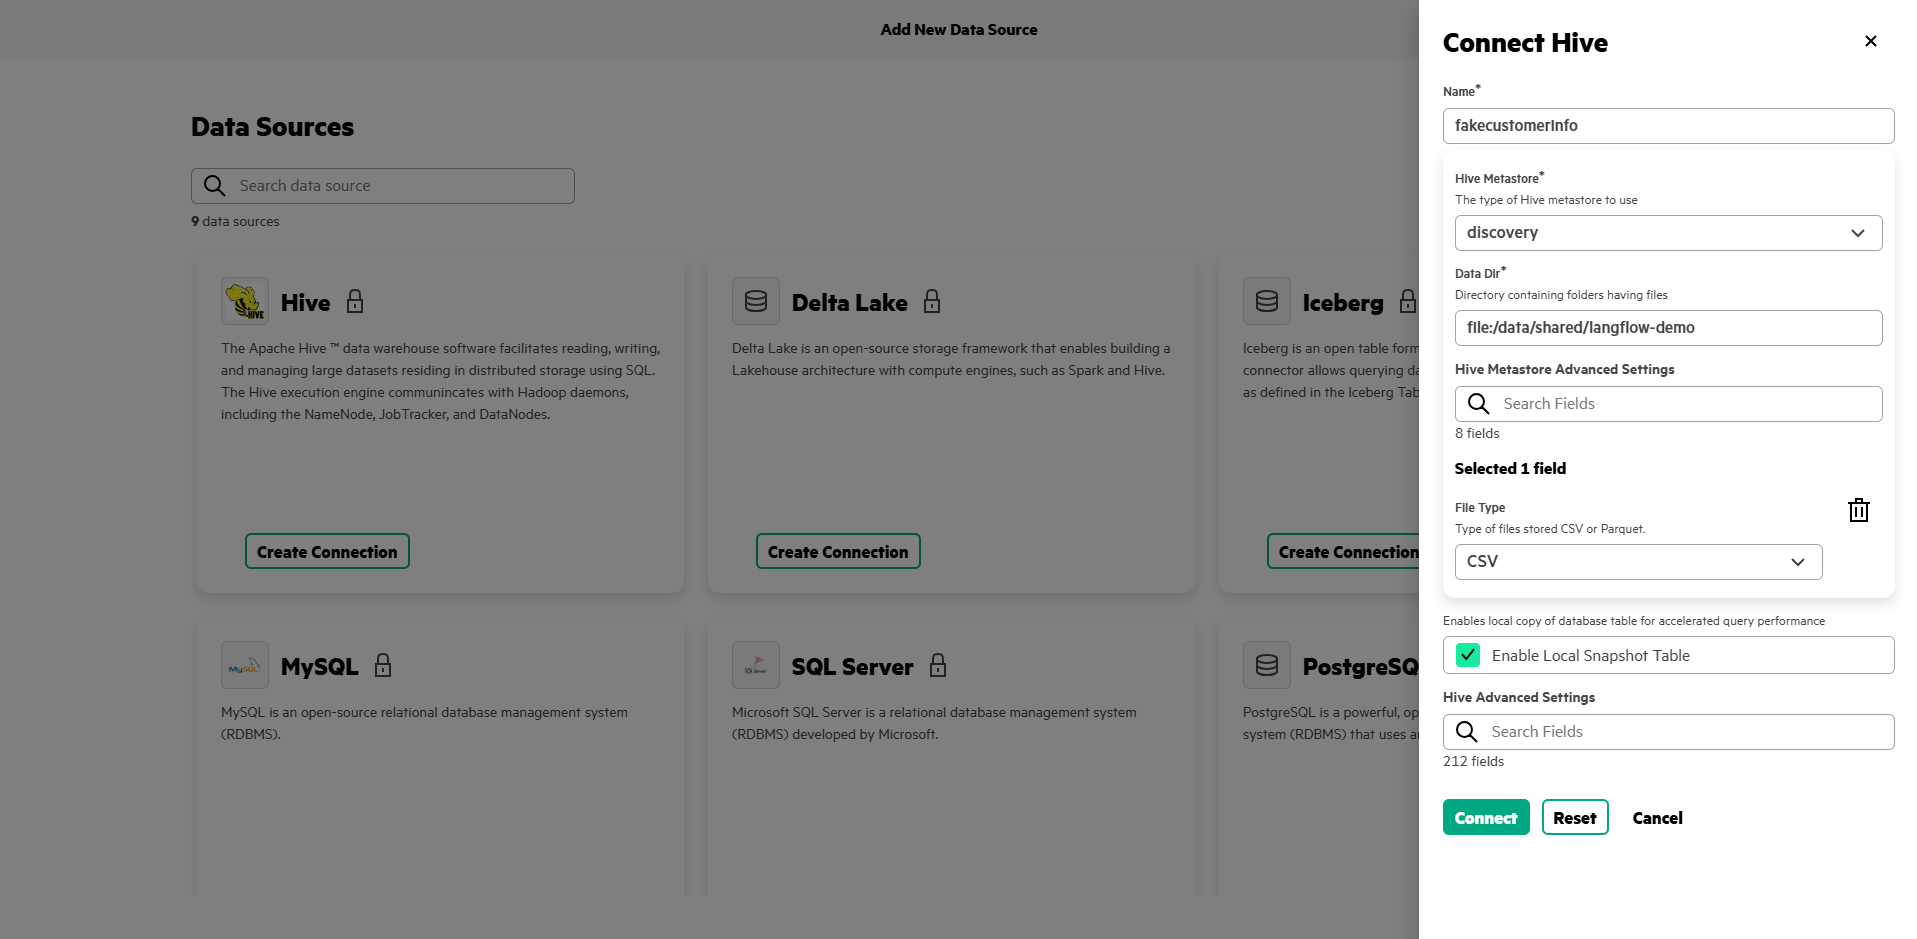
Once the file is uploaded the next step is to connect is a datasource. You could also use a database instead of a CSV file if you wanted to. Within AIE navigate to Data Engineering > Data Sources > Structured Data. Click 'Add New Datasource'. Select 'Hive'. Add the connection filling in the following details:
Name: fakecustomerinfo
Hive Metastore: Discovery
Data Dir: file:/data/shared/langflow-demo
Advanced Field File Type: CSV
When the connection is successful, if it was created as private (lock icon), click the three dots on the new fakecustomerinfo card and select "Change to public access" to make it public (globe icon), this gives all the users on the platform access to that datasource.
Prep Vector Database
Navigate to Tools & Frameworks within AIE, search for your freshly deployed 'Qdrant' and click 'Open'. You might need to append /dashboard at the end of the URL. You should be able to see the Qdrant UI. Navigate to 'Console' in the Qdrant UI. Copy paste the following code in order to create a new Collection named 'anywhere':
PUT /collections/anywhere
{
"vectors": {
"size": 1024,
"distance": "Cosine"
}
}
Click the 'RUN' button in order to execute.

Prep Langflow
Go to Tools & Frameworks and open Langflow. Go to the top right menu next to the profile picture and proceed to settings.
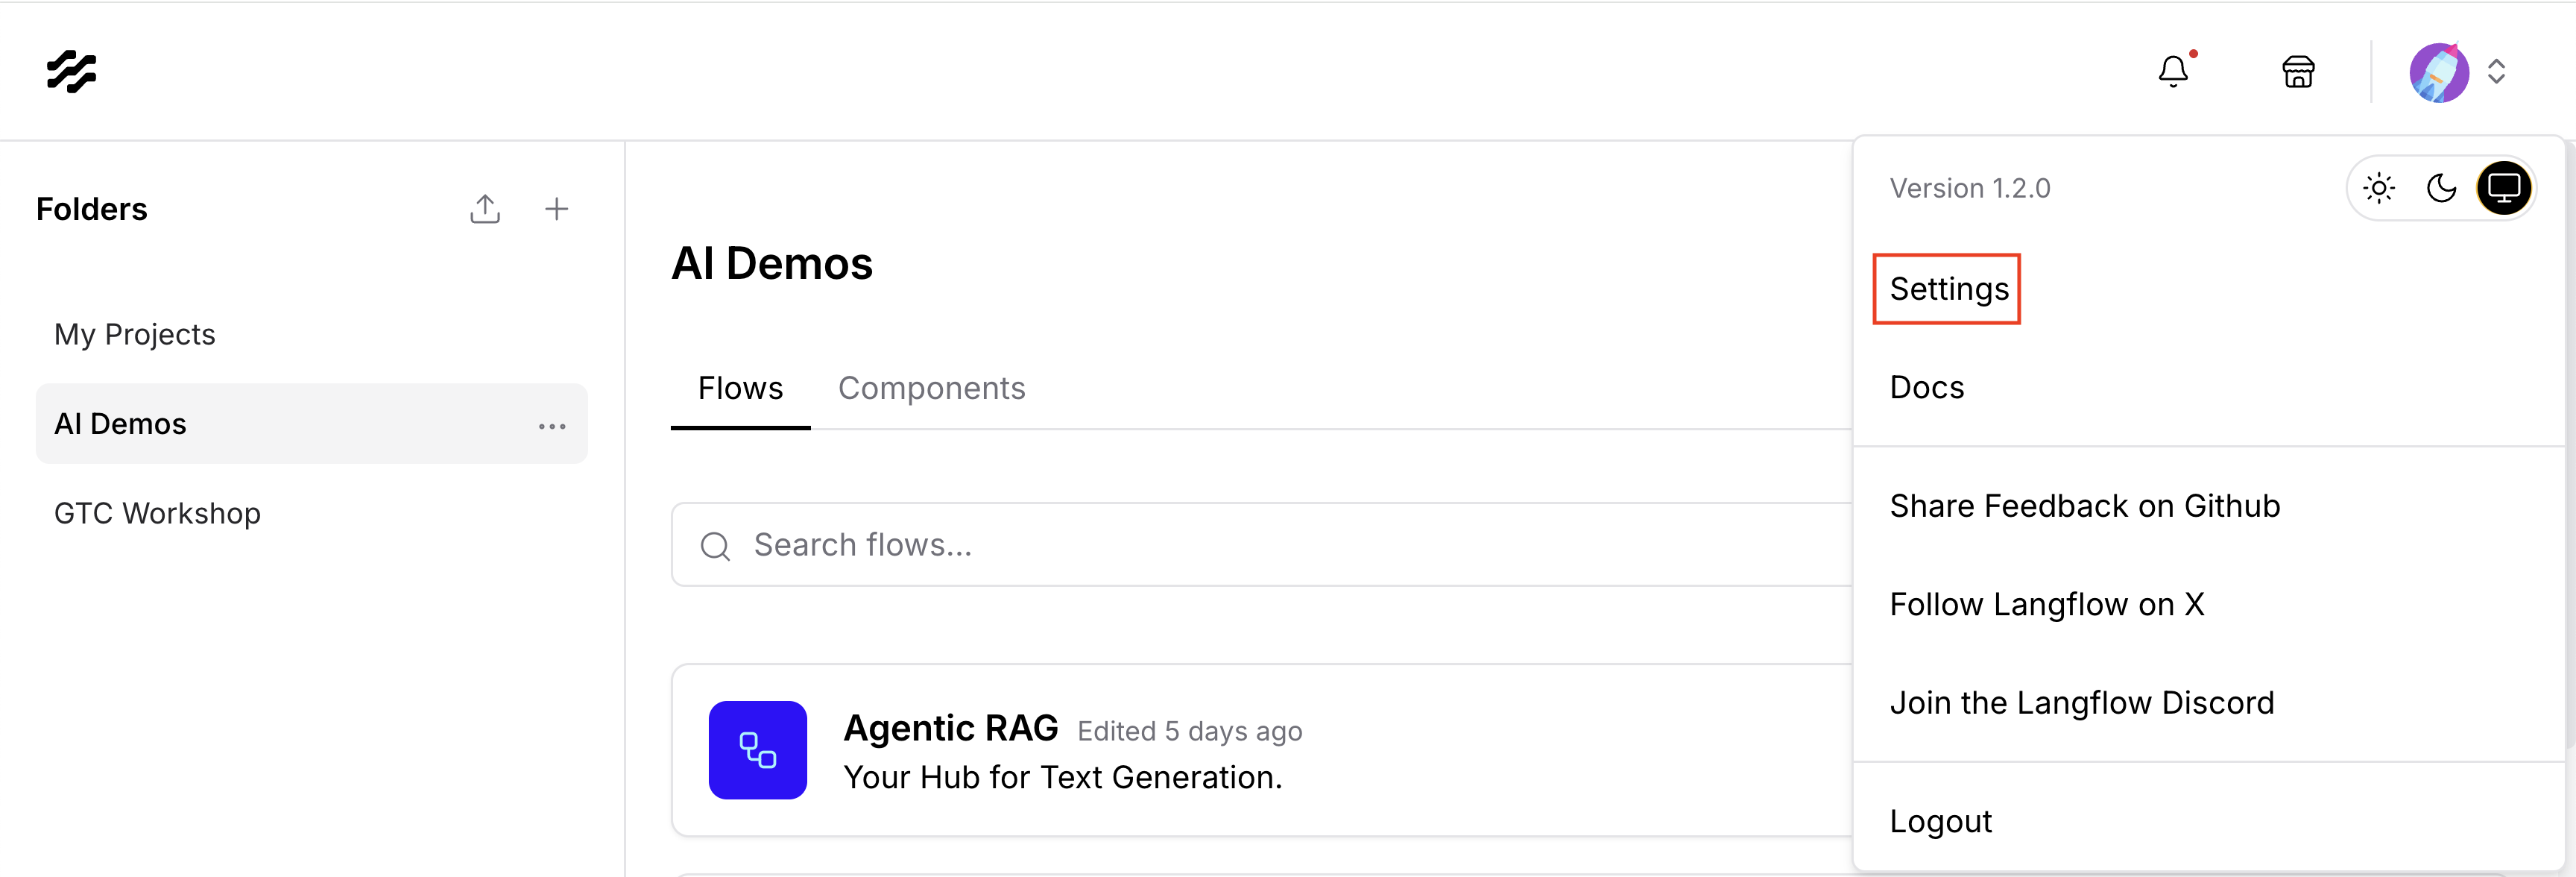
Select Global Variables and create the following:
NV_EMBEDQA_E5_V5_NIM: Set this to your embedding model endpoint URL, can be retrieved via GenAI > Model Endpoints. Don't forget to add /v1 .NV_EMBEDQA_E5_V5_NIM_TOKEN: Set this to the token for your embedding model, you can create one at GenAI > Model Endpoints.LLM_ENDPOINT: Set this to your LLM endpoint URL, can be retrieved via GenAI > Model Endpoints. Don't forget to add /v1 .LLM_TOKEN: Set this to the token for your LLM, you can create one at GenAI > Model Endpoints.QDRANT_ENDPOINT: Set this to the Kubernetes Cluster internal endpoint of qdrant which is http://qdrant.qdrant.svc.cluster.local in case you chose a different namespace please adapt the endpoint http://qdrant.YOURNAMESPACE.svc.cluster.localQDRANT_COLLECTION: Set this to 'anywhere'
Our Langflow Flow will use these global variables. Another thing that needs to be configured is the connection to the ezPresto MCP Server. This MCP Server has 5 tools:
- execute_query: this executes a SQL query, input: SQL query, output: response
- get_table_schema: this gives you the table schema of a specific table, input: catalogname, schema, table, ouptut: table schema
- list_catalogs: this lists all the catalogs (all data sources connected), input: none, ouput: catalogs
- list_schemas: this lists all available schemas for a catalog, input: catalog, output: schemas
- list_tables: this lists all available tables for a schema, input: catalogname and schema, output: tables
With these tools our AI Agent will be able to do what we can as a human, when we browse the data available in Data Engineering > Data Catalog.
To establish a connection to the ezPresto MCP Server navigate within Langflow to Settings > MCP Servers. Add a new one with the following configuration:
- Type:
Streamable HTTP/SSE - Name:
ezpresto Streamable HTTP/SSE URL: take this from AIE navigating to Data Engineering > Data Sources > MCP Server

Headers
- 'Authorization' 'Bearer YOURJWTTOKEN' to retrieve your JWT token, within AIE 1.12 this expires per default every 30 minutes. With newer releases you can create an longer lived application token.
In order to retrieve your JWT token open a Jupyter Notebook server in your AIE. For that navigate to 'Notebooks', select your personal user project, start your default notebook server by clicking on the 3 dots and start. Launch your Jupyter Notebook Server, open a terminal window and execute the following: cat /etc/secrets/ezua/.auth_token
With that the preparation steps are concluded and you can proceed to upload our Flow.
Build your first Agent
Navigate within Langflow to the Project Overview (from settings click the Langflow logo in the top left corner).
Upload this flow by clicking the upload icon next to Folders.
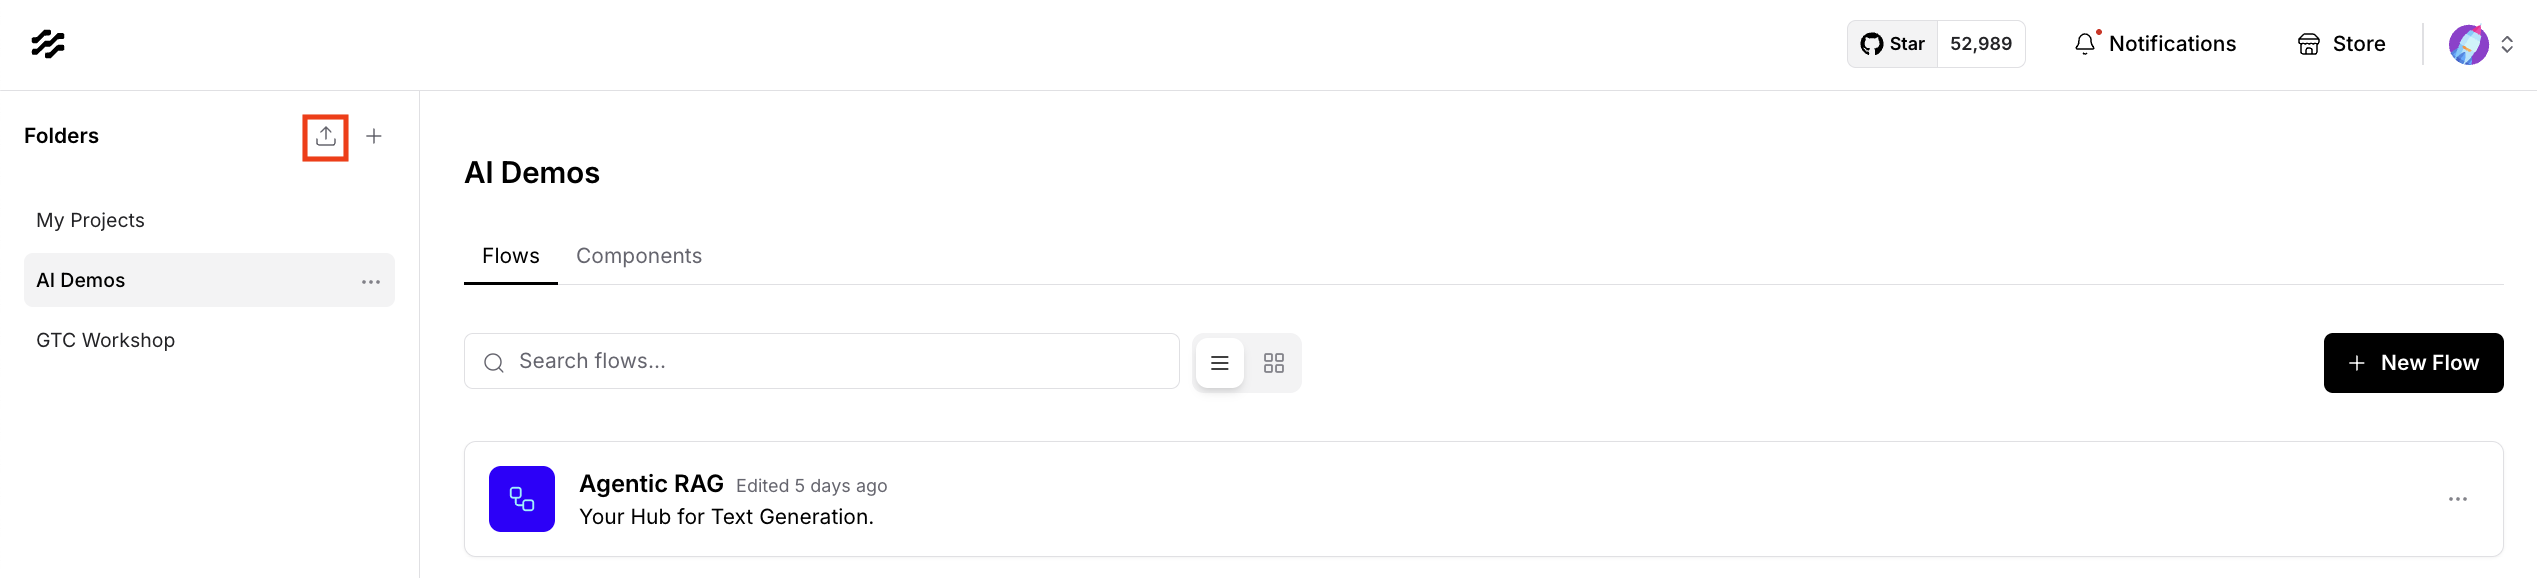
Open the flow by clicking on it. Make sure to upload the PDF file you want to use for the RAG portion in the 'Read File' component. Make sure that the components are using the Global Variables: the Qdrant component, the NVIDIA model and the NVIDIA Embeddings. For each component you have a play button, if you click the Playbutton of the Qdrant component in the "Data Ingestion" Area it executes the Qdrant component but before that all components connected to it. By executing that flow the PDF file was chunked, embedded using the Embedding model and stored in the vectorDB inside the anywhere collection.
To interact with your agent click on the top right corner on Playground. A Chatwindow opens. If you send a message here, the whole flow from Chat Input to Chat Output gets triggered. The agent decides on your message which tool or tools to use in order to answer your message.
For the flight support agent ask something like: "My name is John and my flight is A105, I was downgraded to coach from first class, what is my refund?"
The agent should return the correct answer of 90$ after calling both tools FlightPolicy and ezprestomcp requesting the schema of the table before executing a query.
Credits
Credits where Credits are due:
Alejandro Morales Martinez - the original founder of the flight support agent case
Francesco Caliva - for helping me improve the adapted version and test out the documentation around it
Claudio Calderon - for helping us keeping it up to date
Please keep coming back to the HPE Developer Community blog to learn more about HPE Private Cloud AI and get more ideas on how you can use it in your everyday operations.
Related

Beyond generic AI: achieve contextual accuracy with HPE's Knowledge Bases
Apr 15, 2025
Build your first AI Chatbot on HPE Private Cloud AI using Flowise and HPE MLIS
Jul 11, 2025
Getting started with Retrieval Augmented Generation (RAG)
Nov 14, 2024
HPE Private Cloud AI: Natural Language to Structured Query Language
May 6, 2026
Implementing a local LLM using S3-based model storage and vLLM in HPE Private Cloud AI
Mar 17, 2026Integrating Dagster as a modern data orchestration framework in HPE Private Cloud AI
Apr 19, 2026
LLM observability and cost management on HPE Private Cloud AI
Mar 6, 2026