
Bring your agent to the next level - Introduce LiteLLM for MCP Cost management and Guardrails
August 26, 2026This article provides step by step instructions to enhance your existing Langflow Agent Flow with Guardrails and Cost Management via LiteLLM.
LiteLLM is introduced as a new default framework in AI Essentials, it acts as an AI gateway and provides features like Guardrails.
HPE Private Cloud AI
HPE Private Cloud AI (HPE PCAI) offers a comprehensive, turnkey AI solution designed to address key enterprise challenges, from selecting the appropriate LLMs to efficiently hosting and deploying them. Beyond these core functions, HPE Private Cloud AI empowers organizations to take full control of their AI adoption journey by offering a curated set of pre-integrated NVIDIA Inference Microservices (NIM) LLMs, along with a powerful suite of AI tools and frameworks for data engineering, analytics, and data science.
HPE Machine Learning Inference Software (MLIS) is an enterprise-grade solution designed to simplify the deployment, management, and monitoring of machine learning (ML) models at scale. It specifically targets the complexities of moving models from development into production, with a particular focus on large language models.
HPE AI Essentials (AIE) Software is the integrated software layer that provides the tools for building, deploying, and managing generative AI applications, including HPE MLIS. It provides a flexible Import Framework that enables organizations to deploy their own applications or third-party solutions, like Langflow.
Use Case
An AI Gateway like LiteLLM can not only manage Model Endpoints but also MCP Servers, Agents, and Guardrails. This tutorial covers how to manage access and costs to MCP Servers in LiteLLM. I will use the GitHub MCP Server or a Langflow Flow like the Flight Support Agent or Citizen Passport agent, as described here, and use OpenWebUI as Frontend to interact with it as an example. Additionally, Guardrails are introduced.
Prerequisites
This tutorial requires a feature available in newer Private Cloud AI versions, specifically the ezPresto MCP Server, supported since AIE 1.12. In addition we are using LiteLLM and OpenWebUI, new default Frameworks included since AIE 1.13/2026070. If you are working on an older version, you can import the frameworks as explained for LiteLLM here.
This tutorial assumes you use the GitHub MCP Server which requires a GitHub Account and a Personal Access Token (you can create one in your User Settings -> Developer Settings). If you want to interact with this MCP Server, you will need at least 1 free GPU to deploy a Large Language Model with tool-calling enabled. If you are looking for a guide for deployment, you can leverage for example this one. A HuggingFace account is required.
The more advanced example assumes an agentic Langflow Flow to be already existing. You can follow this tutorial in order to create one. For creating this sample Agent, you will need at least 1 free GPU in your platform or a model with tool calling enabled, that's already deployed. If you only have one free GPU, you will need to switch to a CPU only embedding model, the one included in that linked instruction is using a GPU. You also need a HuggingFace account to deploy the LLM.
Managing a MCP Server in LiteLLM
A simple GitHub MCP Server
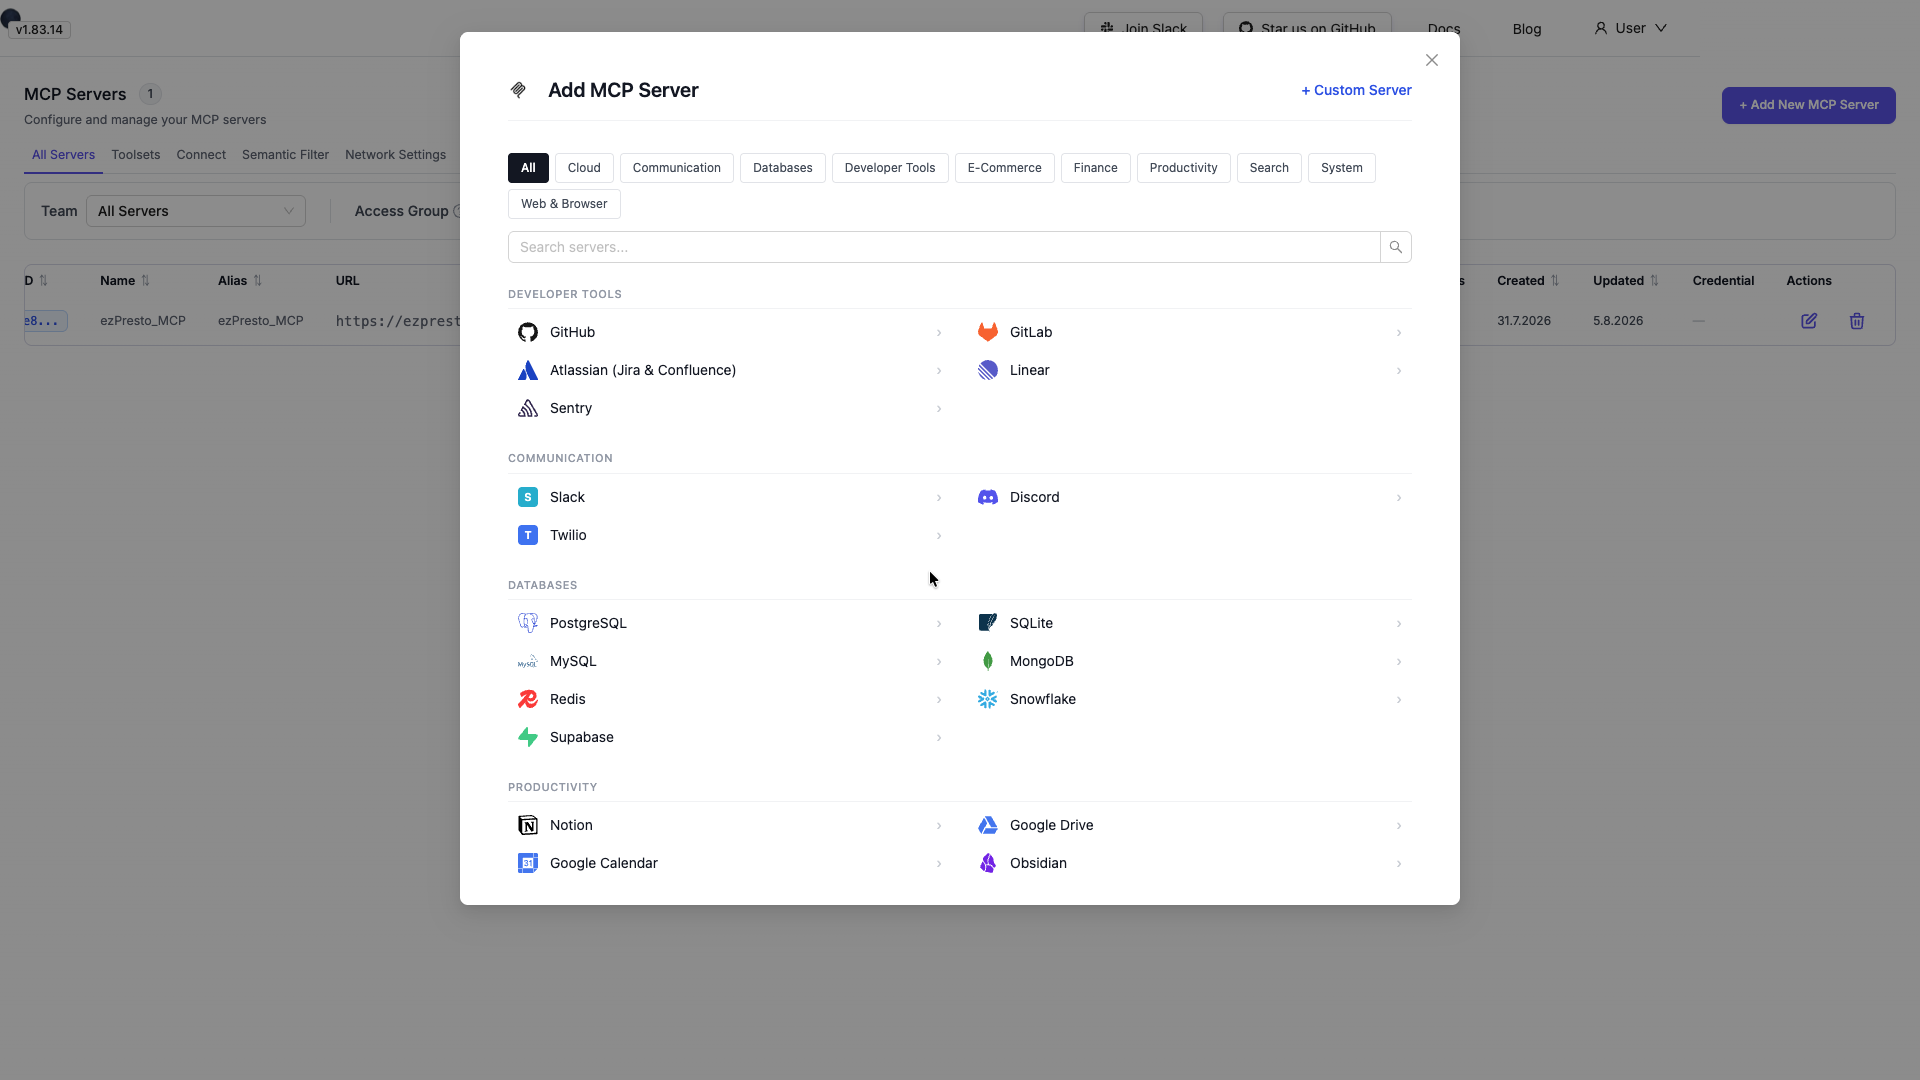
Within LiteLLM, navigate to MCP Servers. In this example a connection to the EzPresto MCP Server already exists. Let's create a new MCP Server. Select 'GitHub' from the provided options.
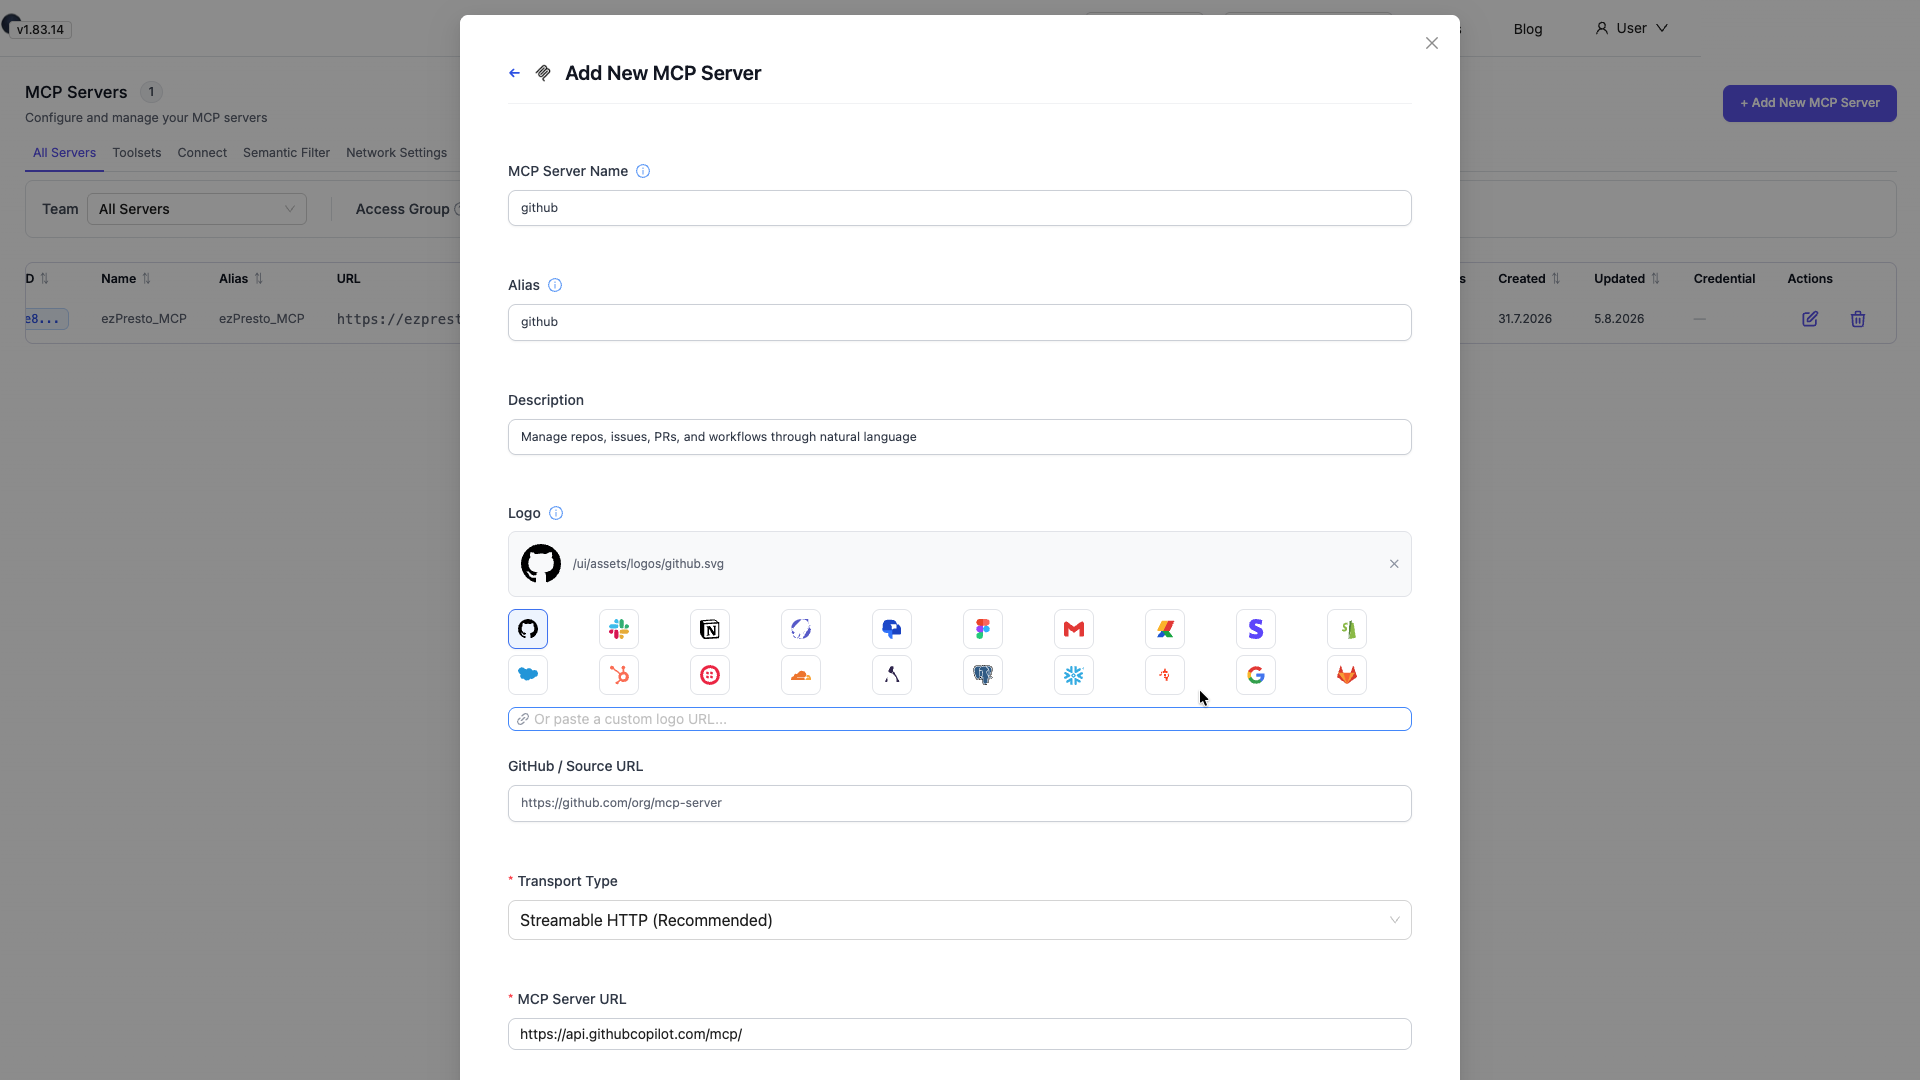
Adapt the name of the MCP Server as well as the description if you want. Select the GitHub Logo as your Logo. The following fields 'Transport Type' and 'MCP Server URL' are already filled.
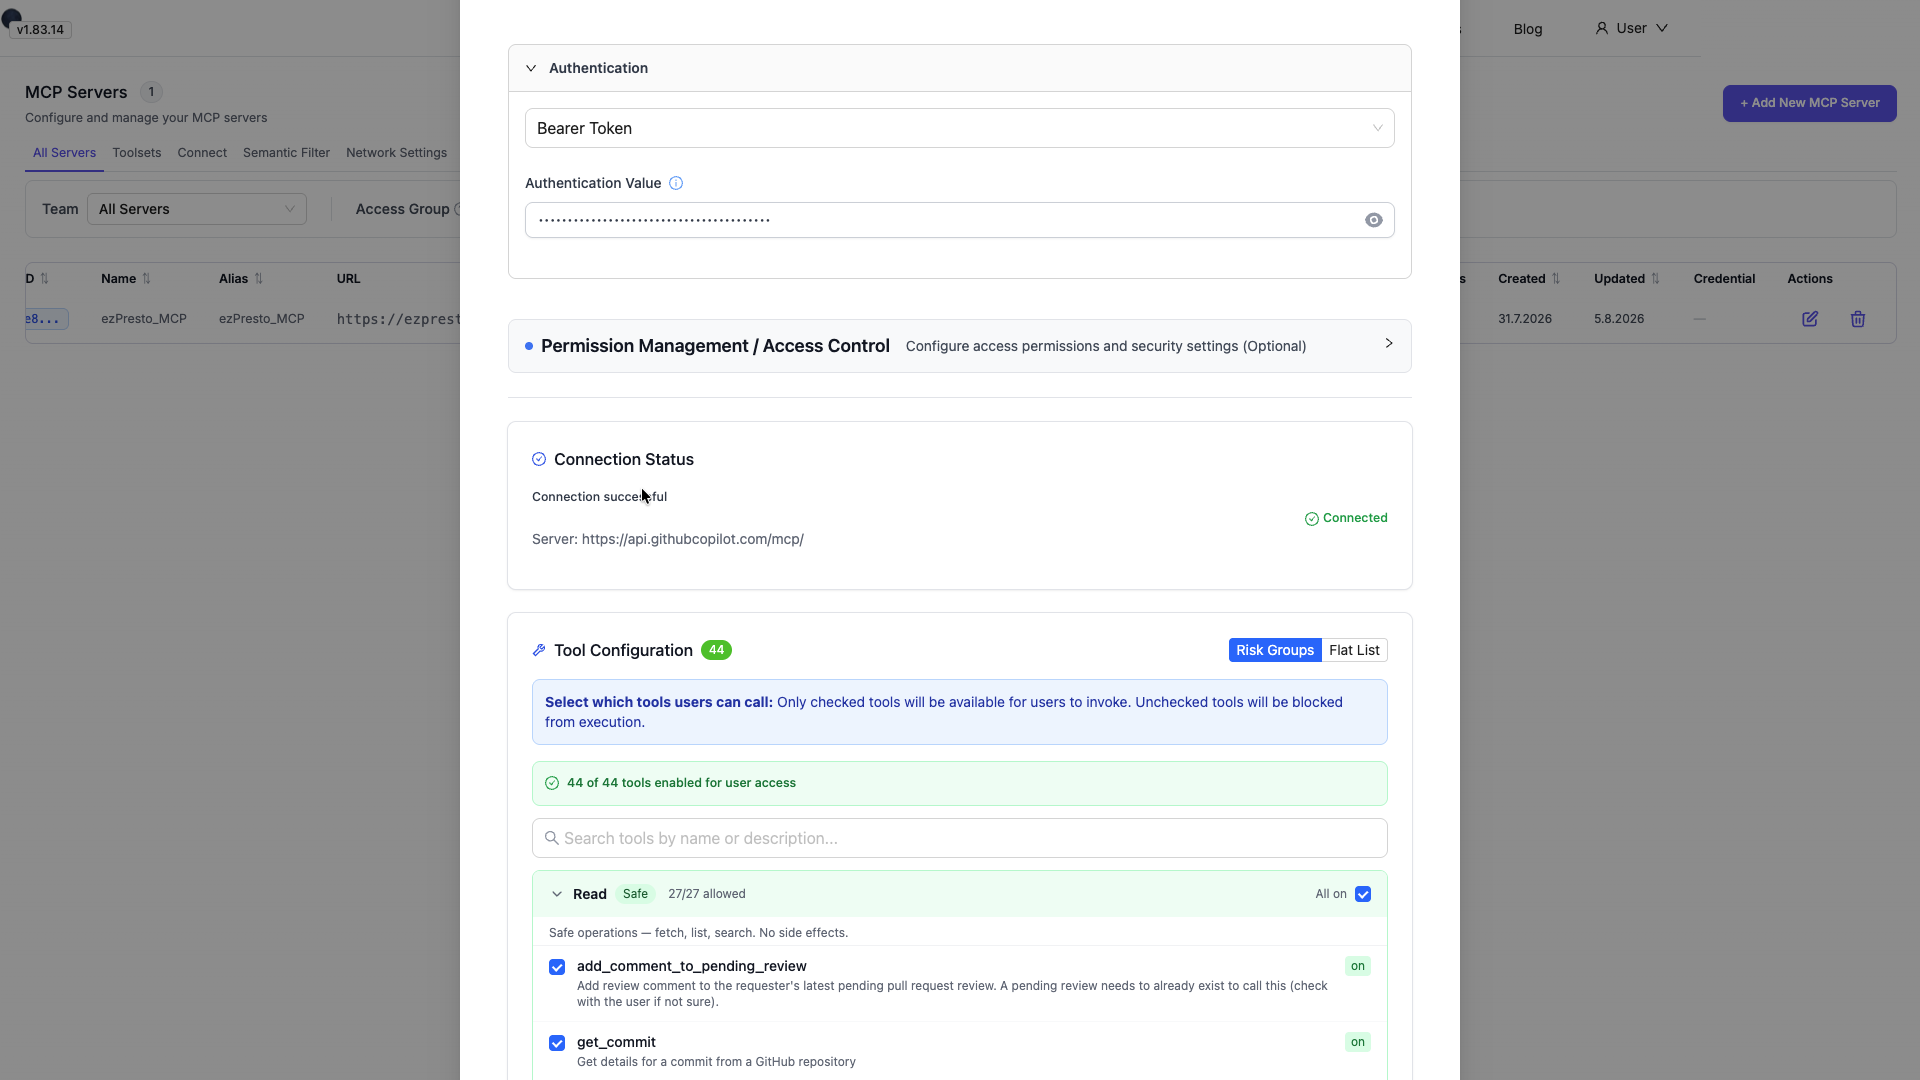
For Authentication select 'Bearer Token' and provide here your GitHub Personal Access Token. Within the Tool Configuration you can select which tools the user can call. How many and which tools you see here depends on what your MCP Server offers. In our case it depends also on the rights you assigned when you created the GitHub Personal Access Token. Feel free to remove for example all the Write and Delete Tools for now.
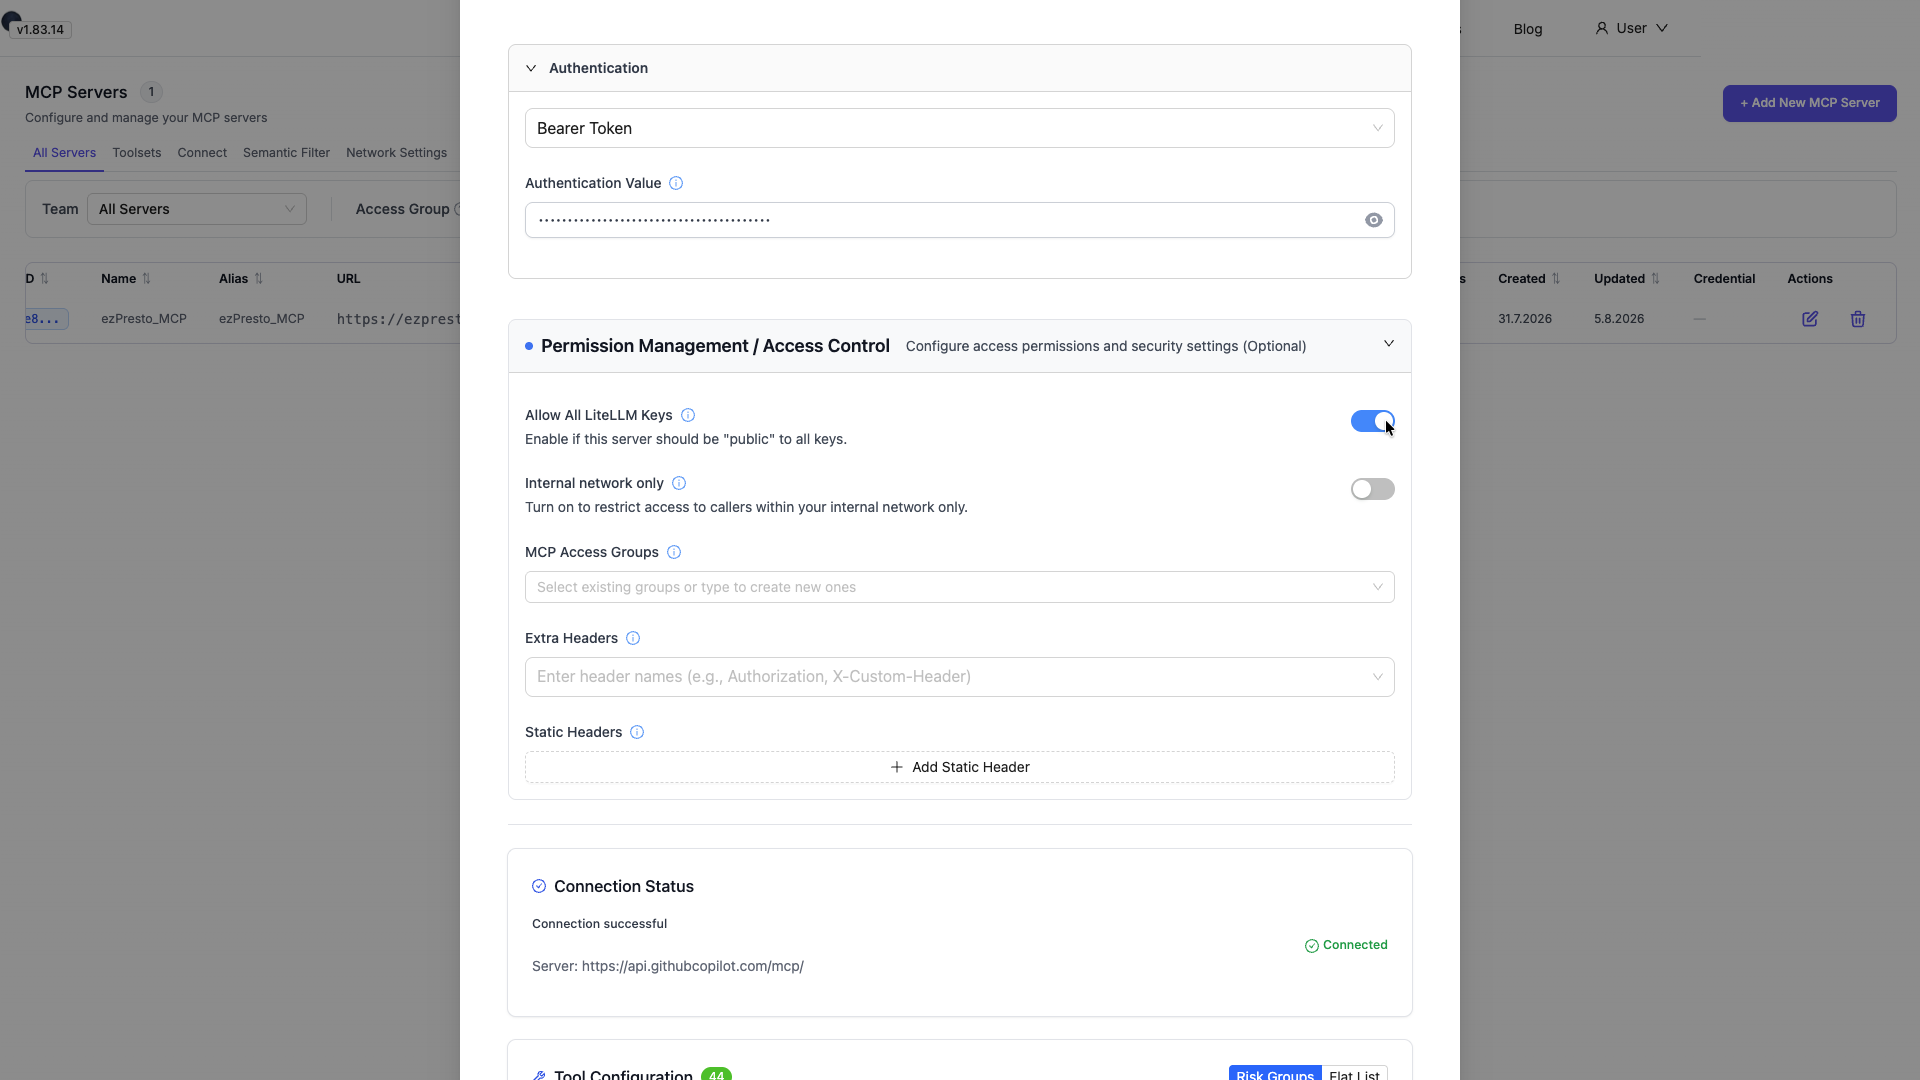
When providing access to the MCP server later you can assign a MCP Server for example to 'Teams' within LiteLLM. Or when creating a Virtual Key the access to the MCP Server can be granted. For now within Permission Control / Access Control toggle the Allow All LiteLLM Keys. With this setting, any virtual key created will have access to this GitHub MCP Server.
For a custom MCP Server follow, the next section. If you are not familiar with Langflow yet, feel free to continue with 'Interact with your MCP Server managed in LiteLLM via Open WebUI'.
Advanced: A Langflow Flow
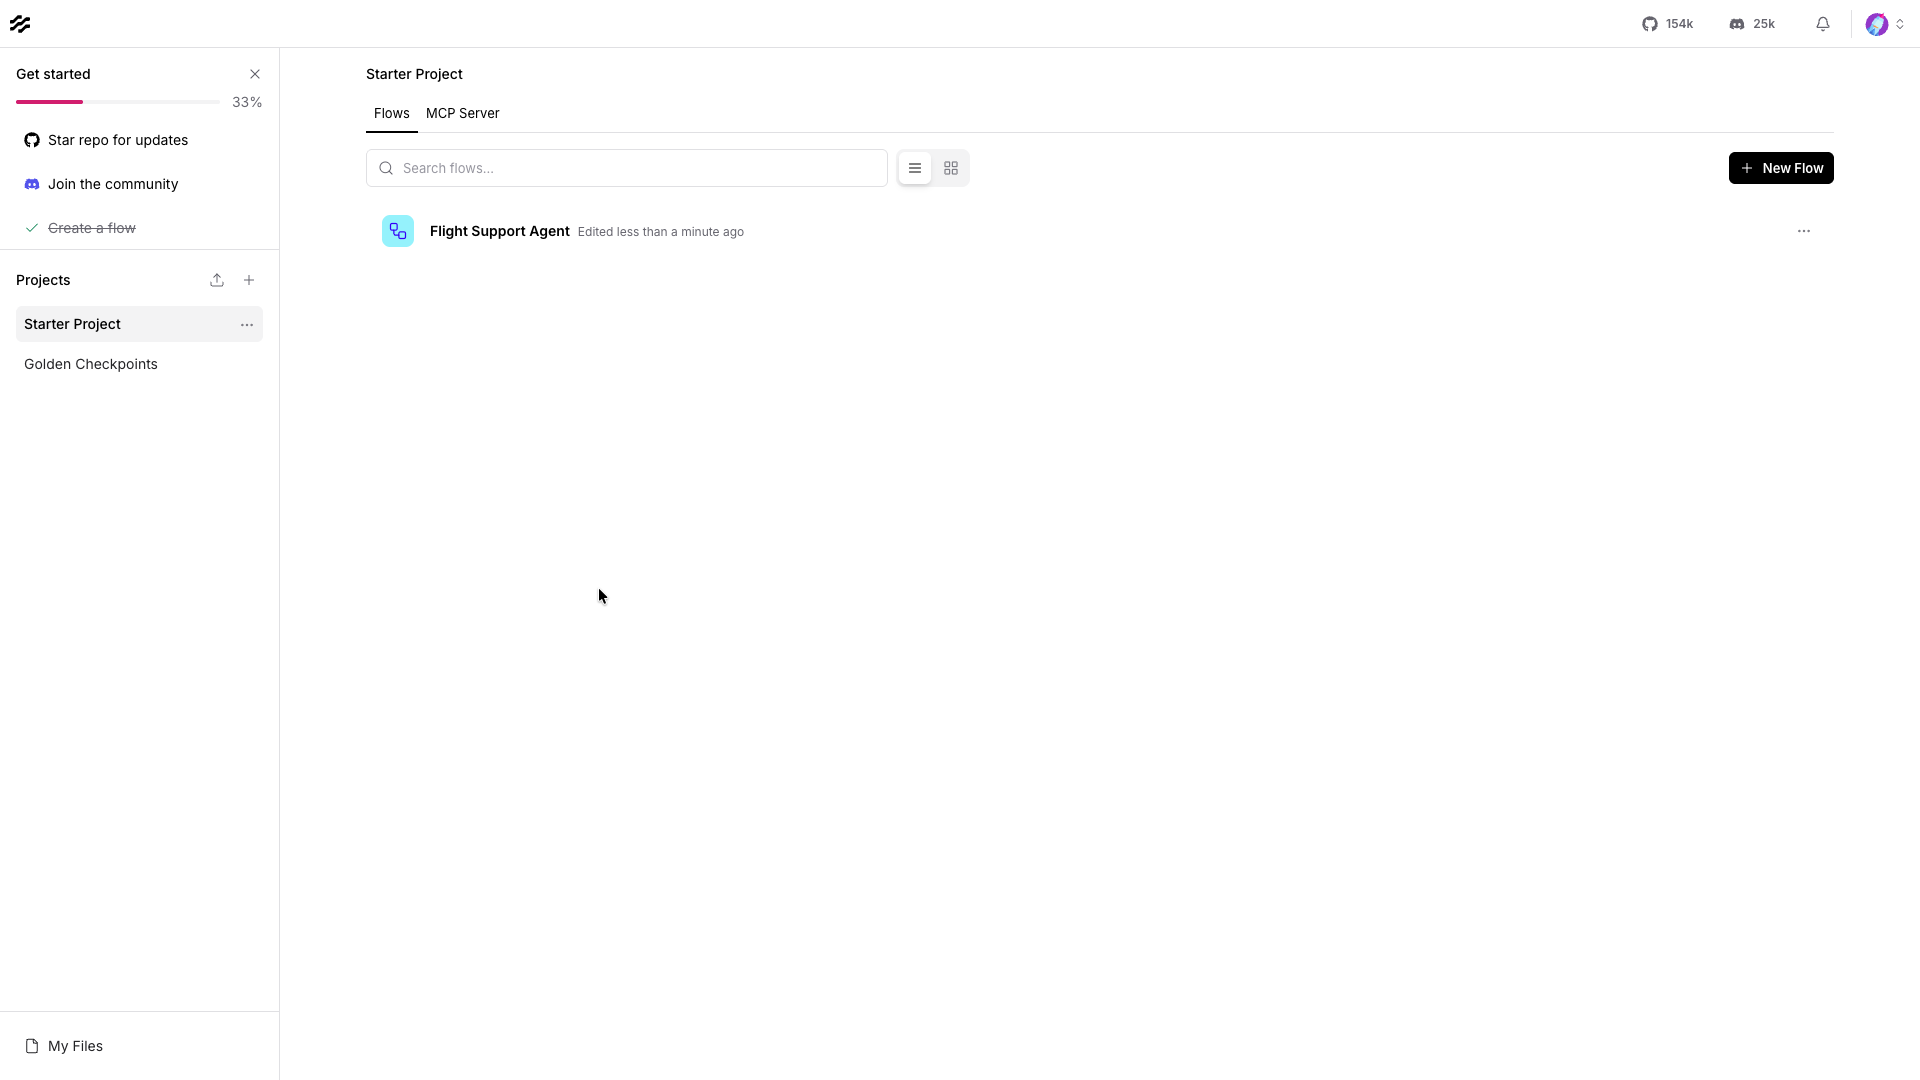
Your Langflow should look similar to this, a project, can be the Starter Project or also another Project, and should have at least one flow with your agent in it.
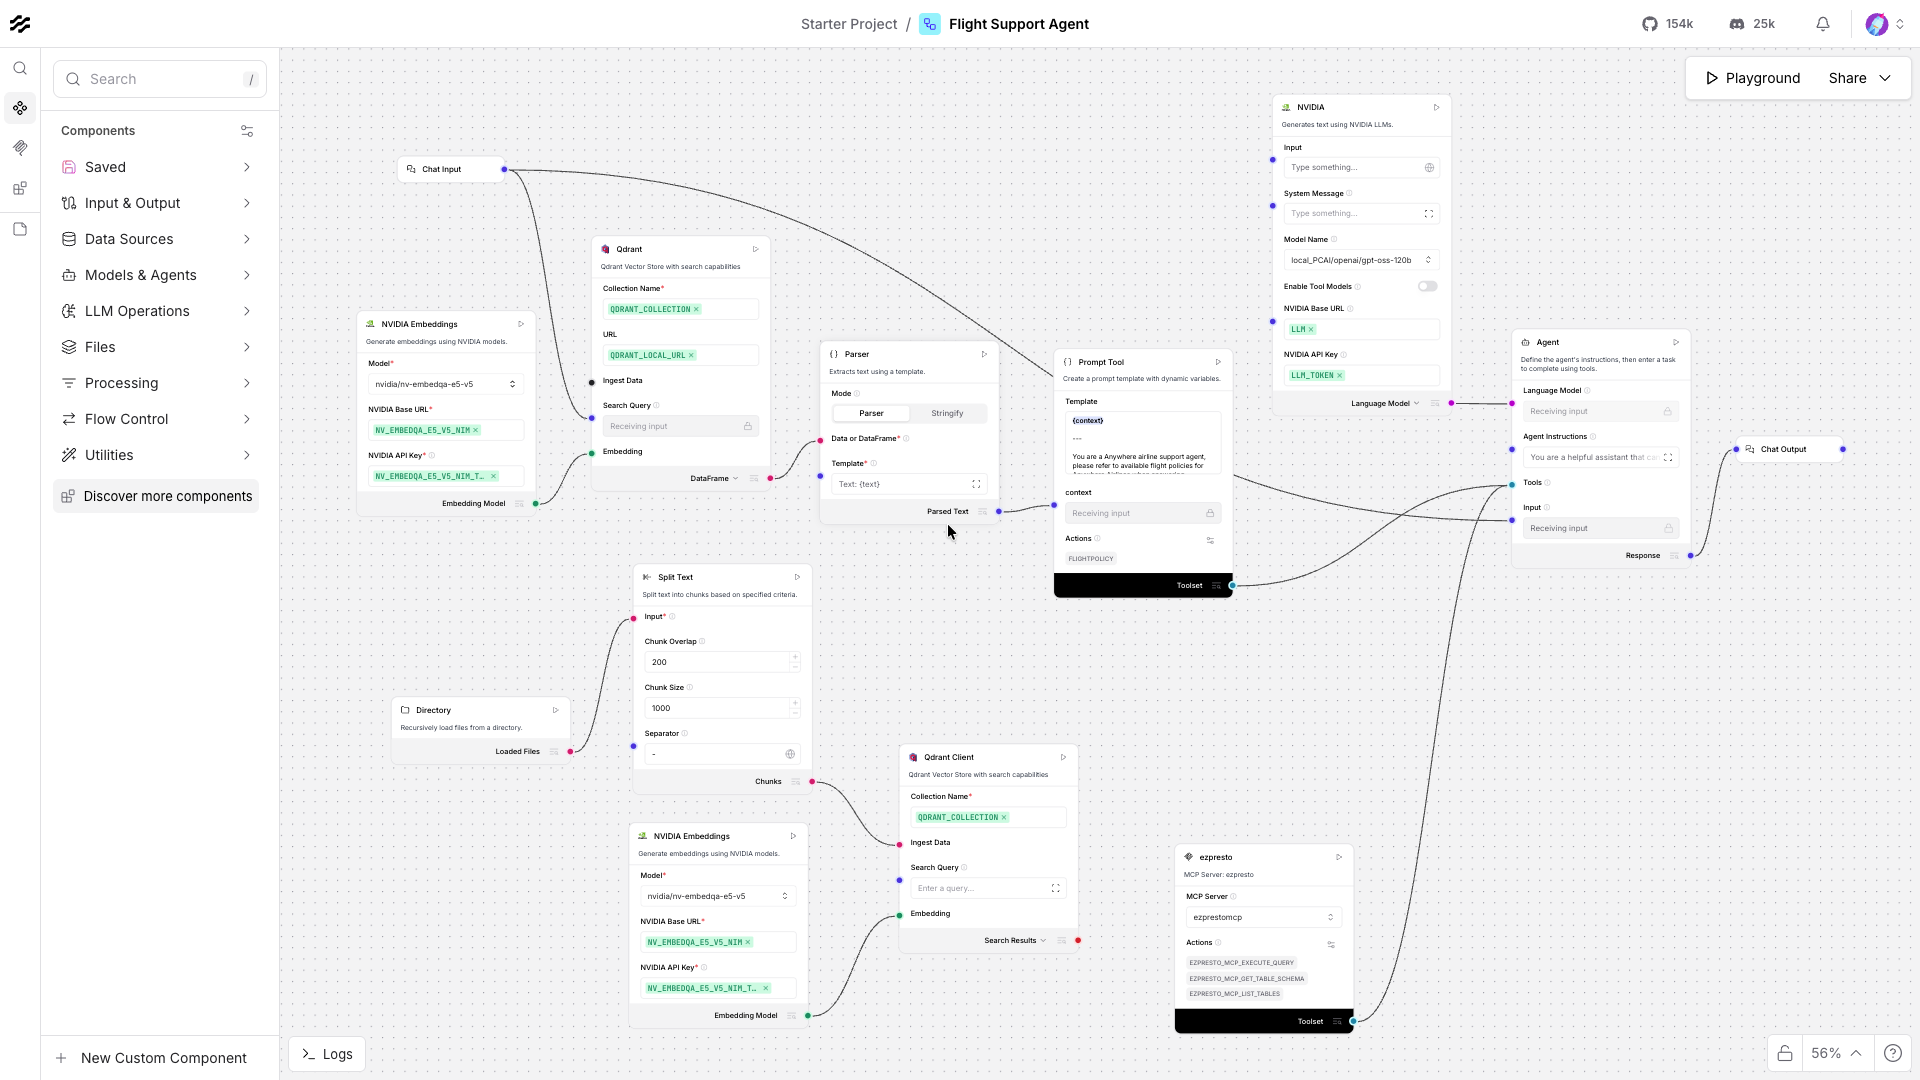
When you open your flow, you have a Chat Input, a Chat Output and something in between that is your Agent interaction. In this example, there is an Agent with a custom RAG tool available, and a connection to the ezPresto MCP Server.
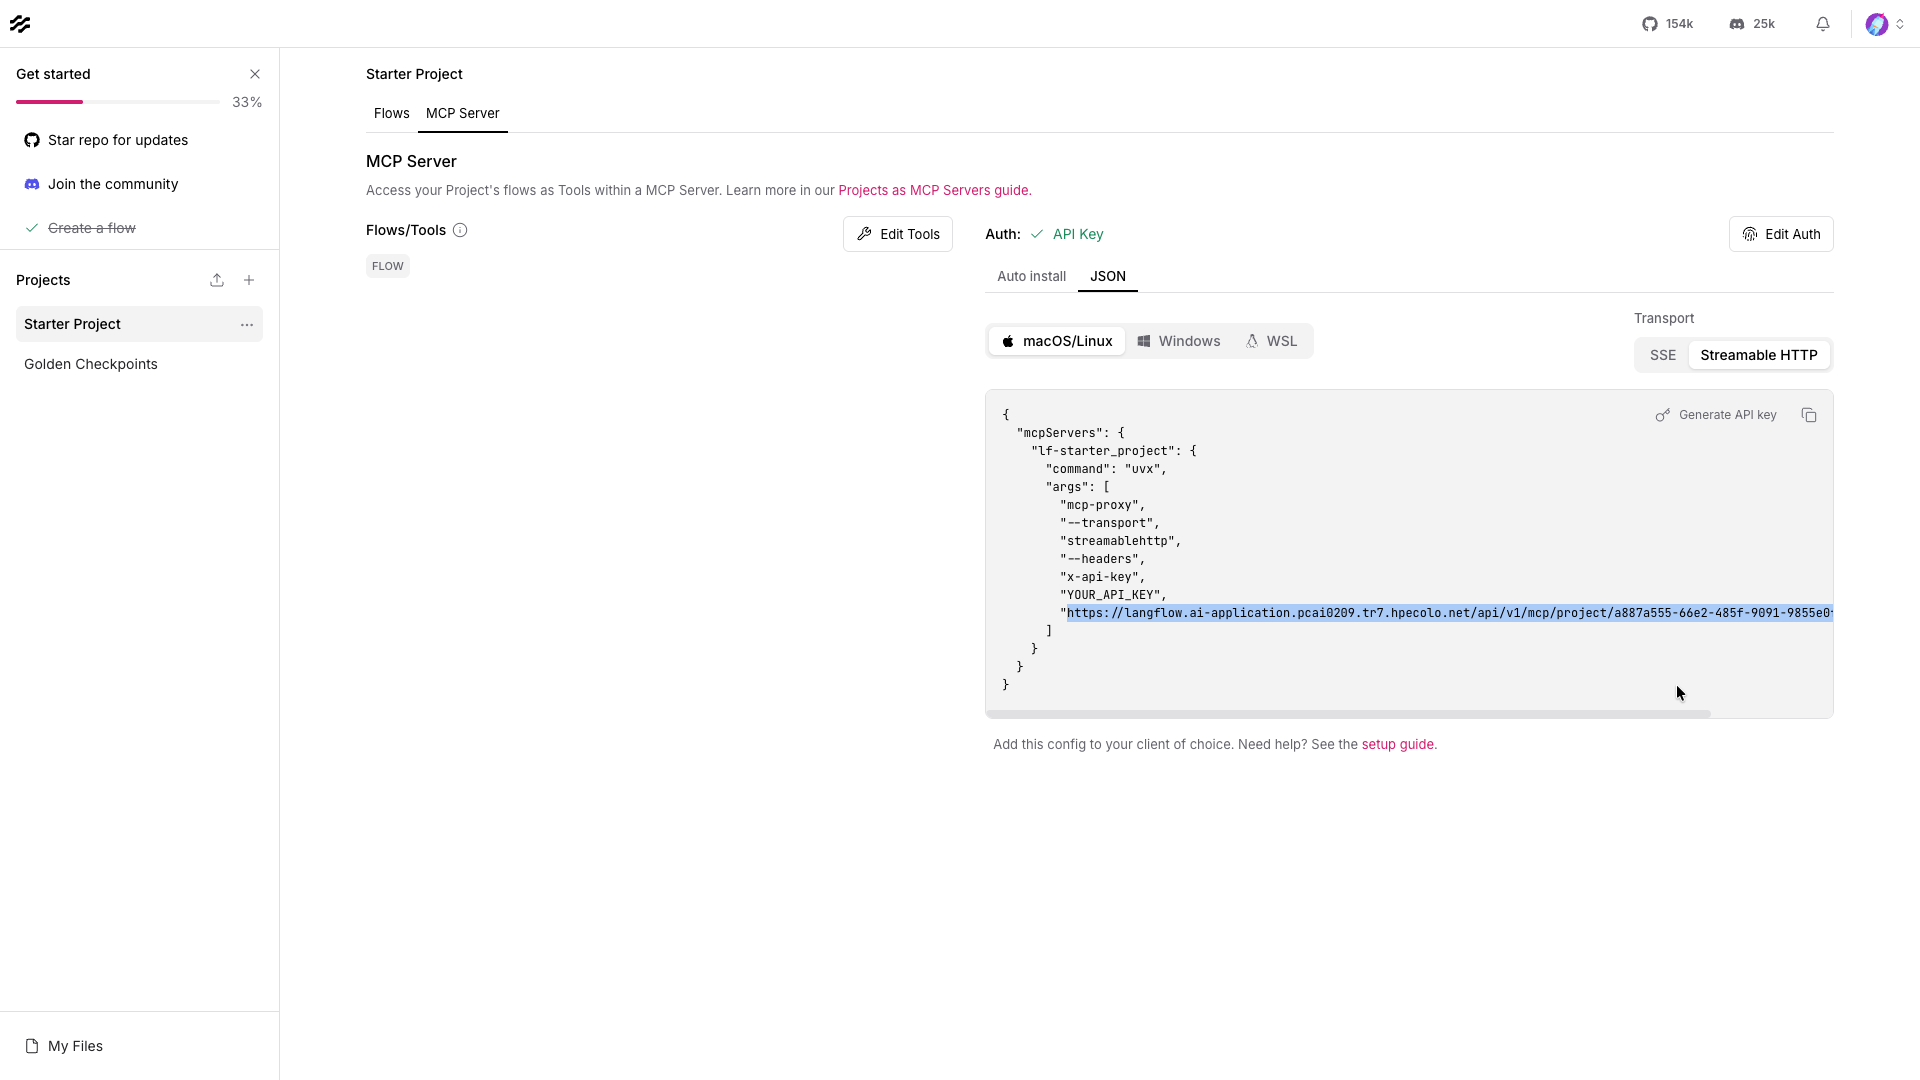
You can also use your own custom flow. Every Langflow Project is exposed as MCP Server per default. Each Flow in this Project is one tool available in the MCP Server. Navigate to your Project and instead of 'Flows' select 'MCP Server'.
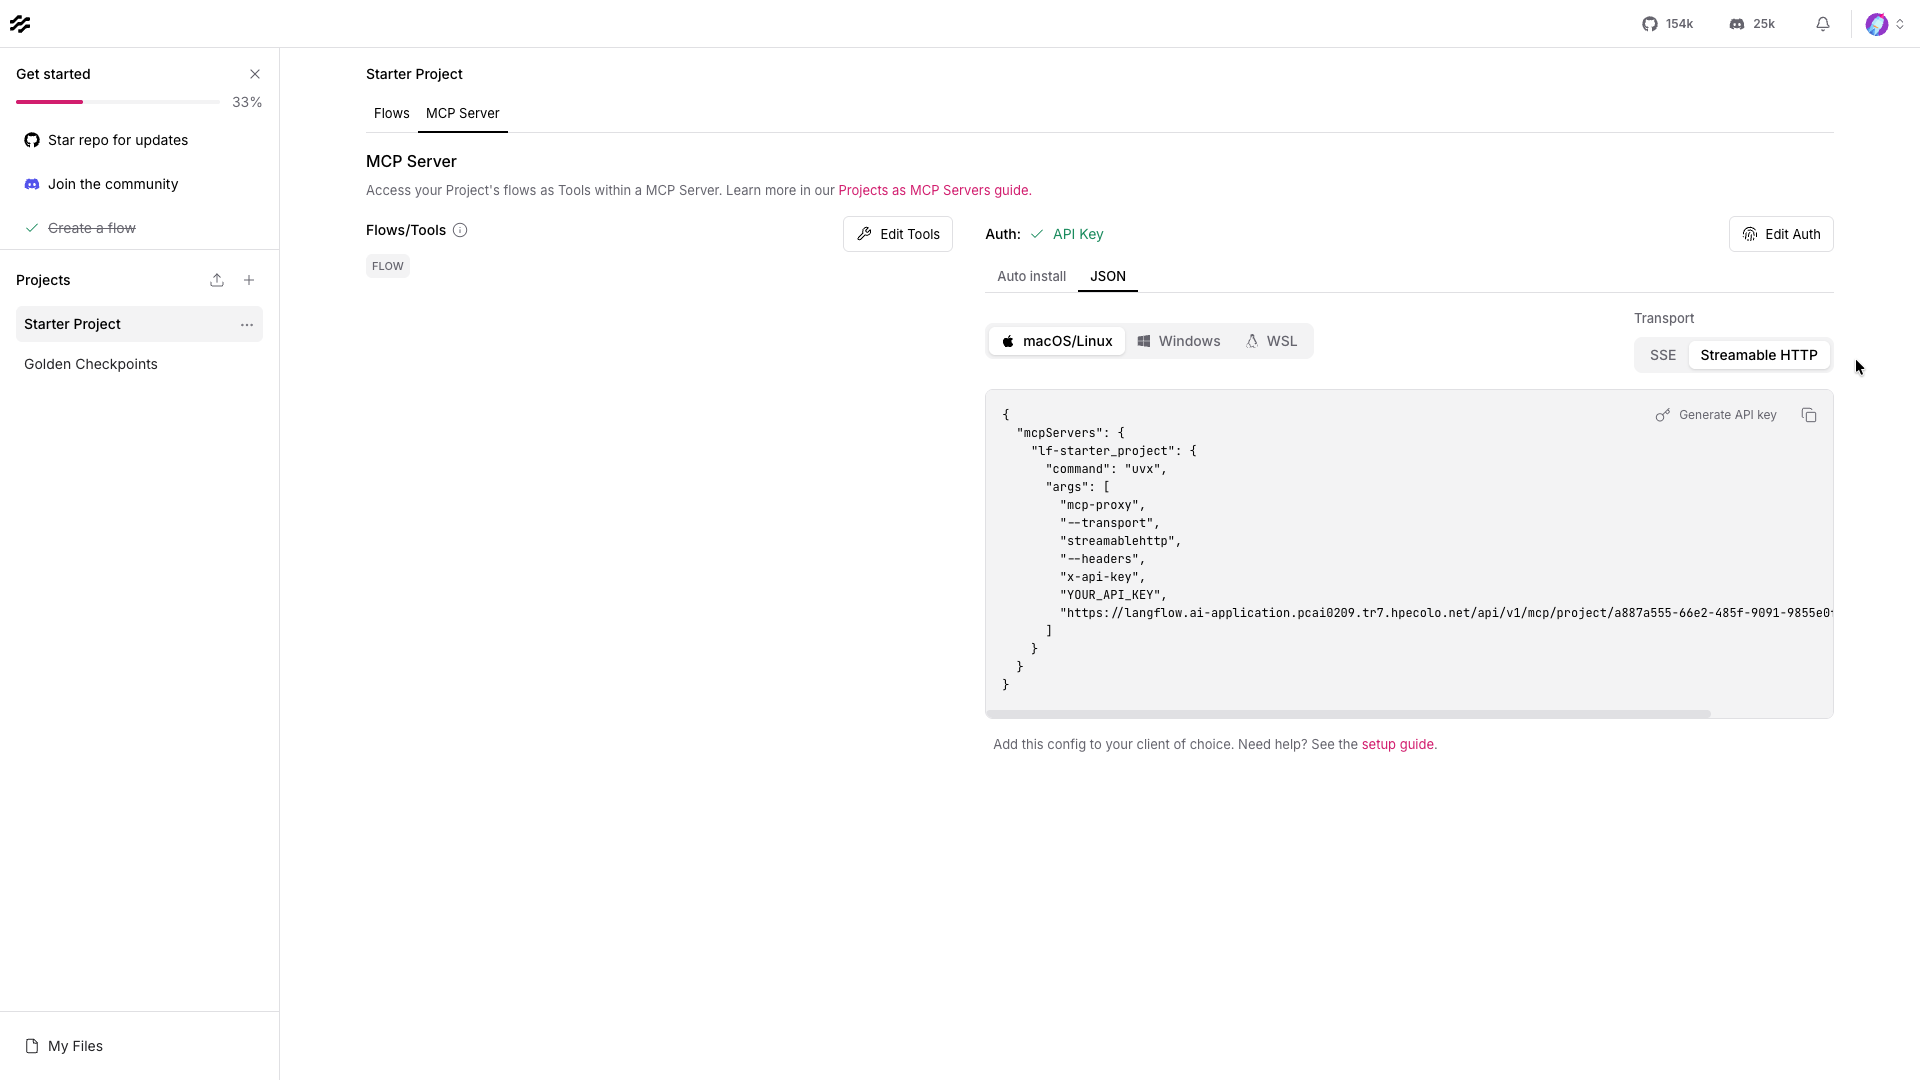
This is the MCP Server I am about to use. If you are using the Starter Project you might want to enable Auth first.
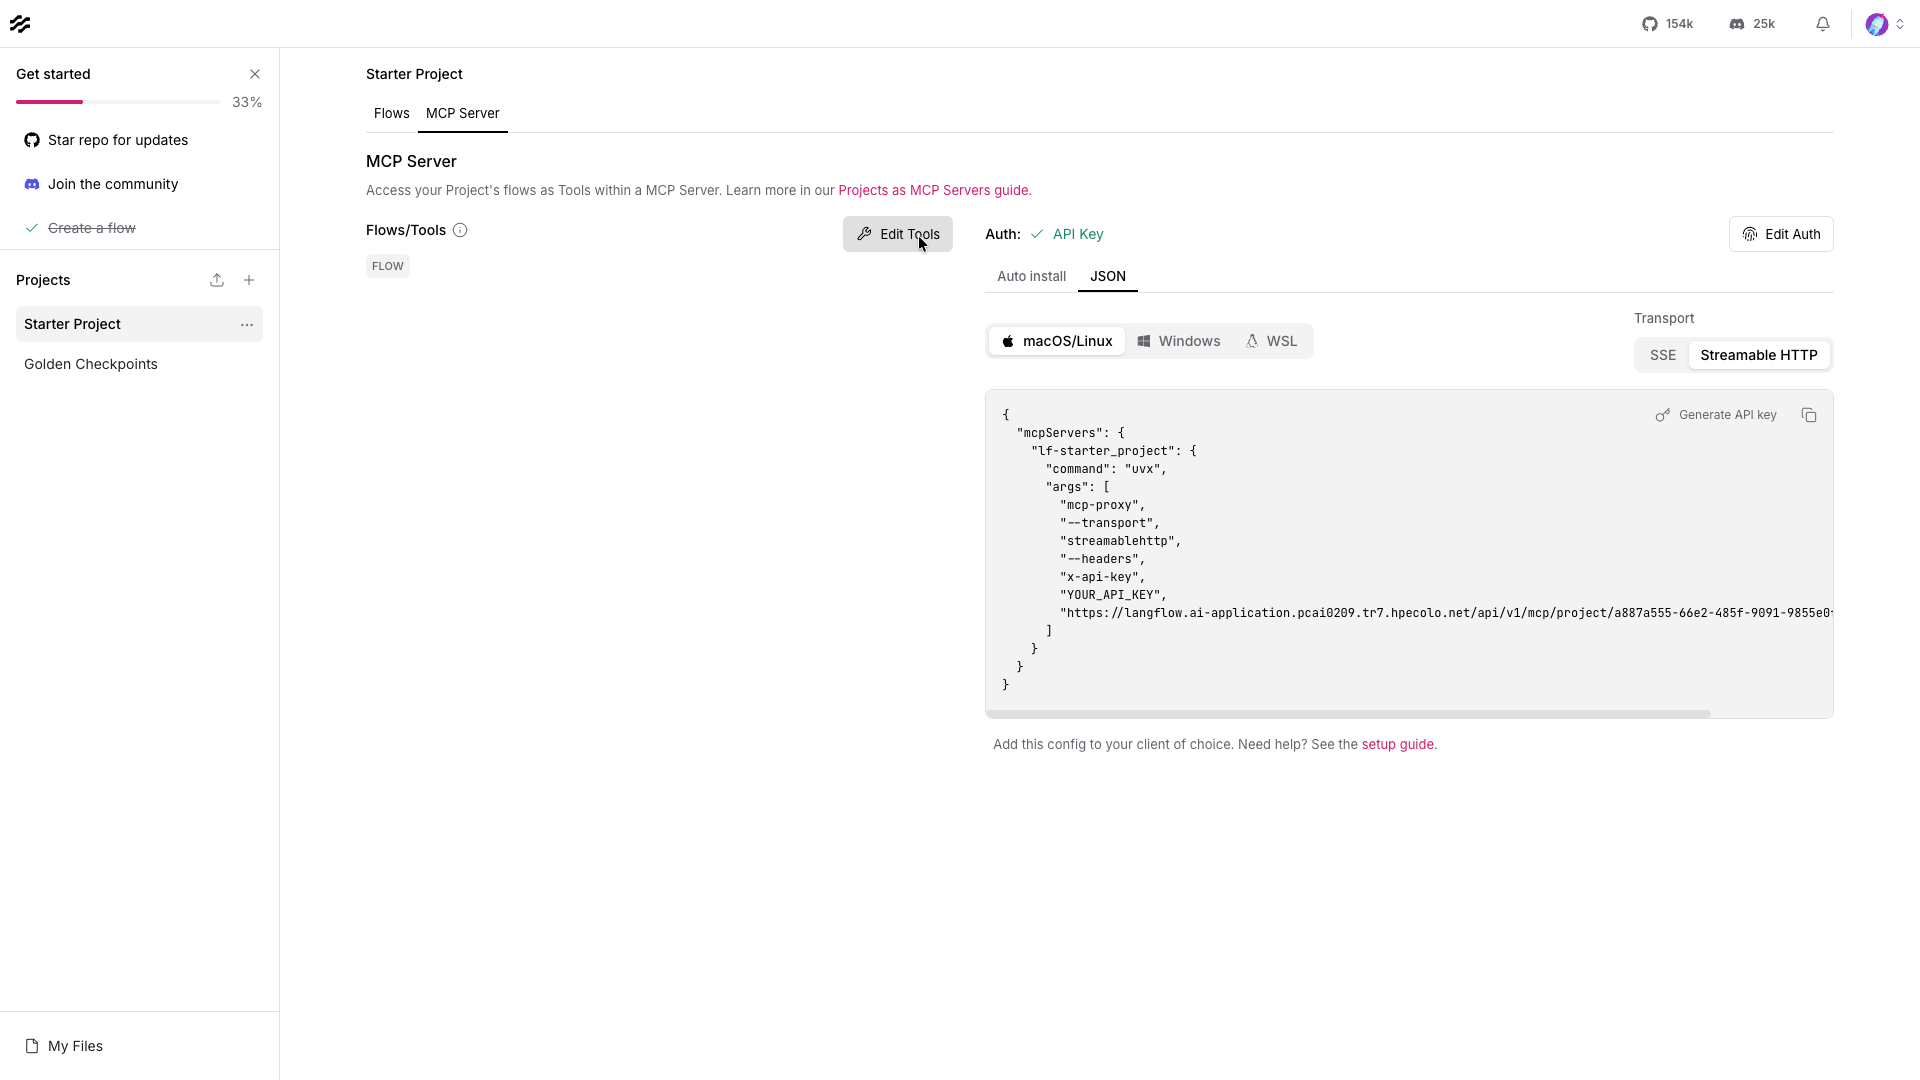
When you want to edit the name or the description of the tools available in your MCP Server, you can click Edit Tools in order to change those.
Within the 'JSON' configuration file for Transport Type 'Streamable HTTP', the URL for our MCP Server is set. This information is required later. Click on Generate API key in order to have a JSON with a fresh created API Key. These two informations are needed for adding it into LiteLLM.
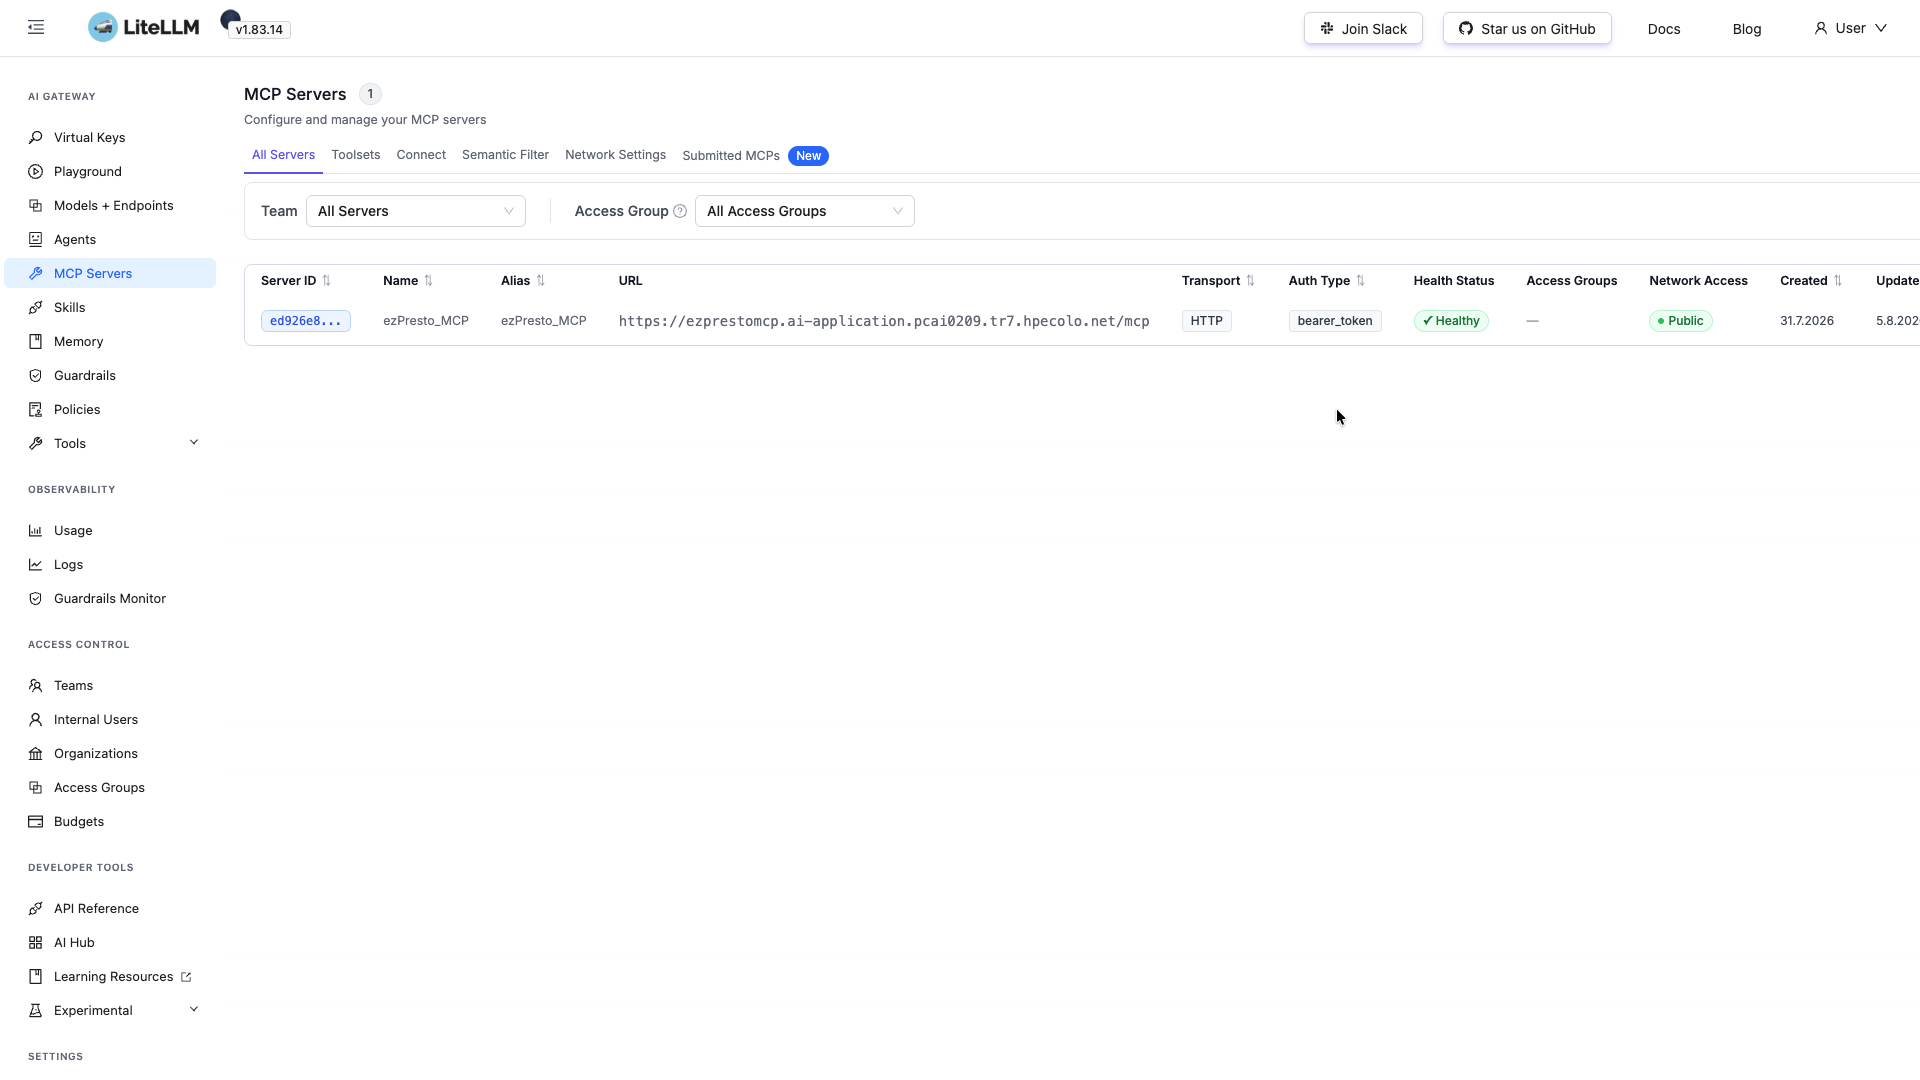
Let's proceed to LiteLLM. Navigate to MCP Servers. In this example, a connection to the EzPresto MCP Server is already set.
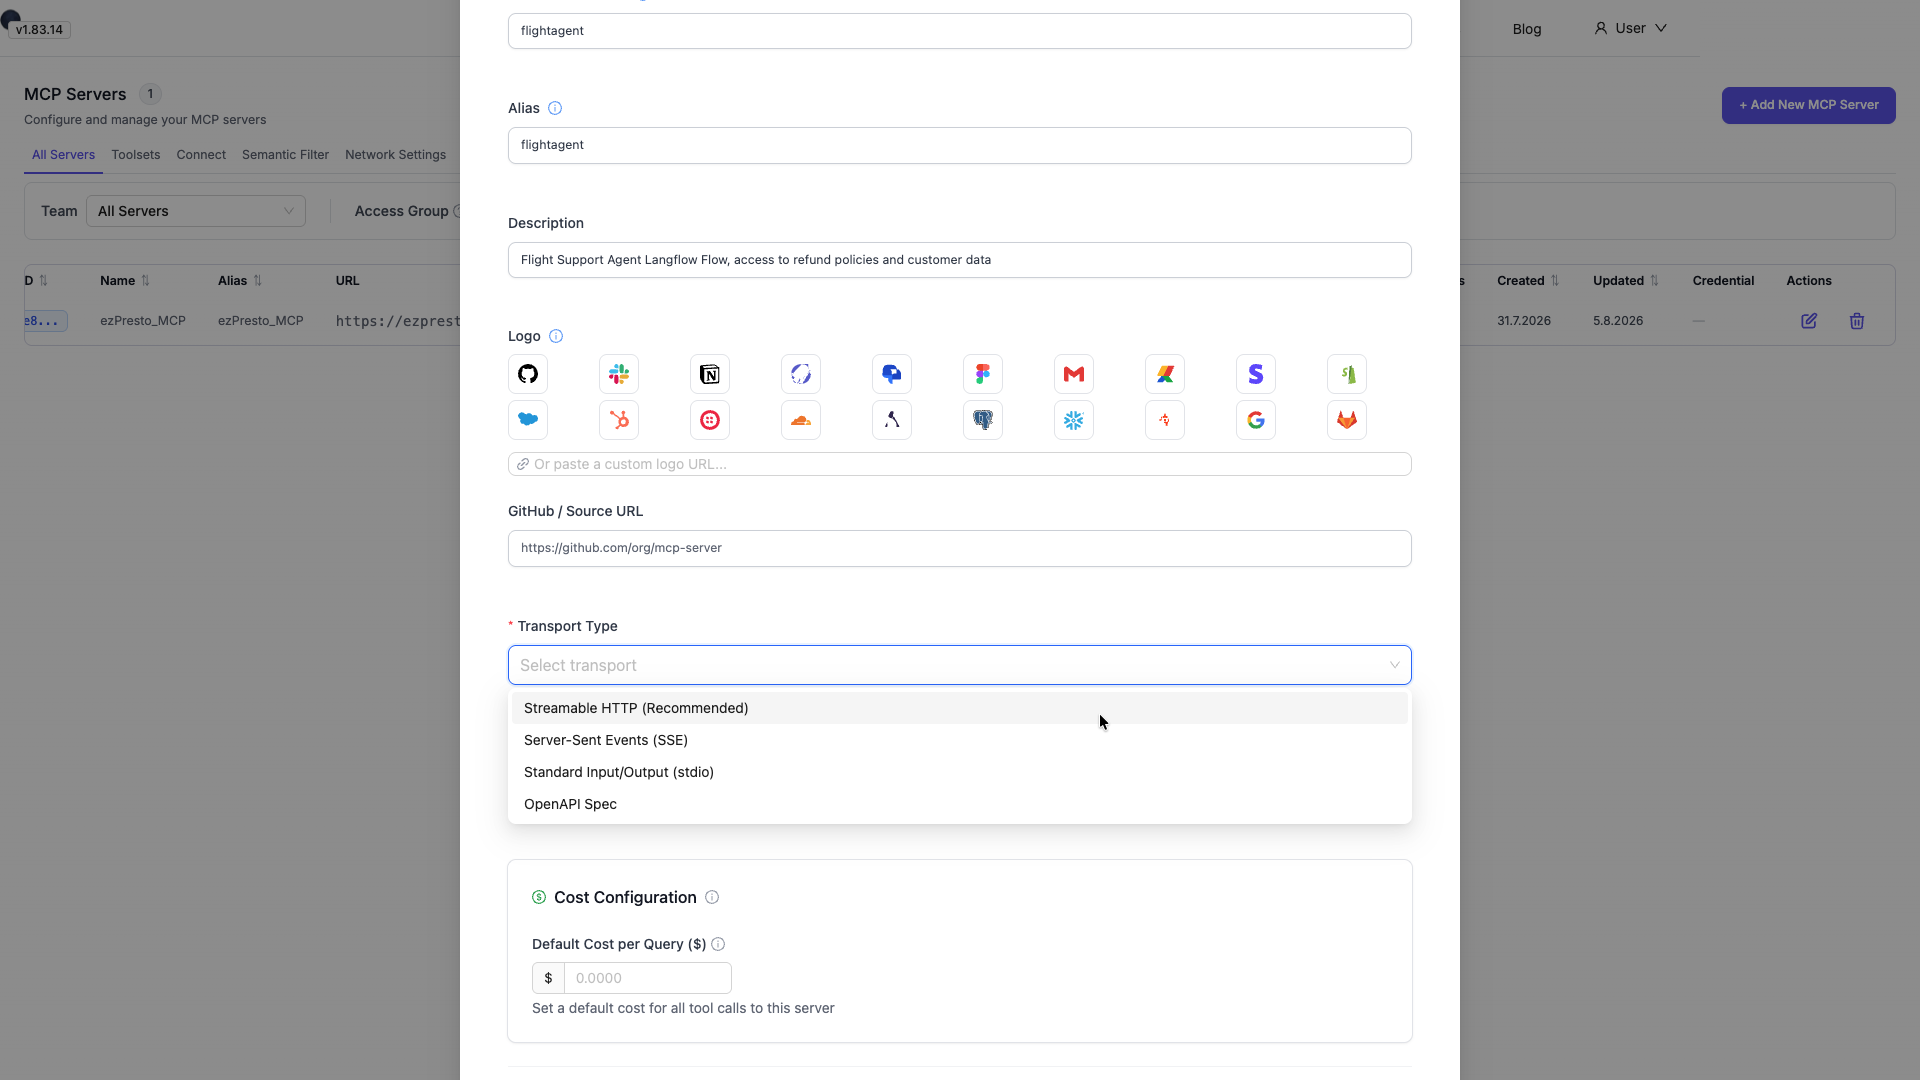
Let's add a new one, therefore click on the button 'Add New MCP Server'. There are a few predefined, like the GitHub one, but for Langflow create a custom one.
Select 'Custom MCP Sever'. Fill in a custom name and description for your MCP server, for example 'flightagent'. Please select for the Transport Type 'Streamable HTTP'.
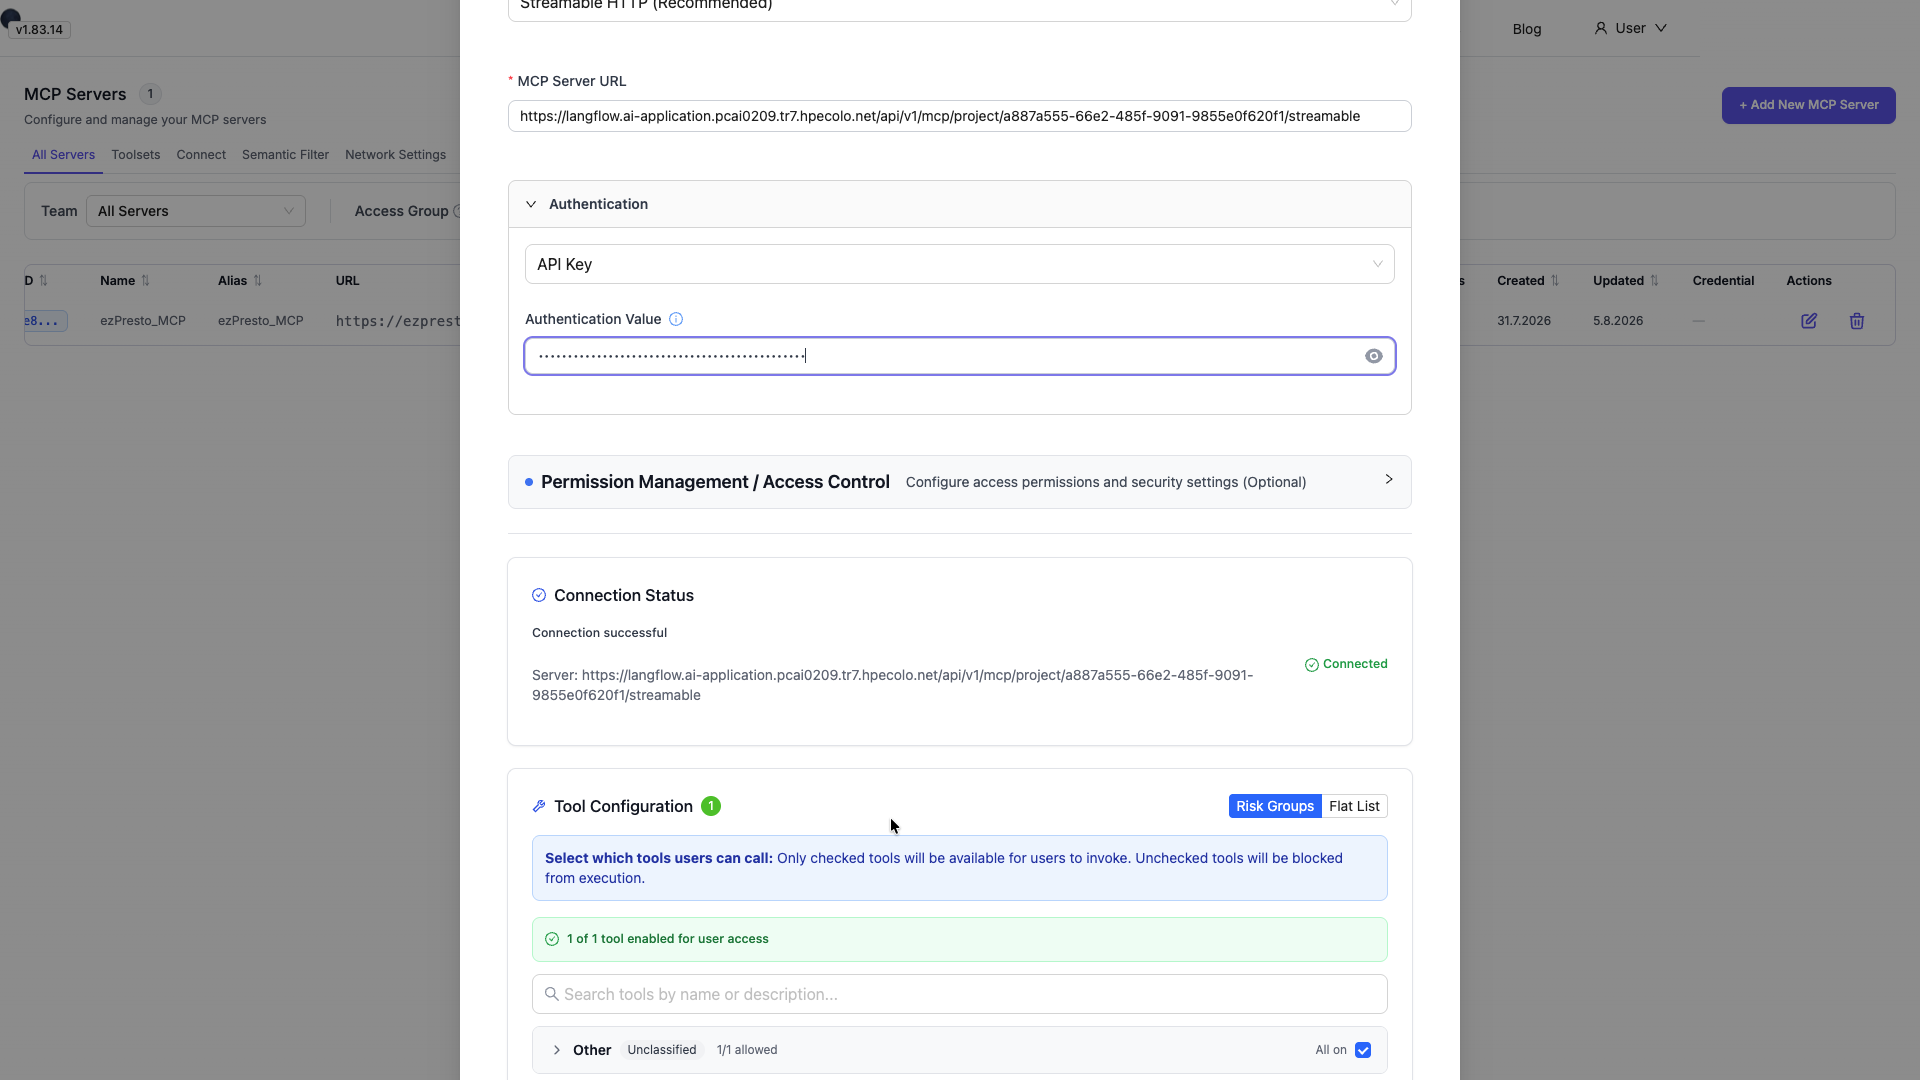
For the MCP Server URL, enter the URL retrieved from the JSON in Langflow. For Authentication, choose API Key and paste in the API Key previously generated within Langflow. The connection status should immediately switch to connected. You will see the tools listed, being the flows you have available in your Project, and can define in the Tool Configuration which of these tools can be called by a user. Within the Cost Configuration define a default cost for a Tool Call of this MCP Server.
Regarding access, you can manage your Teams within LiteLLM and add this new MCP Server to those teams. When creating a Virtual Key, you can select within the Optional Settings in the MCP Settings which MCP Servers are allowed with this Virtual Key. Or you can allow the access to this MCP Server per default for all virtual keys. To achieve that, click on the Permission Management/Access Control and toggle the 'Allow All LiteLLM Keys'.
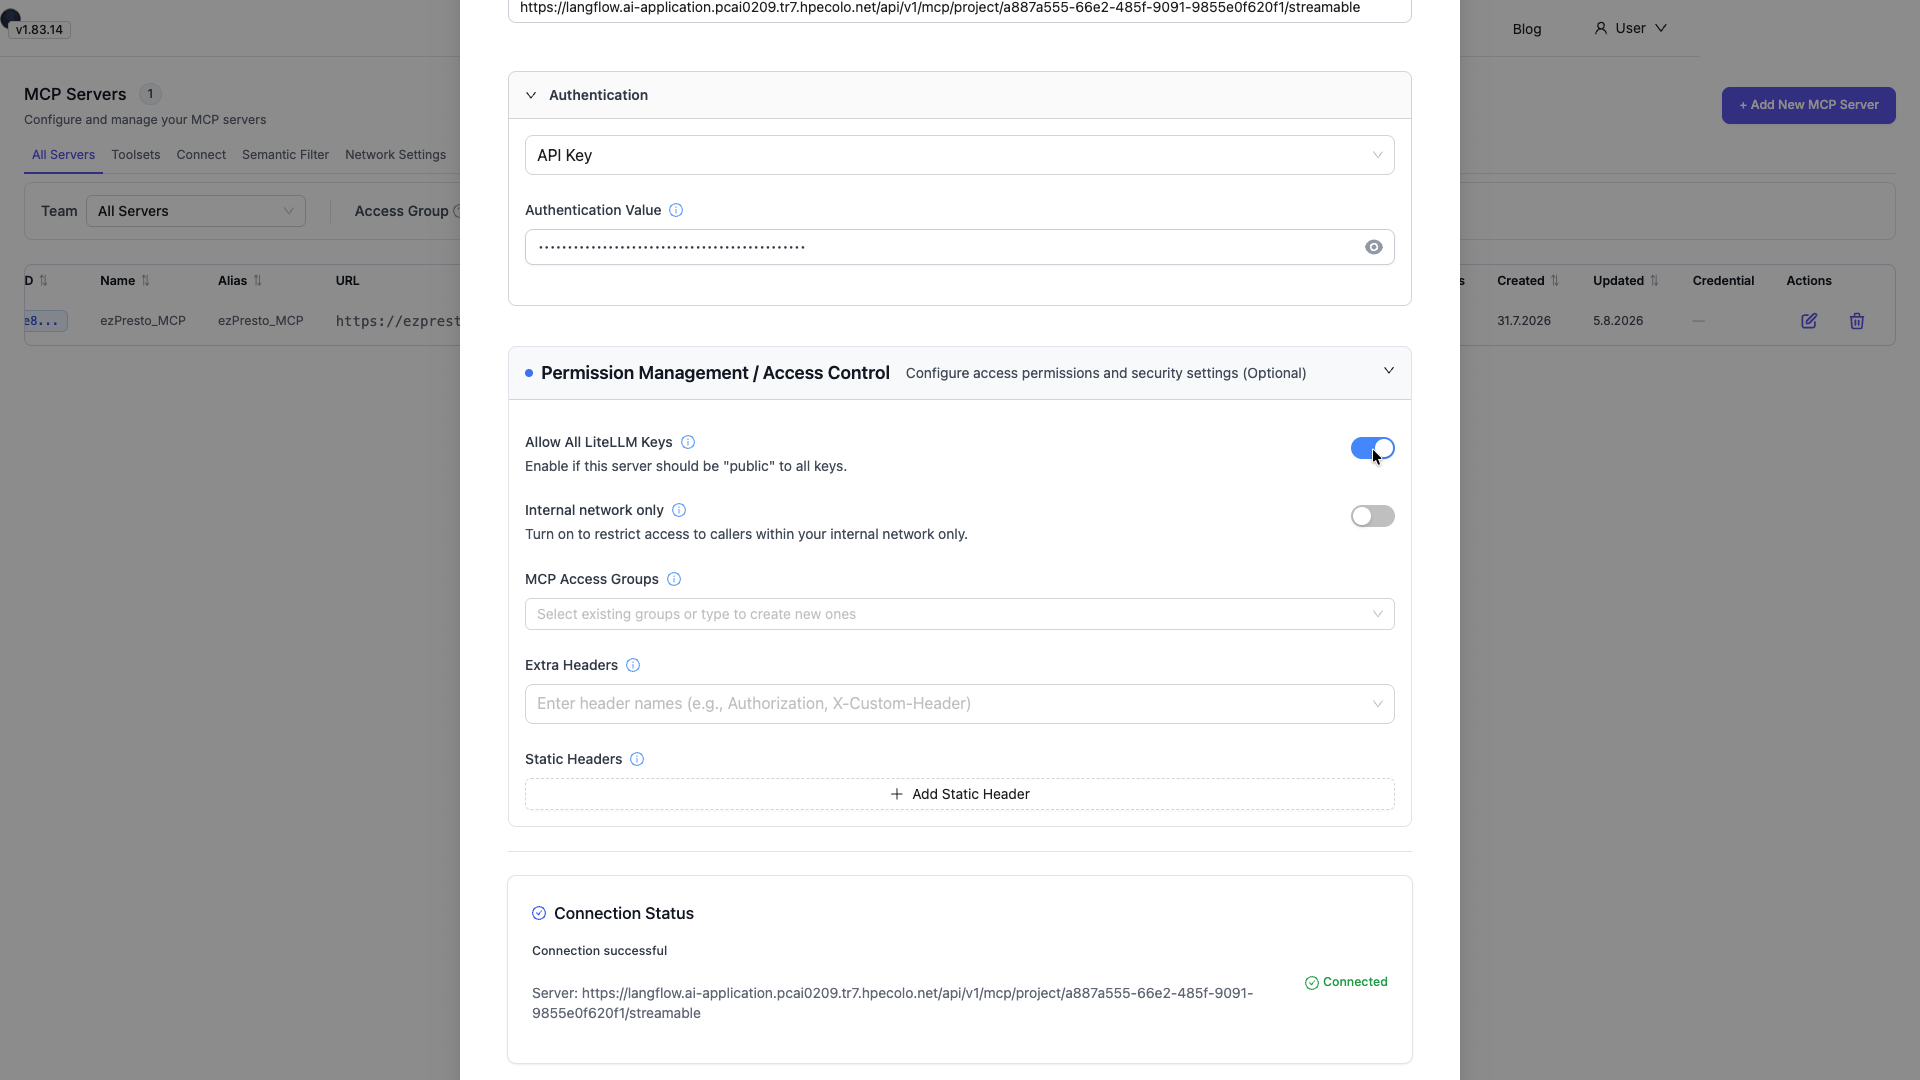
With this setting, any Virtual Key you create will have access to this MCP Server. Click 'Add MCP Server'.
Interact with your MCP Server managed in LiteLLM via Open WebUI
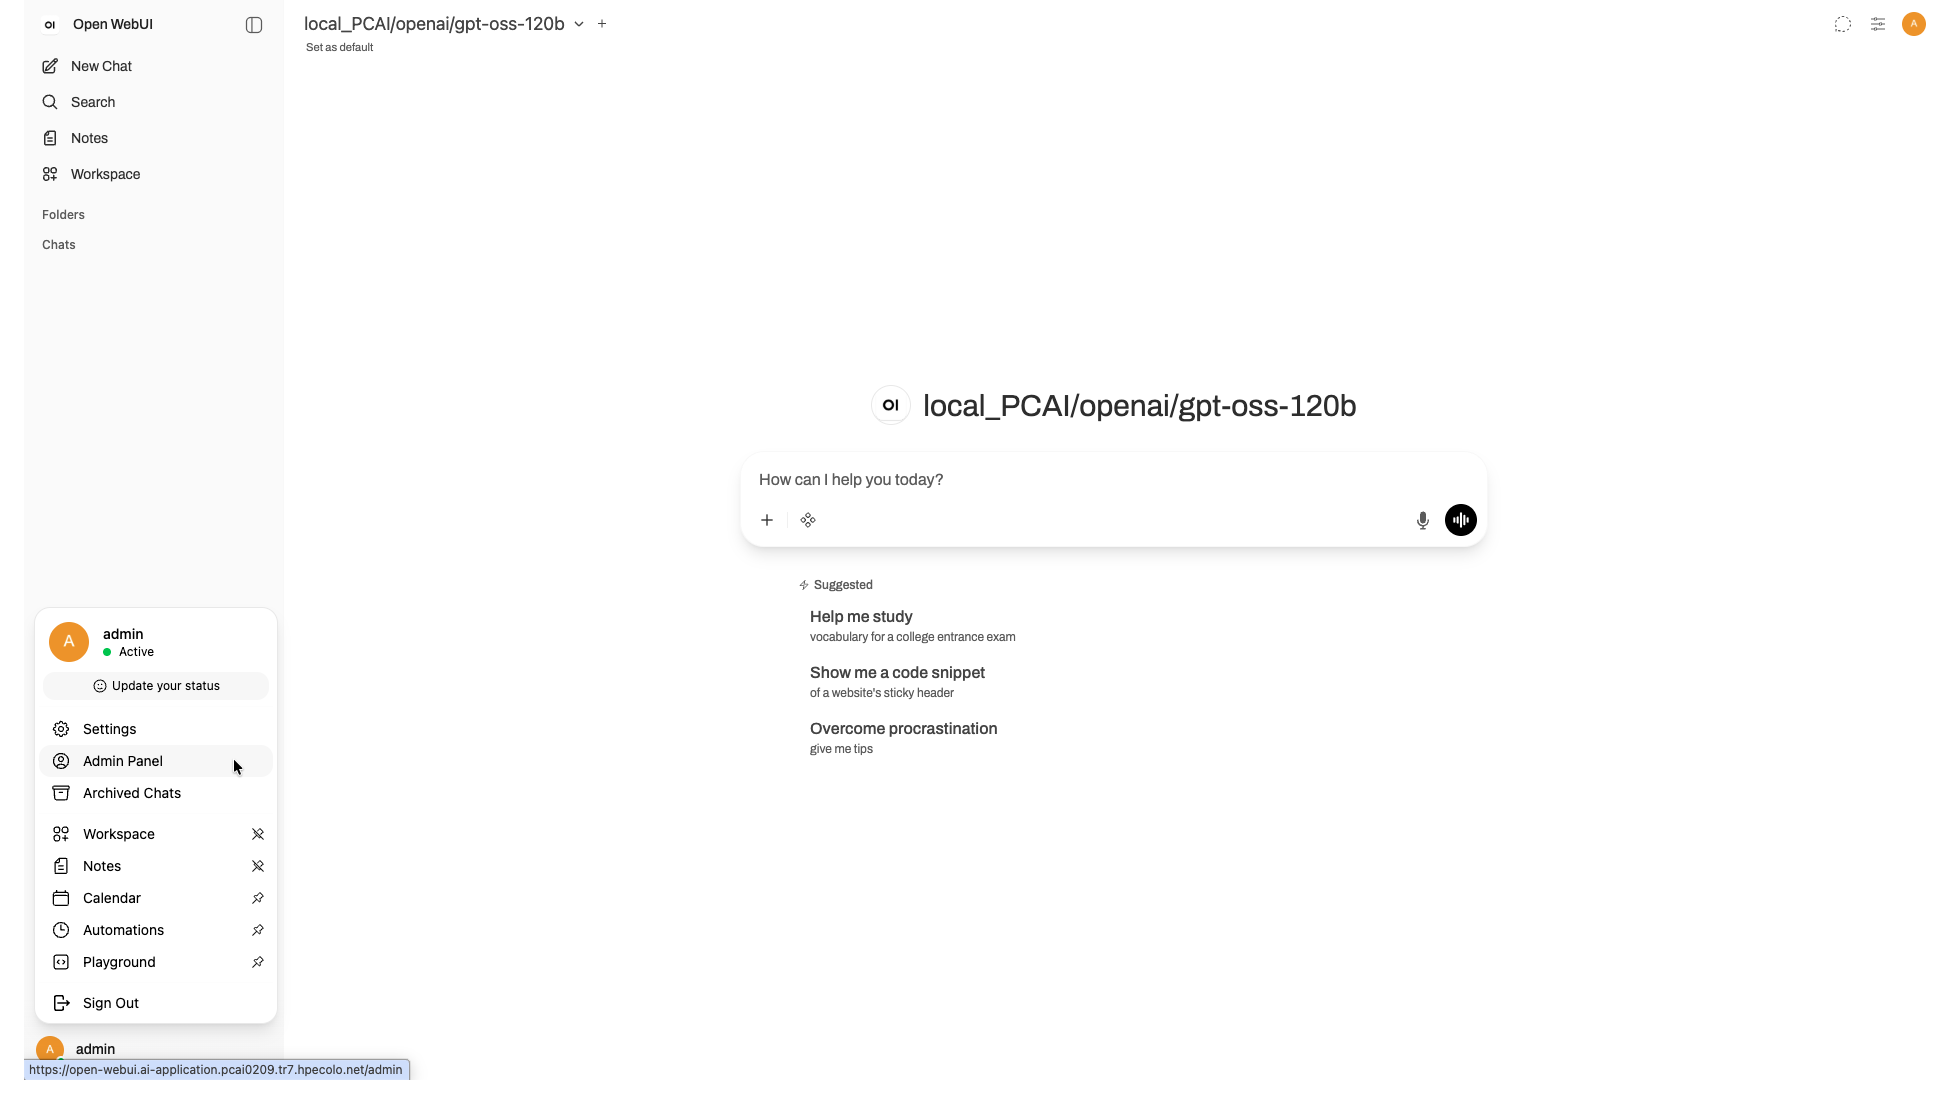
In order to interact with this MCP Server, we can use a frontend, like for example Open WebUI. Therefore, we need to add an integration. Navigate to Open WebUI -> Admin Panel.
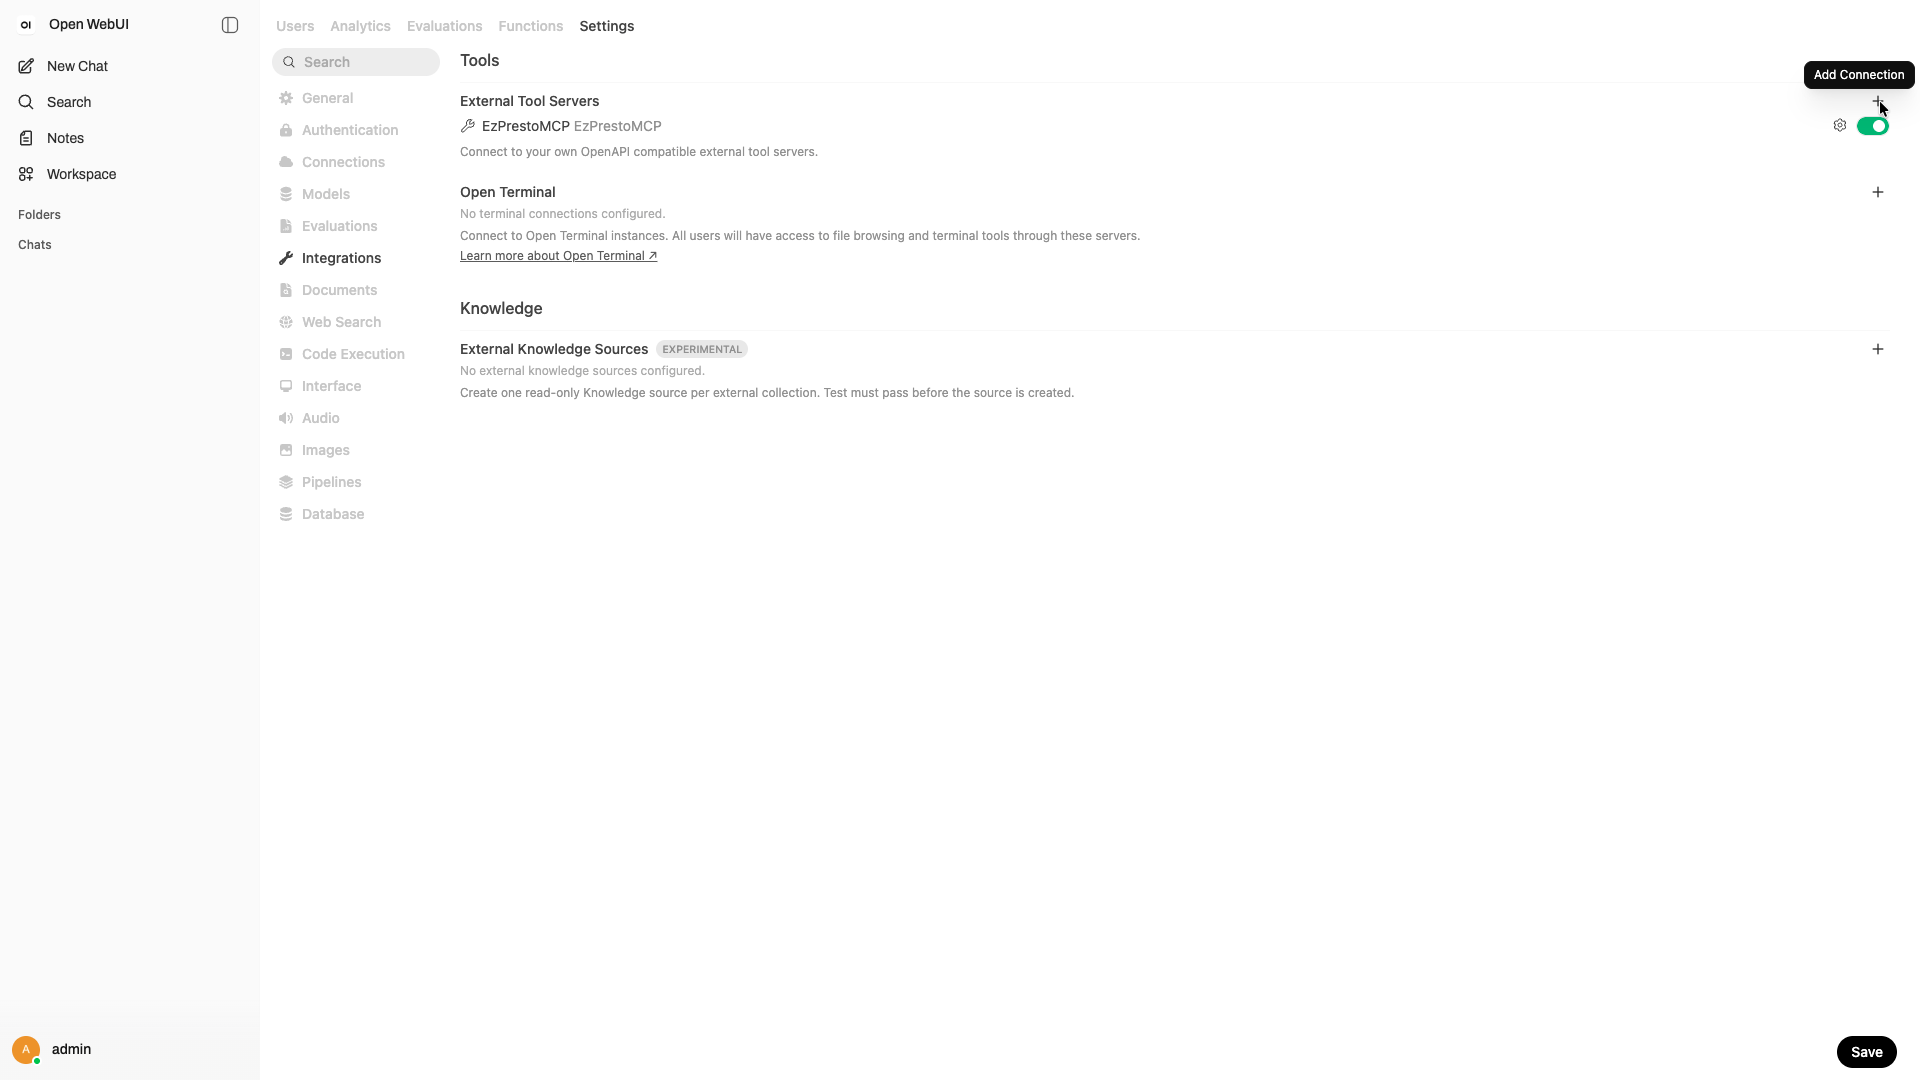
Go to Settings -> Integrations. Click on + to Add a Connection.
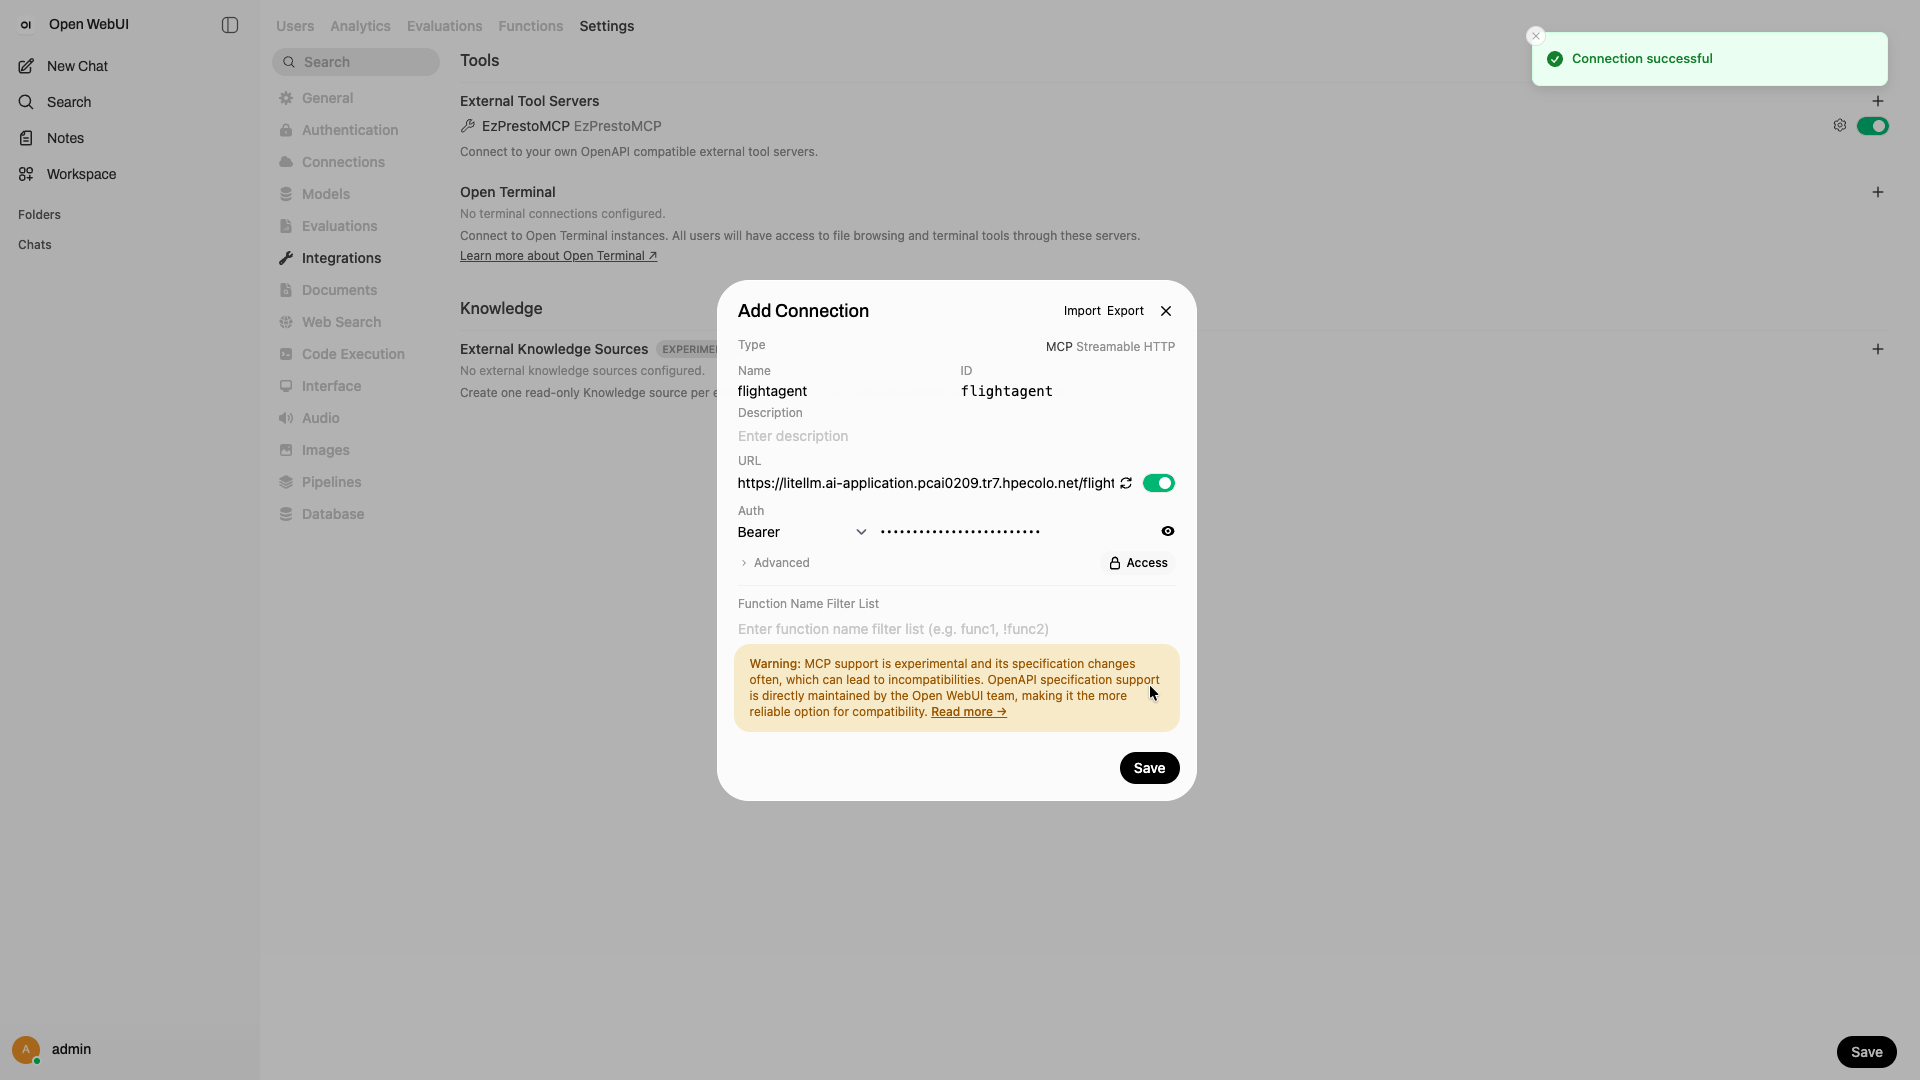
Change the type to MCP Streamable HTTP add a custom name for example 'flightagent'. The URL is the endpoint of your LiteLLM, usually that would be https://litellm.YOURDOMAINNAME
Append after that /NAMEOFYOURMCPSERVER/mcp . This results for this example into https://litellm.YOURDOMAINNAIME/github/mcp OR for the Langflow example https://litellm.YOURDOMAINNAIME/flightagent/mcp . As Token add any virtualkey you have already created within LiteLLM or create a new one (Virtual Keys -> Create New Key). Click 'Save'.
In order to interact with this Agentflow, create a 'new Chat'. You can select a model to chat with. In this example, I use a gpt-oss-120b deployed on the same Private Cloud AI, managed via LiteLLM.
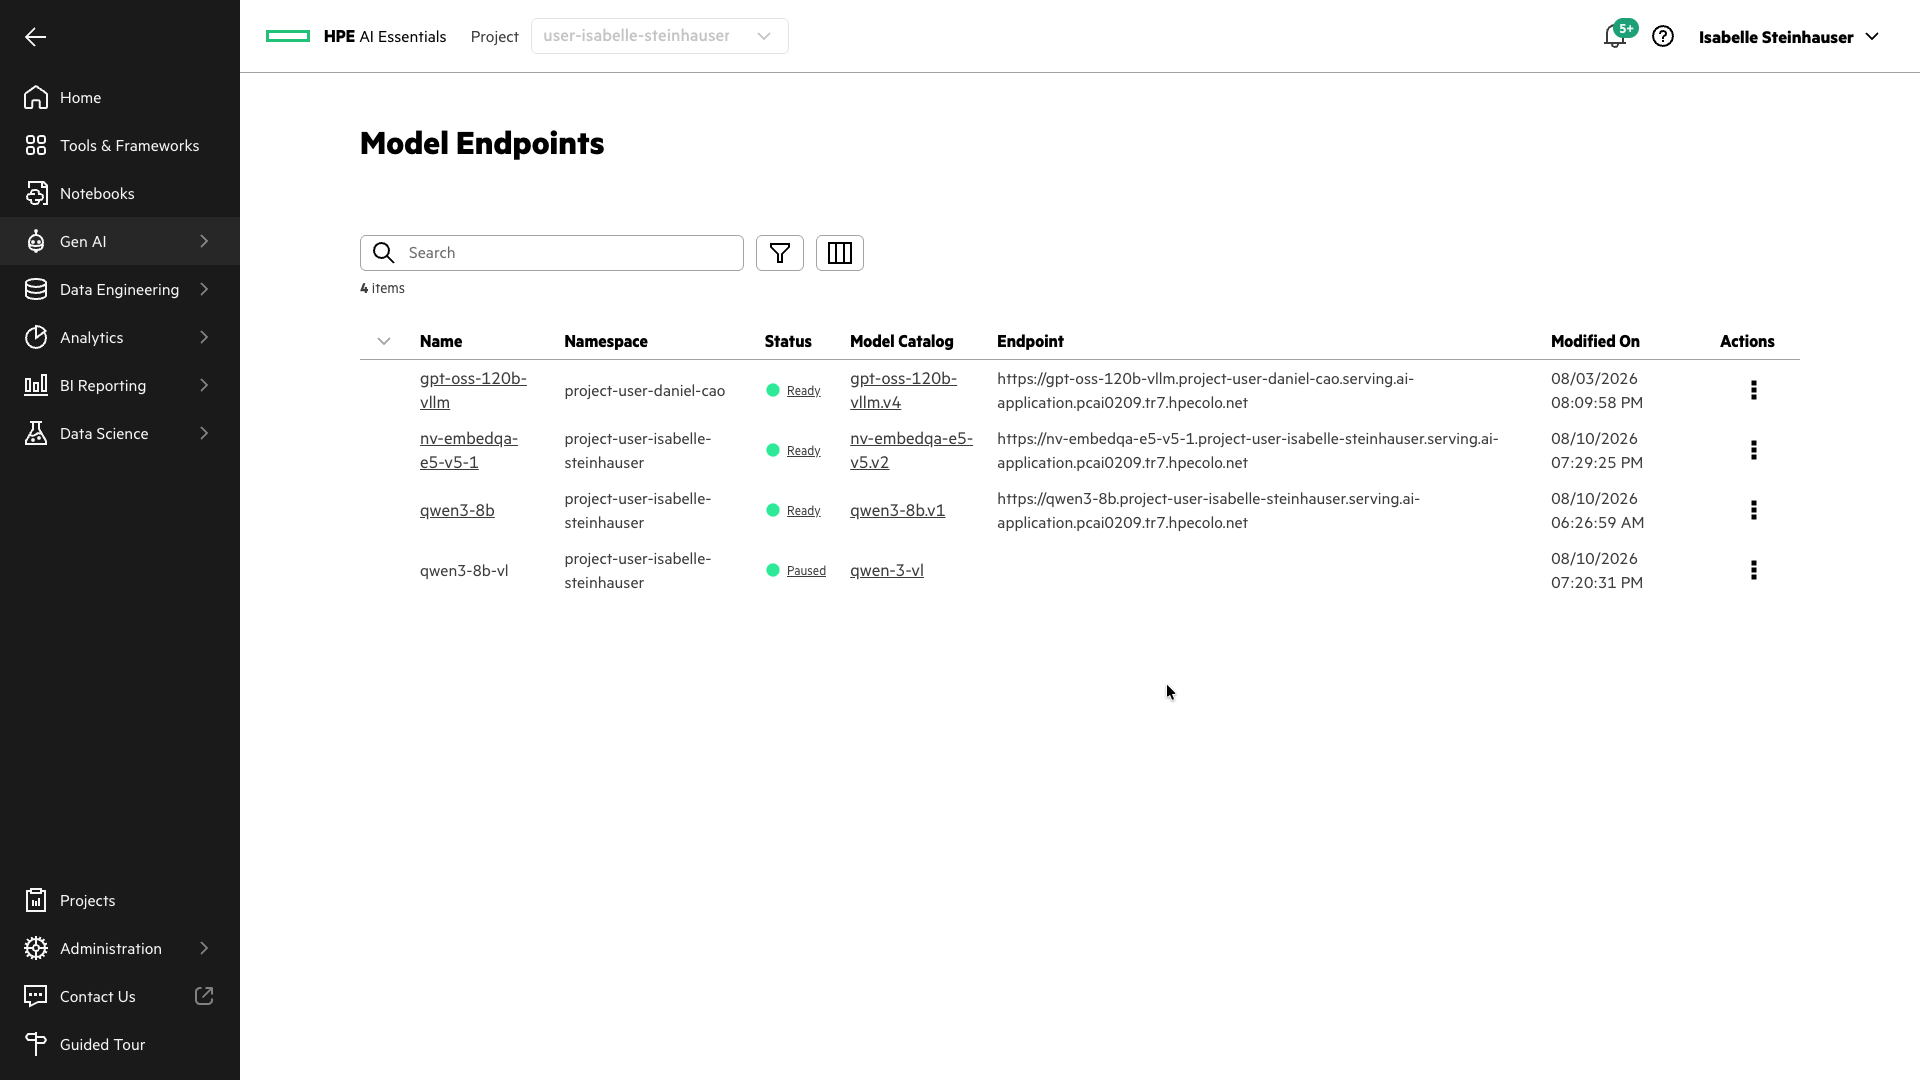
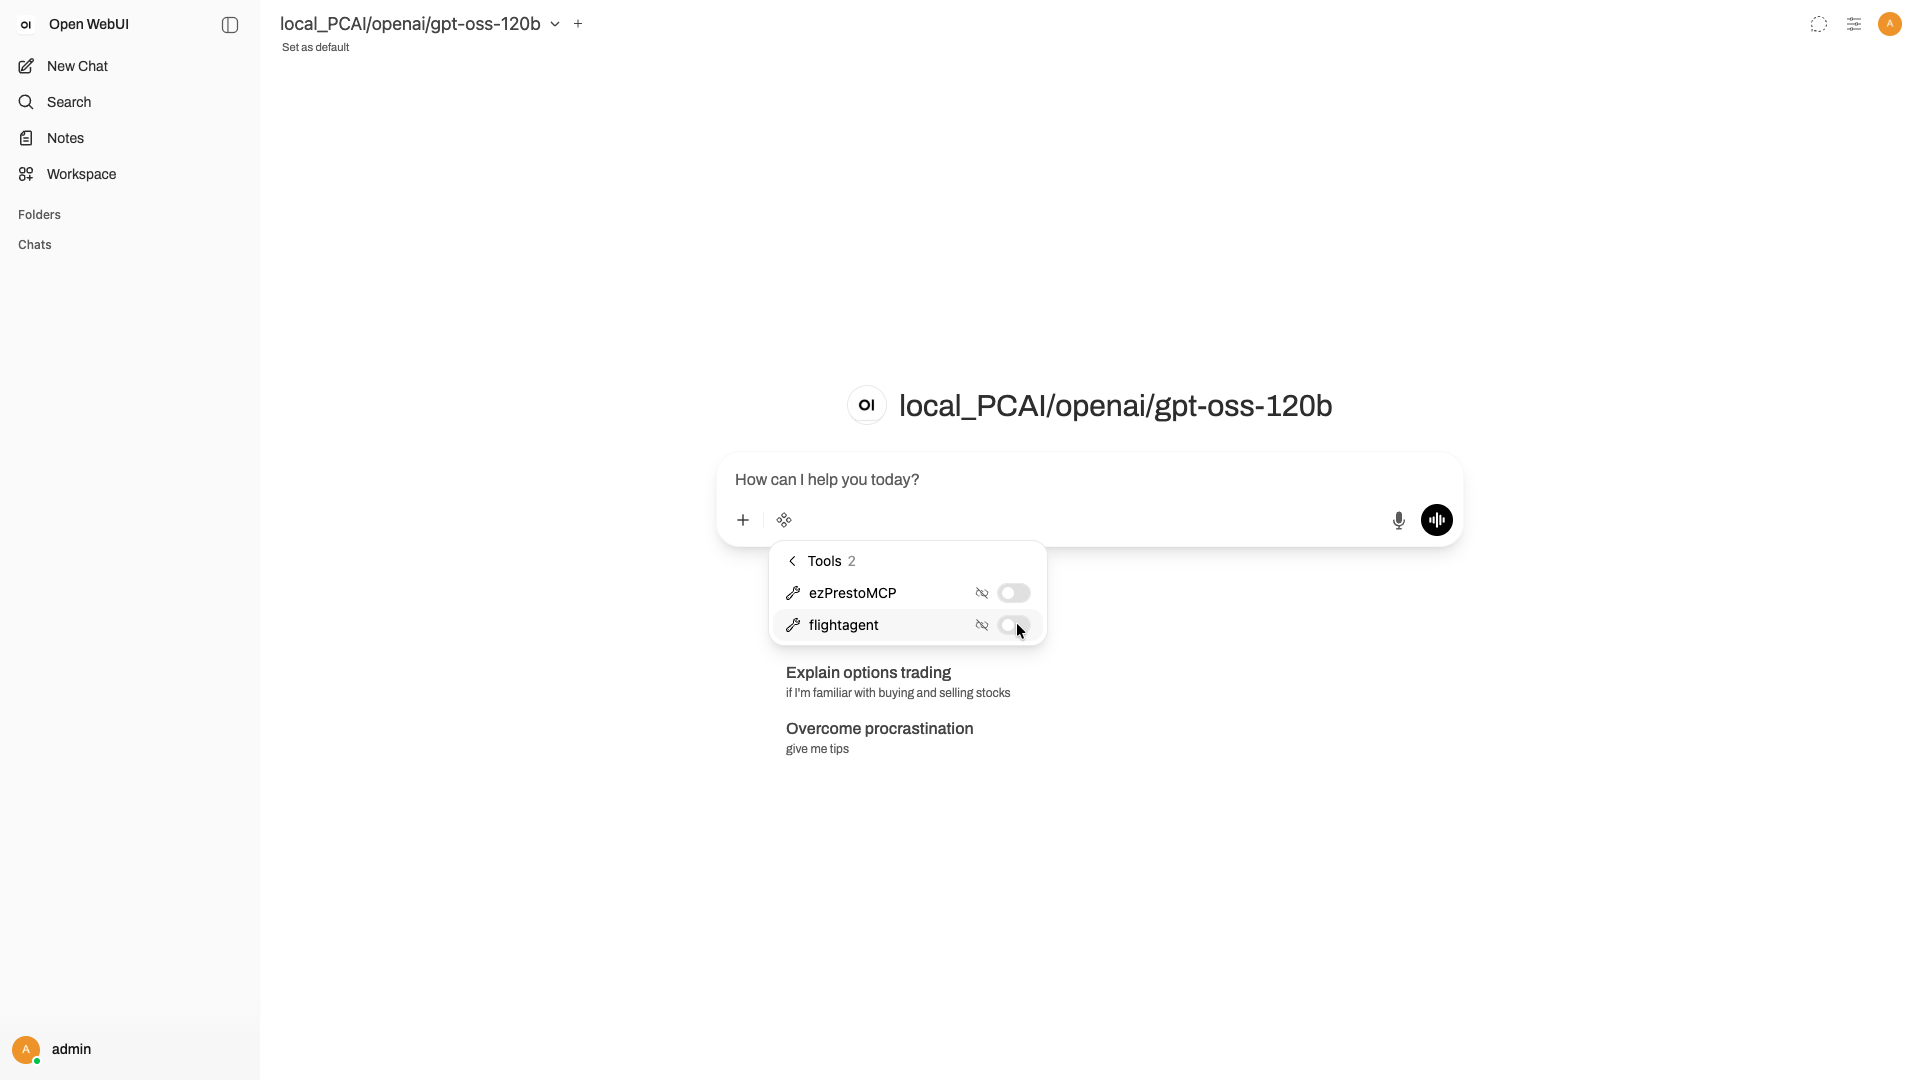
This can be any model with tool calling enabled. When you click Integrations under tools, your added Integration should appear. Click the toggle to enable it for your chat message.
Now enter a chat message, for example 'To which GitHub Repositories have we contributed?'. The model will use the configured GitHub MCP Server to solve this question.
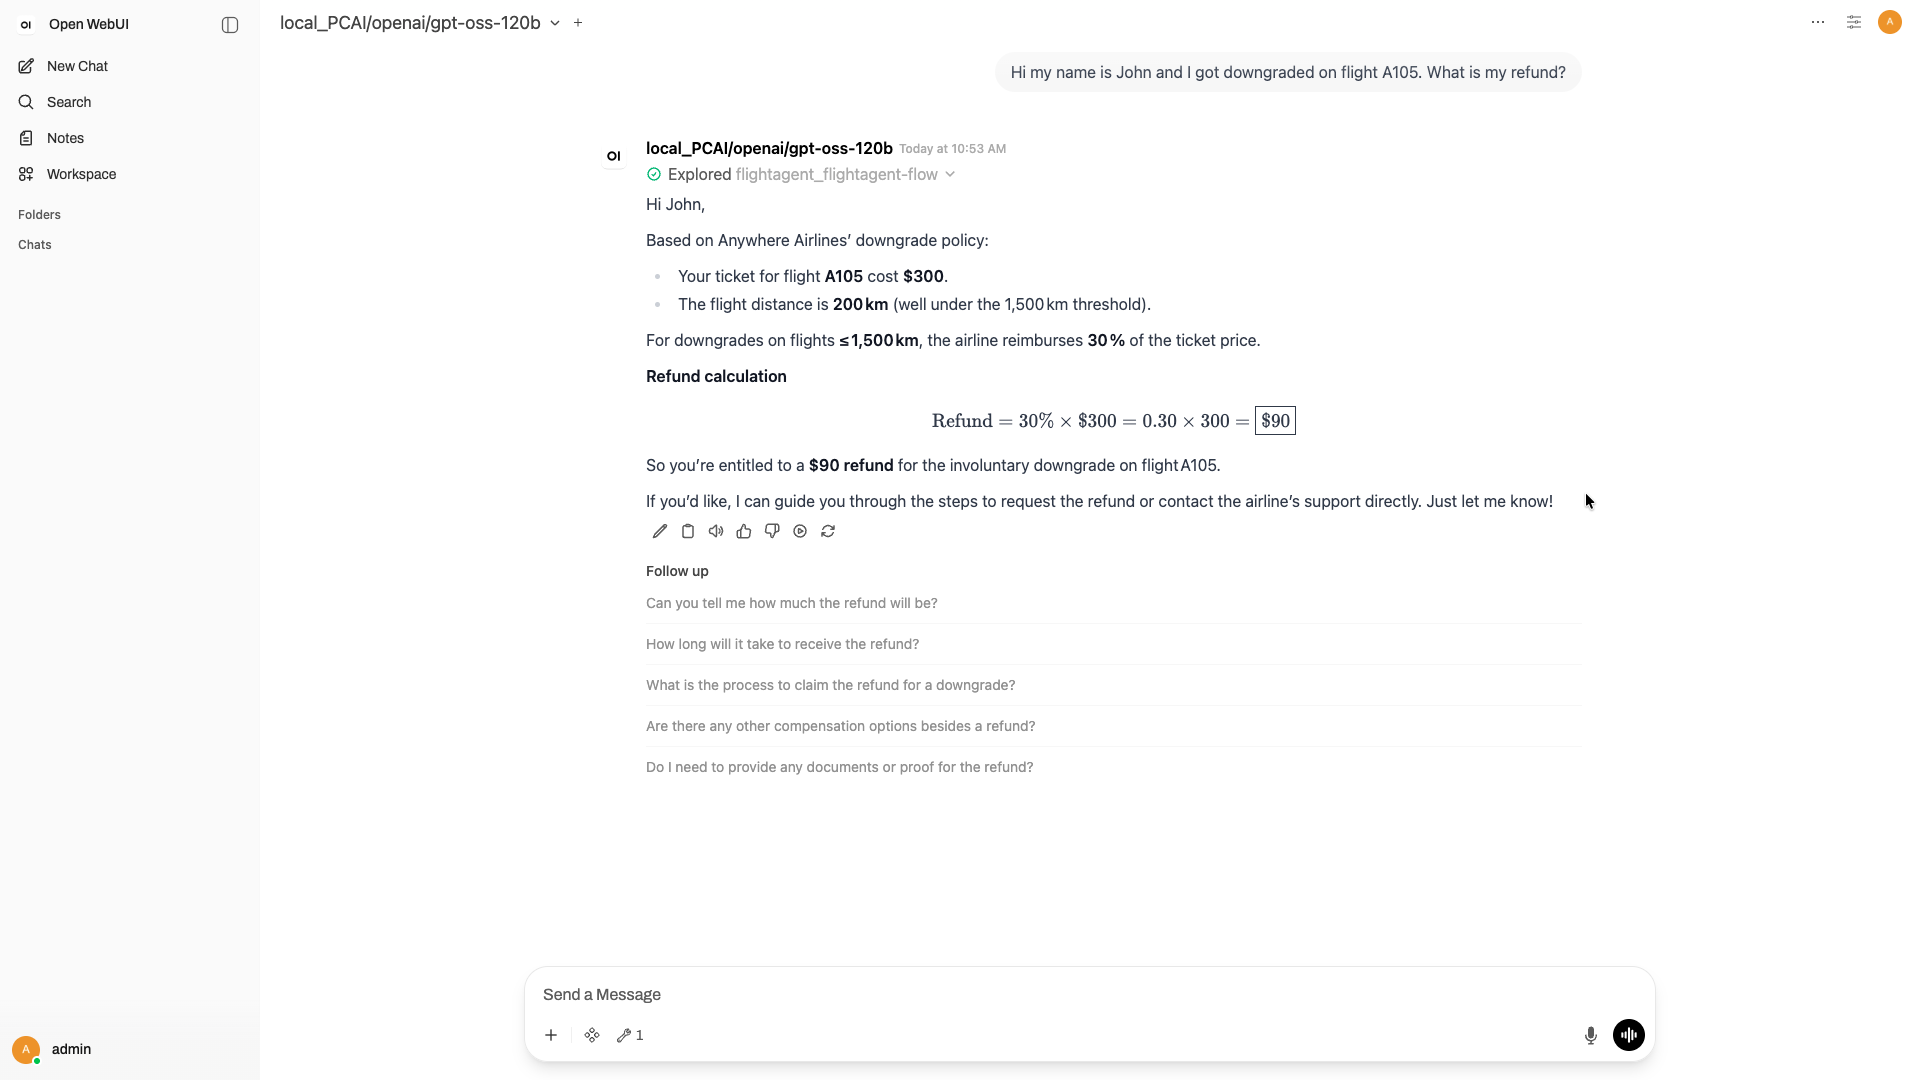
Or for the Langflow flow a sample question could be 'Hi my name is John and I got downgraded on flight A105. What is my refund?' and the Langflow Flow is being executed. In this example the Langflow Flow retrieves the refund policies from a VectorDB and combines it with executing the ezPrestoMCP server for some more information on John, eg how much he paid for his ticket.
If you defined costs per tool call, you can see increasing costs in the overview dashboard visible within LiteLLM under 'Usage'.
This is great. What about adding Guardrails to this flow?
Add a guardrail in LiteLLM
Within LiteLLM, navigate to Guardrails -> Guardrails and select 'Add New Guardrail'. Click on 'Add Provider Guardrail'.
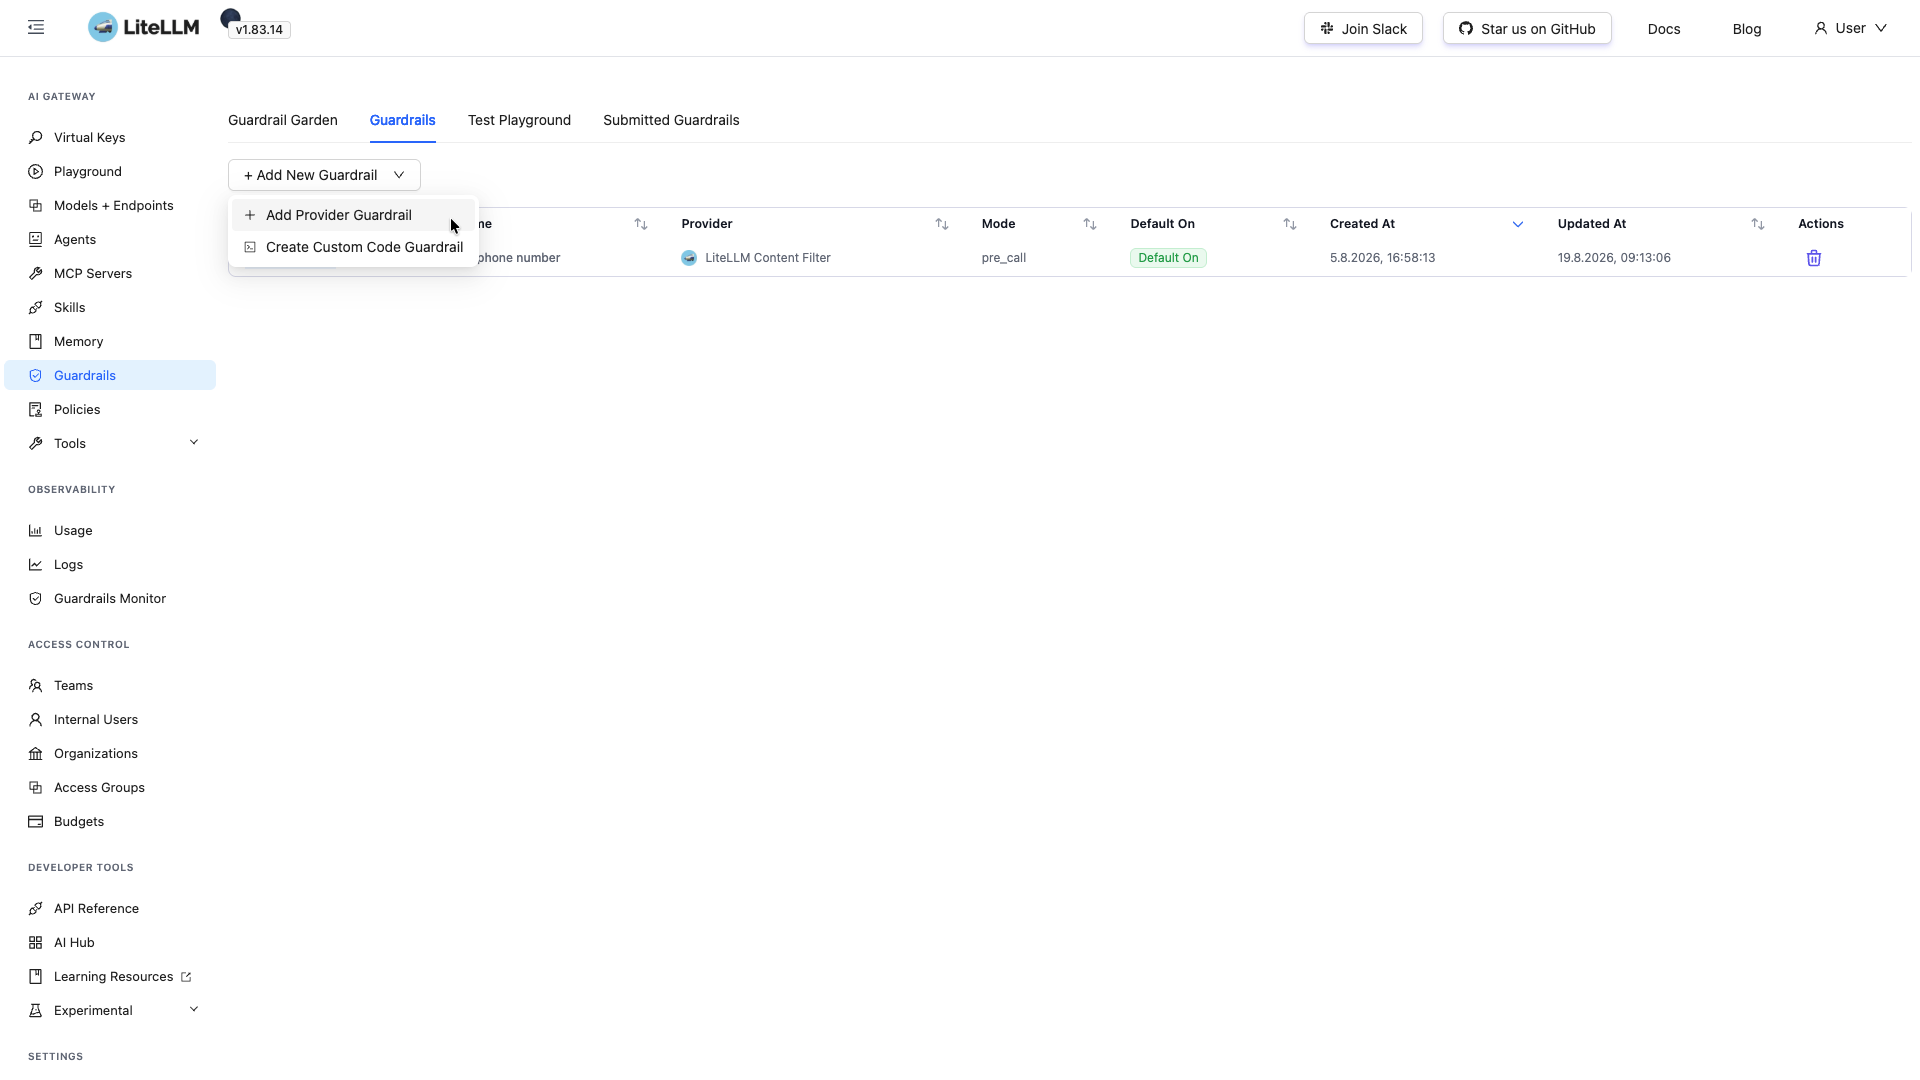
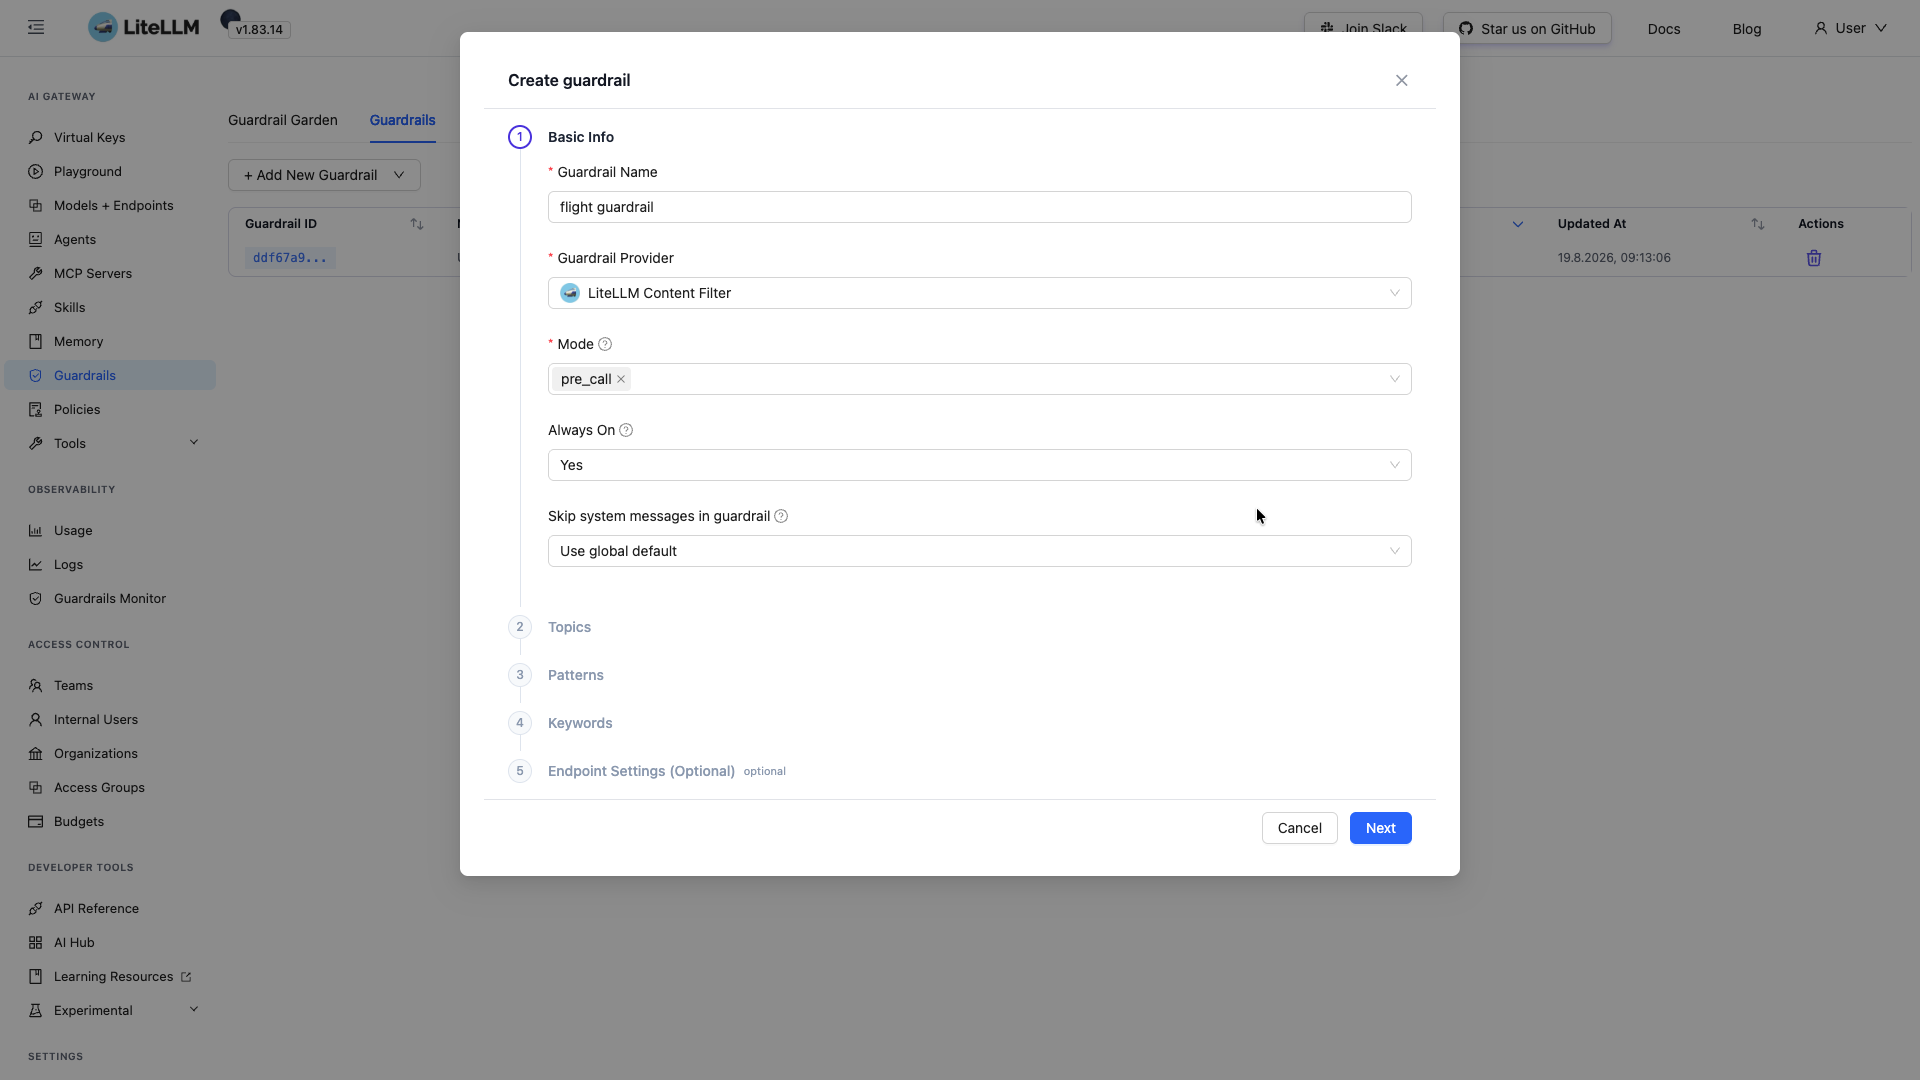
You need to enter a Guardrail Name. Choose between several Guardrail Providers, some of these being 3rd party where a license would be required. Select now the LiteLLM Content Filter which is built-in. Keep the default mode 'pre_call'. There are several others you could choose like 'post_call' or 'pre_mcp_call'. This decides where your guardrail intercepts. It can be before the call to the model is made, after the call is made, or before the model calls a MCP tool. In order for the guardrail to be active, select Always On Yes. The guardrail will apply to all models immediately then.
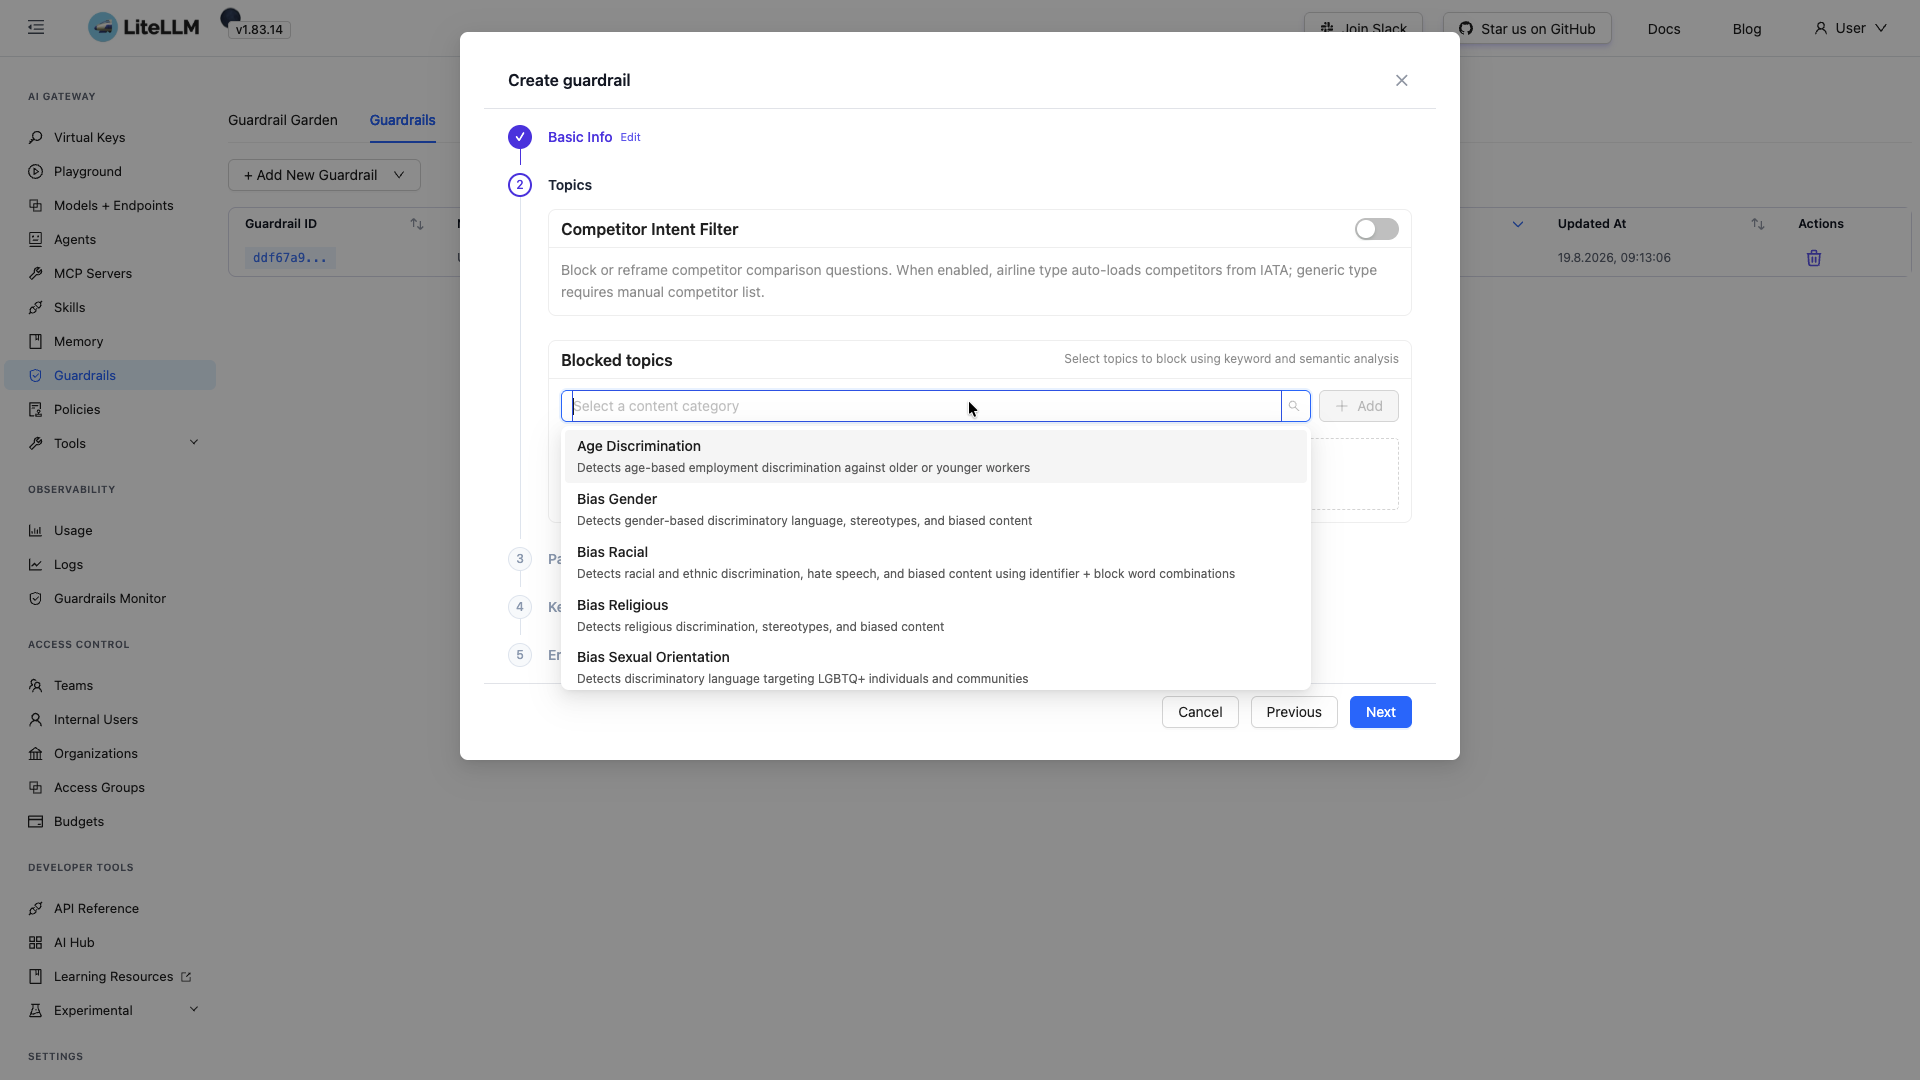
In order to proceed, click Next. In this view select the Topics you want to block. There are several to choose from, as we want to block Insults select 'Insult & Personal Attacks'. When you select a Topic, you get a preview of the YAML that applies and contains several keywords that are blocked with this topic. Click the '+ Add' Button additionally in order to add this Topic to your Guardrail.
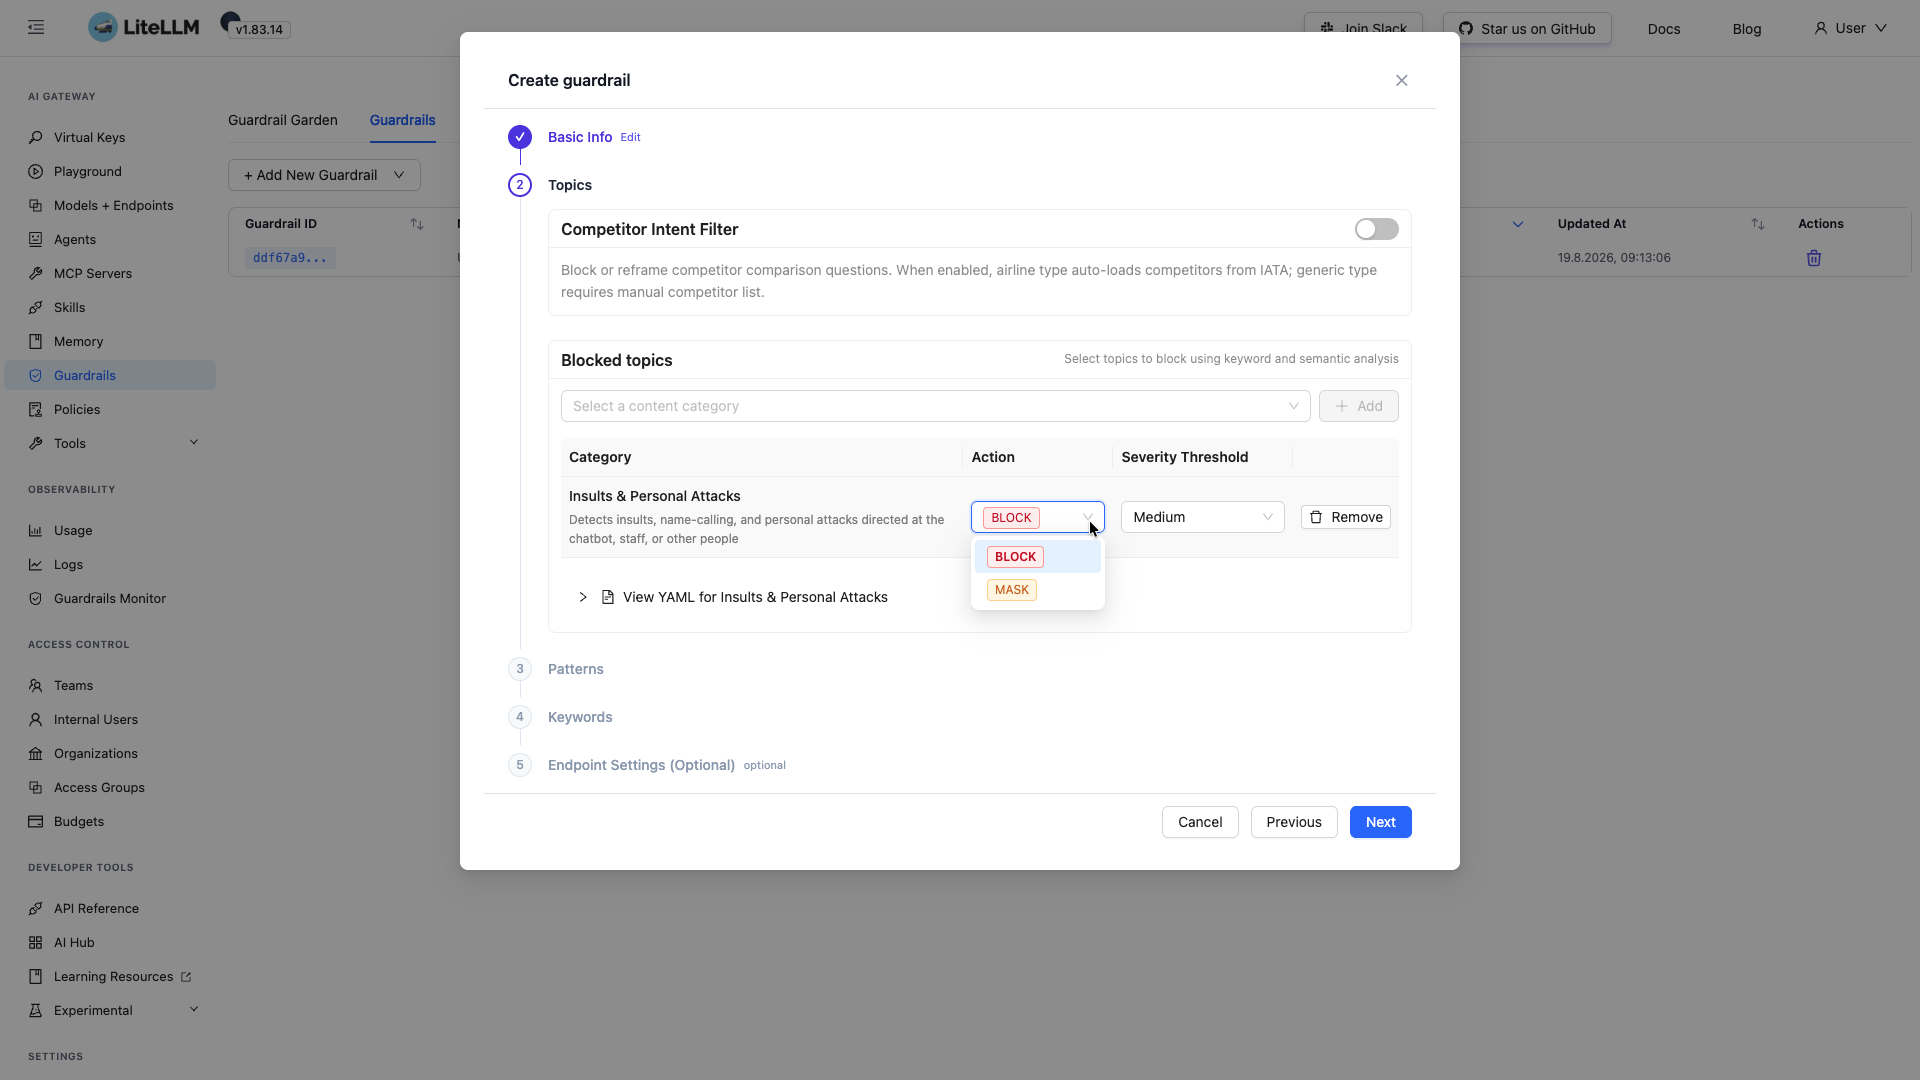
You can define the Action that should be executed once the topic is identified with a choice between BLOCK and MASK. The Severity Threshold can also be selected. In this example, choose BLOCK.
In the next steps, you can add specific patterns, samples like E Mail addresses or custom regex to your guardrail as well as keywords. Continue without those. Proceed through the wizard and click 'Create Guardrail'.
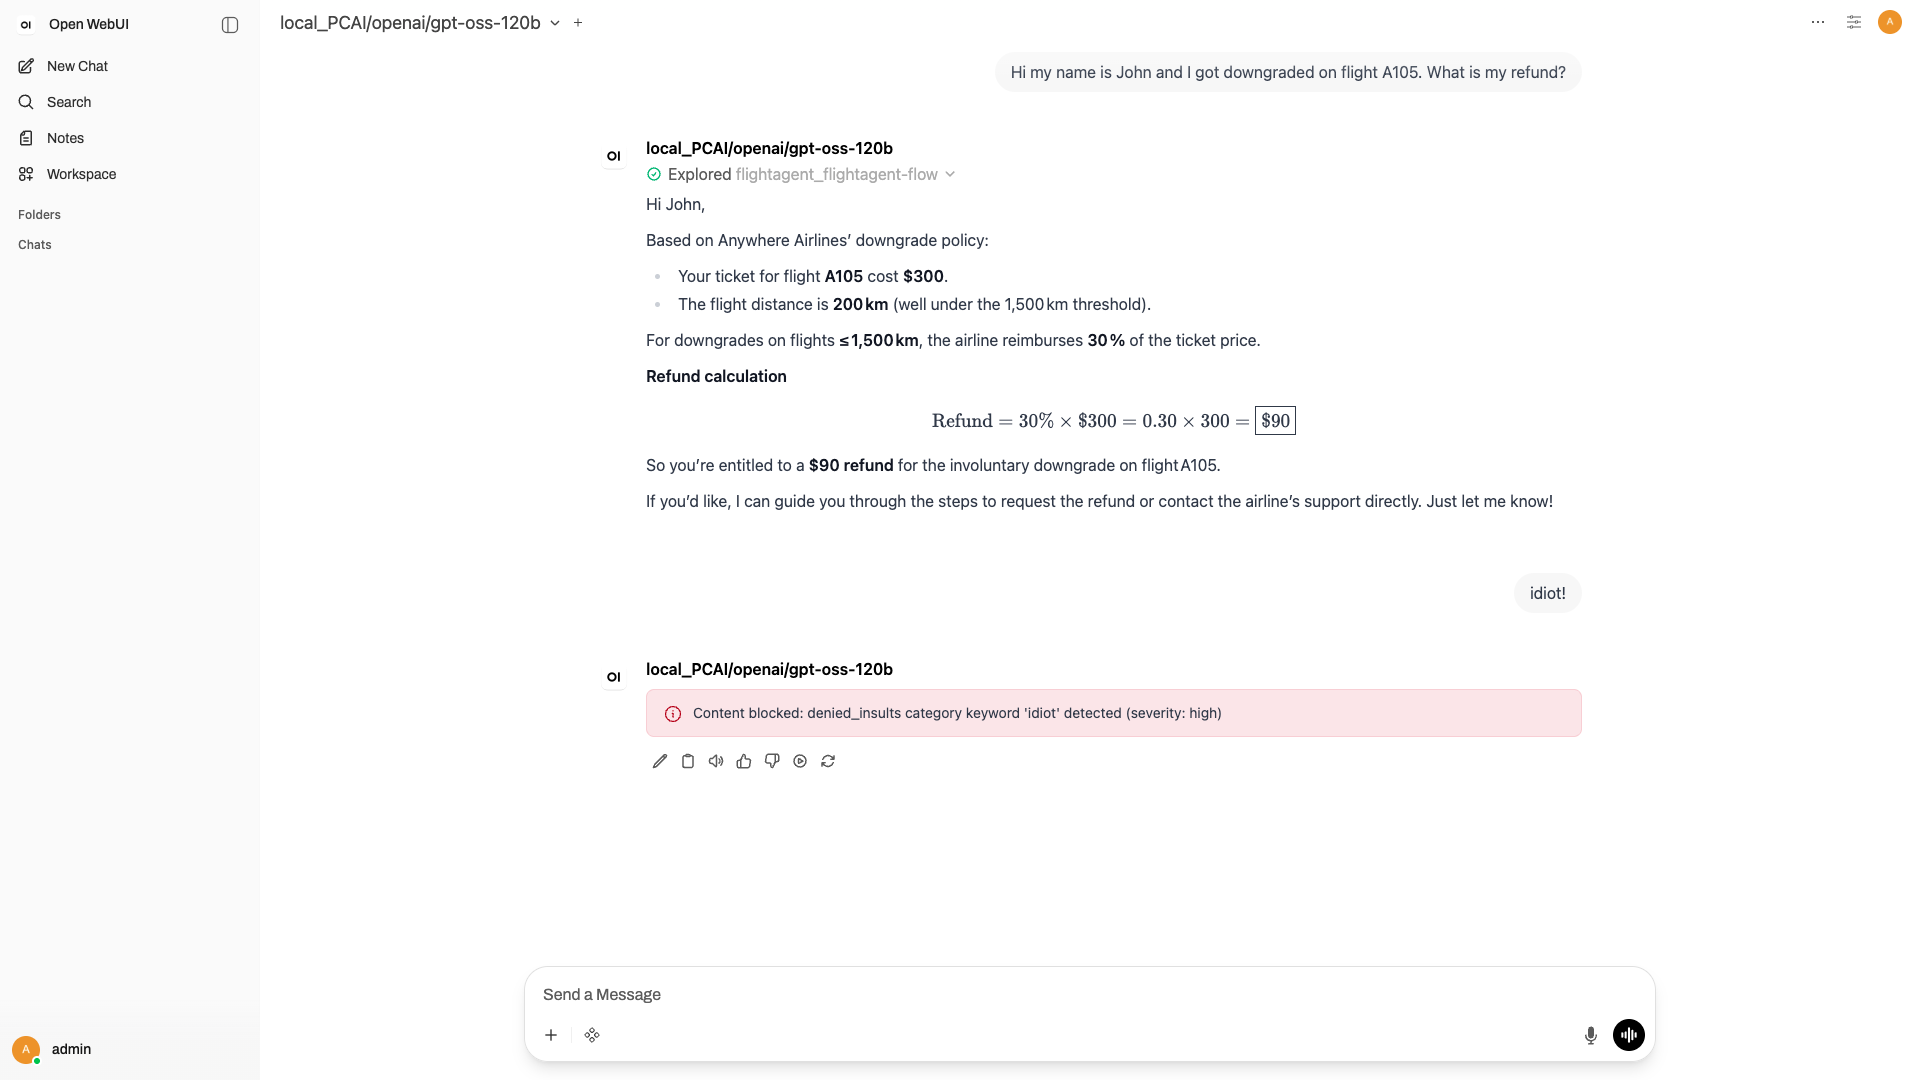
Without any further action, the Guardrail immediately applies to all calls to our AI Gateway. The reason for this is the selection of Always on. Let's test it in Open WebUI. If you insult the Agent, your request will be blocked.
This concludes the tutorial on how to bring your agent to the next level by introducing Tokenomics and Guardrails.
Please keep coming back to the HPE Developer Community blog to learn more about HPE Private Cloud AI and get more ideas on how you can use it in your everyday operations.
Related

Beyond generic AI: achieve contextual accuracy with HPE's Knowledge Bases
Apr 15, 2025
Build your first AI Chatbot on HPE Private Cloud AI using Flowise and HPE MLIS
Jul 11, 2025
Getting started with Retrieval Augmented Generation (RAG)
Nov 14, 2024HPE Private Cloud AI: Build your first Agent
Jun 18, 2026
HPE Private Cloud AI: Natural Language to Structured Query Language
May 6, 2026
Implementing a local LLM using S3-based model storage and vLLM in HPE Private Cloud AI
Mar 17, 2026Integrating Dagster as a modern data orchestration framework in HPE Private Cloud AI
Apr 19, 2026