

Automating application deployments to MKS clusters using GitOps with Argo CD
January 13, 2026While Kubernetes (K8s) is widely adopted, enterprises often face challenges when deploying and managing application workloads across K8s clusters, including configuration drift, inconsistent deployment practices, and limited operational visibility. As environments grow, manual processes introduce variability and make compliance and rollback procedures increasingly difficult. A GitOps model addresses these challenges by using Git as the single source of truth for all declarative configurations and maintaining alignment through continuous reconciliation. This approach enhances reliability, strengthens auditability, and enables predictable, repeatable deployments across complex K8s environments.
This blog post describes how to automate application deployments to Morpheus Kubernetes Service (MKS) clusters using a GitOps workflow powered by Argo CD. While the implementation example focuses on HPE Private Cloud Enterprise, the same approach applies seamlessly to HPE Morpheus Enterprise as long as a MKS cluster is provisioned. By taking advantage of Argo CD’s real‑time monitoring and alerting features, the solution provides clear visibility into application deployment health and enforces strict alignment between the live cluster state and the declarative configuration stored in Git. This ensures reliable, consistent, and version‑controlled application delivery across both environments.
What is GitOps?
GitOps is an operational framework that extends core DevOps principles, such as version control, collaboration, compliance, and CI/CD (continuous integration and continuous delivery), and applies them to infrastructure automation. In a GitOps workflow, Git acts as the single source of truth for all declarative infrastructure and application configurations. The entire desired state of a Kubernetes (K8s) cluster, including resources such as Deployments, Services, ConfigMaps, and more, is stored in Git. A GitOps controller continuously compares the cluster's actual state with the desired state defined in the repository and reconciles any differences to ensure consistency. Several well-known GitOps tools exist, including Argo CD, Flux CD, Jenkins X, and Spinnaker. For the purpose of this blog, Argo CD will be used as the primary tool for demonstrating GitOps automation.
What is Argo CD?
Argo CD is a declarative, GitOps-driven continuous delivery platform for K8s. It automates consistent and repeatable application deployments by using Git as the single source of truth for all configuration artifacts. Argo CD continuously monitors the live state of applications running in a K8s cluster and compares it against the desired state defined in a Git repository. When developers push changes to Git, Argo CD detects the updates and synchronizes them to the cluster.
Synchronization can be configured to run automatically, commonly used for development and test environments, or manually, which is typically preferred for production workflows. By defining the target environment state in Git, Argo CD ensures that the applications deployed in the K8s cluster remain aligned with the declared configuration.
Beyond synchronization, Argo CD provides real-time insights into application health, deployment status, and configuration drift through its monitoring and alerting capabilities. It integrates seamlessly with existing CI/CD pipelines and enforces GitOps best practices throughout the application deployment lifecycle.
The following sections provide a technical walkthrough for automating application deployments to MKS clusters using a GitOps workflow built around Argo CD. This blog specifically demonstrates the end‑to‑end process in a HPE Private Cloud Enterprise environment, including installing Argo CD on a MKS cluster, connecting application source repositories, configuring deployment parameters, and monitoring the application state within the cluster.
Prerequisites
Ensure that the following prerequisites are fulfilled:
- A MKS cluster has been provisioned from an HPE Private Cloud Enterprise workspace. You can refer to the blog post Provisioning MKS clusters in HPE Private Cloud Enterprise to provision an MKS cluster.
- The kubectl CLI tool has been properly installed, along with the kubeconfig file used to access the MKS cluster.
Install Argo CD
You can install Argo CD using either the provided installation YAML file with kubectl or the Helm charts with helm. Refer to the Argo CD installation documentation for detailed instructions.
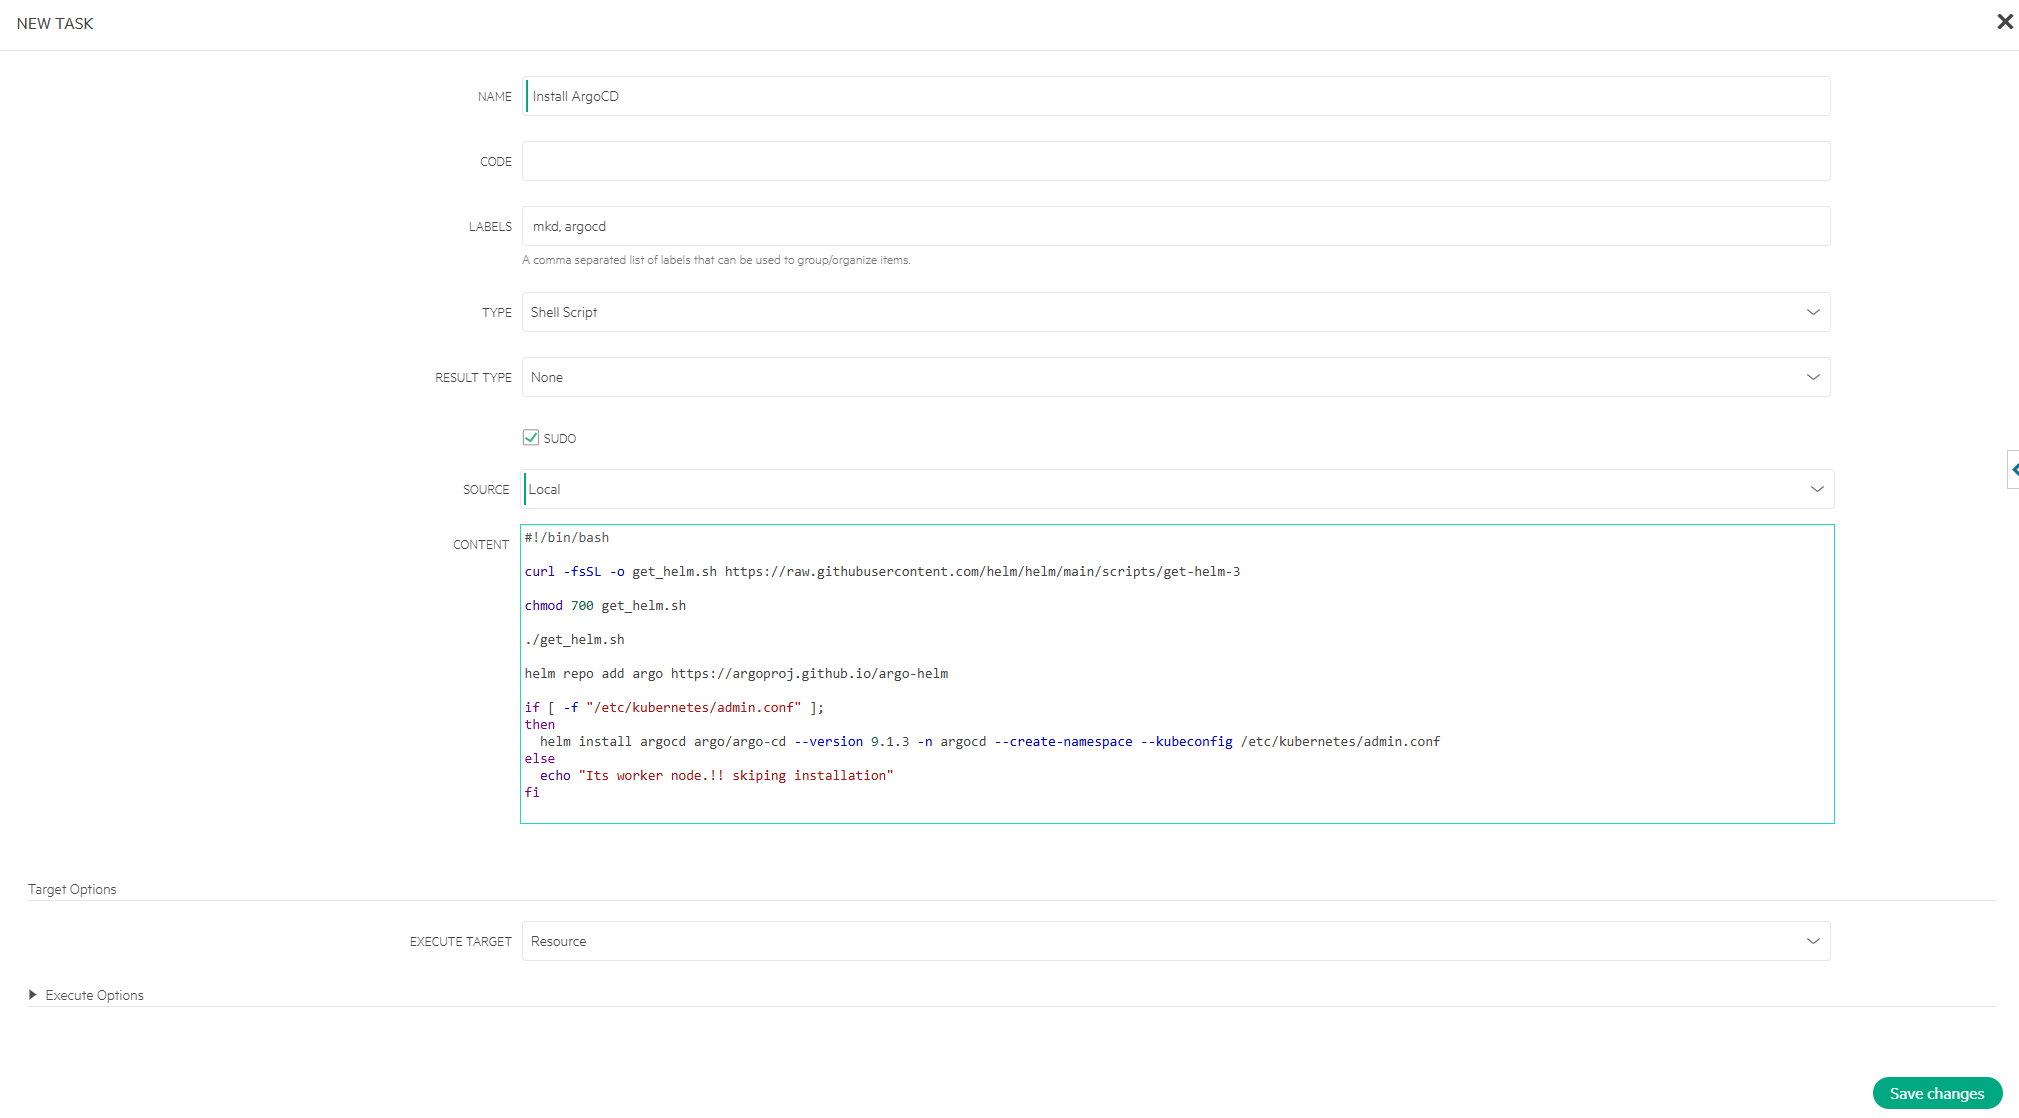
For MKS clusters in HPE Private Cloud Enterprise, you can automate the installation by creating a Shell script and add it as a Morpheus task. Running this task from the MKS master node will deploy Argo CD to the cluster.
Below is the Shell script used to install Argo CD.
#!/bin/bash

curl -fsSL -o get_helm.sh https://raw.githubusercontent.com/helm/helm/main/scripts/get-helm-3

chmod 700 get_helm.sh

./get_helm.sh

helm repo add argo https://argoproj.github.io/argo-helm

if [ -f "/etc/kubernetes/admin.conf" ];
then
  helm install argocd argo/argo-cd --version 9.1.3 -n argocd --create-namespace --kubeconfig /etc/kubernetes/admin.conf
else
  echo "Its worker node.!! skiping installation"
fi
Follow the steps below to install Argo CD on the MKS cluster.
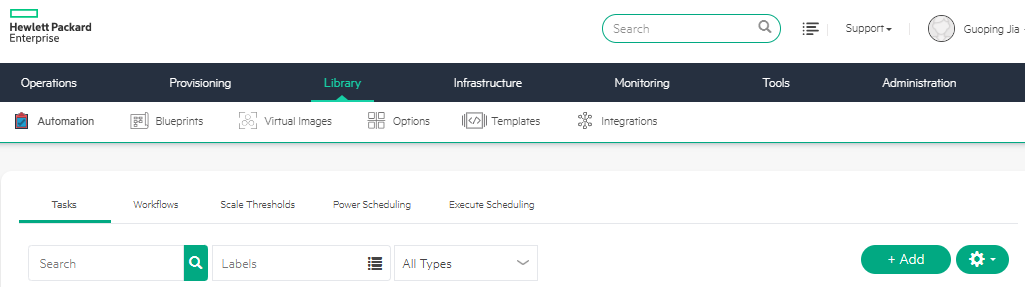
- In the Morpheus Dashboard, navigate to Library -> Automation -> Tasks tab. Click + Add.
- Enter NAME as Install ArgoCD and select TYPE as Shell Script. Enable SUDO, select SOURCE as Local, paste the Shell script into CONTENT. Click Save changes.
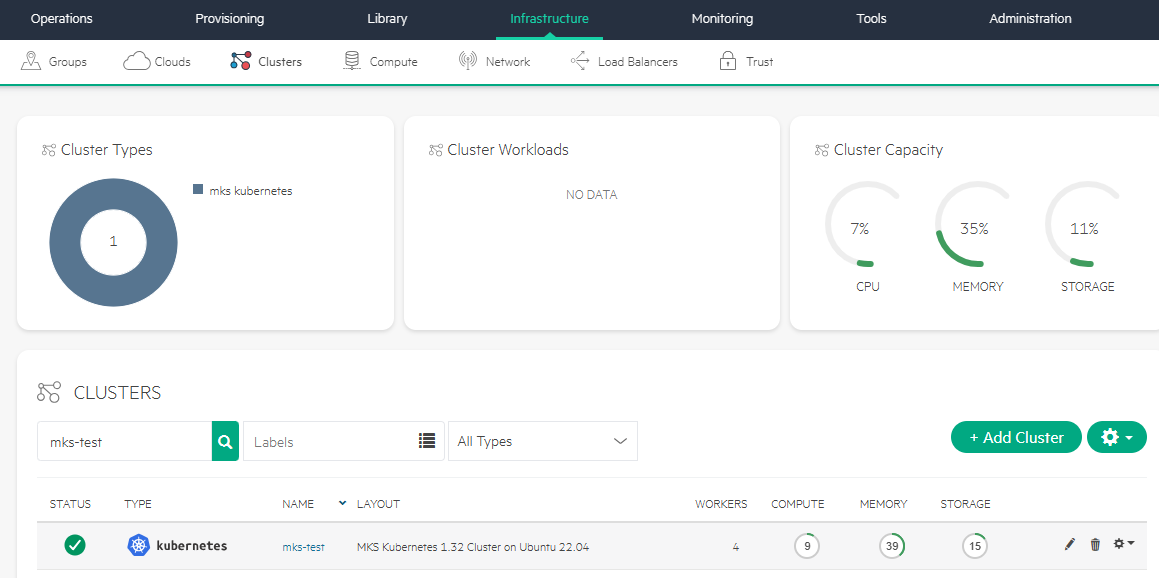
- Navigate to Infrastructure -> Clusters. Click the target MKS cluster NAME, e.g., mks-test.
- Open the Nodes tab. Click the MKS master node, e.g., mks-test-master.
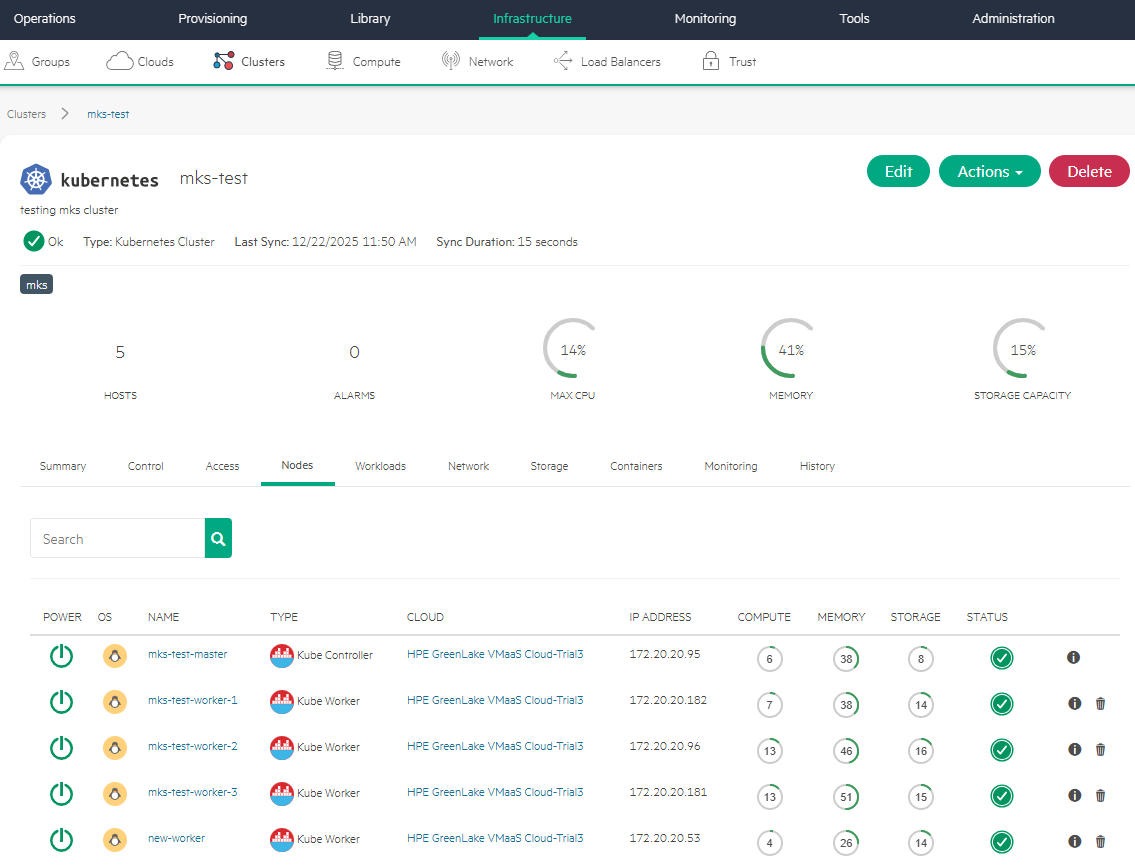
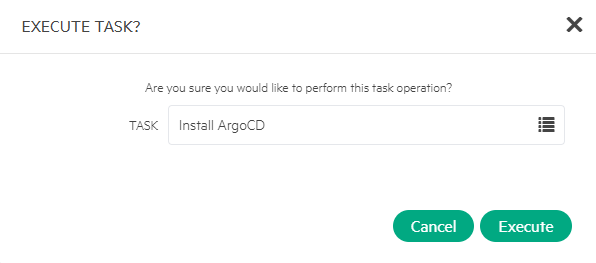
- Click Actions. Select Run Task.
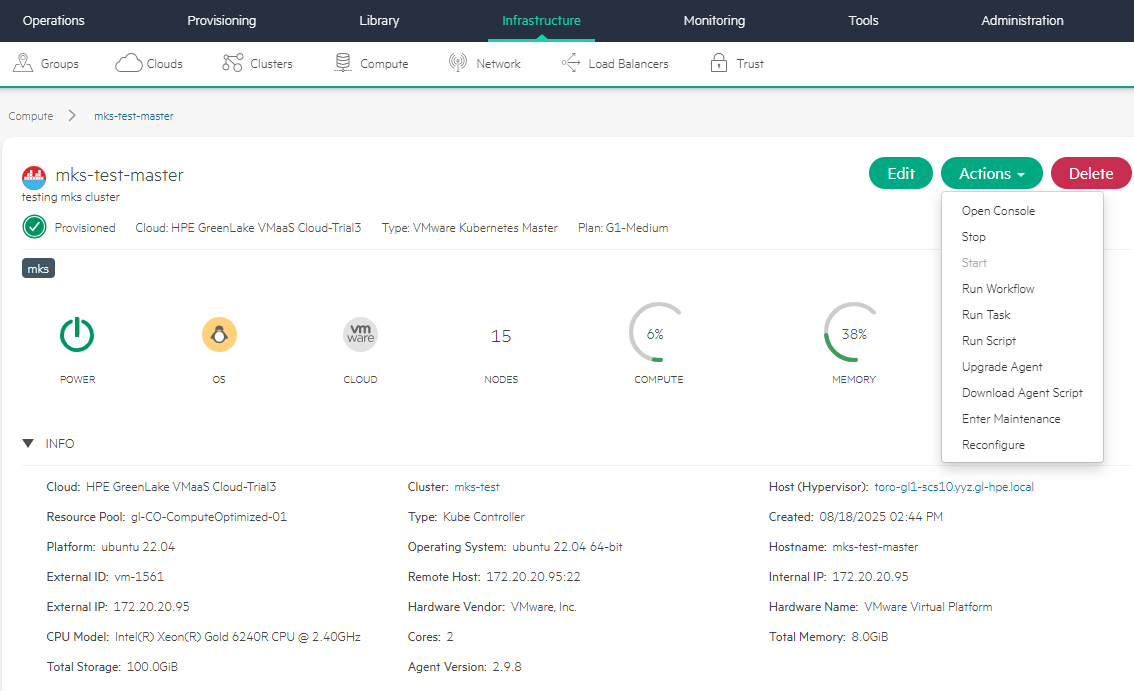
- Select Install ArgoCD as TASK.
- Open History tab. Click info ("i") icon to view the logs for Run Task: Install ArgoCD.
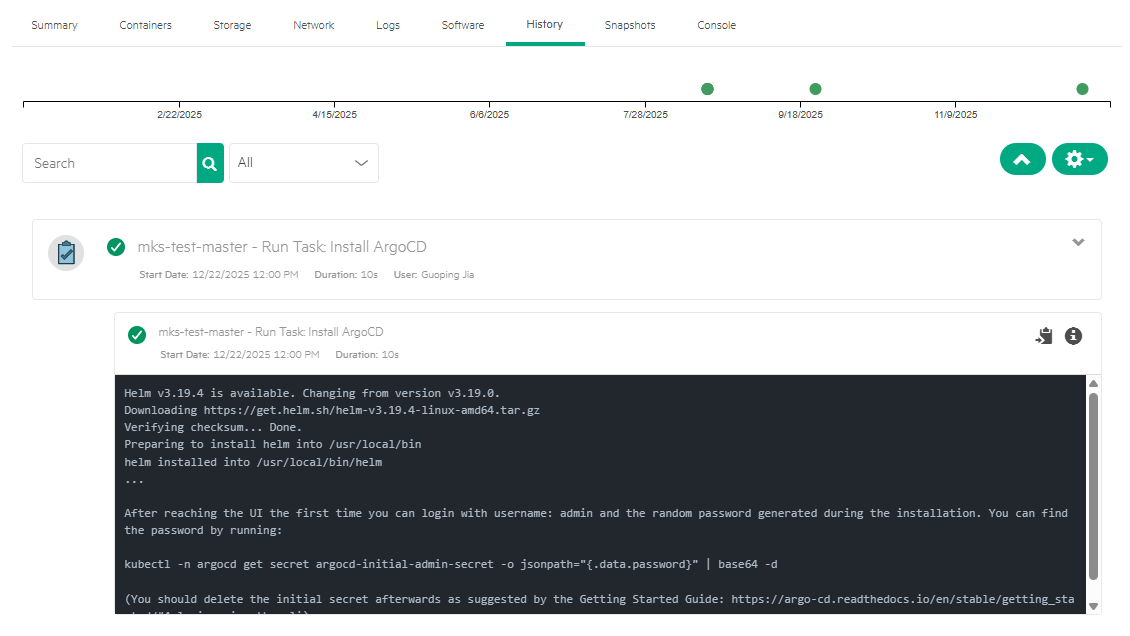
You can verify that Argo CD has been successfully deployed to the namespace 'argocd'.
$ kubectl get ns argocd
NAME     STATUS   AGE
argocd   Active   52s

$ k get all -n argocd
NAME                                                    READY   STATUS      RESTARTS   AGE
pod/argocd-application-controller-0                     1/1     Running     0          48s
pod/argocd-applicationset-controller-579f778f57-m4t4d   1/1     Running     0          48s
pod/argocd-dex-server-7d99b44d96-bjvxn                  1/1     Running     0          48s
pod/argocd-notifications-controller-57dd69d5d9-5dtw2    1/1     Running     0          48s
pod/argocd-redis-9ff9dddb8-x58gp                        1/1     Running     0          48s
pod/argocd-redis-secret-init-9hqtt                      0/1     Completed   0          52s
pod/argocd-repo-server-56dbf9bd9-xbx8z                  1/1     Running     0          48s
pod/argocd-server-5d56b98664-q2l5f                      1/1     Running     0          48s

NAME                                       TYPE        CLUSTER-IP      EXTERNAL-IP   PORT(S)             AGE
service/argocd-applicationset-controller   ClusterIP   172.30.219.75   <none>        7000/TCP            50s
service/argocd-dex-server                  ClusterIP   172.30.32.229   <none>        5556/TCP,5557/TCP   50s
service/argocd-redis                       ClusterIP   172.30.65.186   <none>        6379/TCP            50s
service/argocd-repo-server                 ClusterIP   172.30.1.116    <none>        8081/TCP            50s
service/argocd-server                      ClusterIP   172.30.64.166   <none>        80/TCP,443/TCP      50s

NAME                                               READY   UP-TO-DATE   AVAILABLE   AGE
deployment.apps/argocd-applicationset-controller   1/1     1            1           50s
deployment.apps/argocd-dex-server                  1/1     1            1           49s
deployment.apps/argocd-notifications-controller    1/1     1            1           50s
deployment.apps/argocd-redis                       1/1     1            1           49s
deployment.apps/argocd-repo-server                 1/1     1            1           50s
deployment.apps/argocd-server                      1/1     1            1           49s

NAME                                                          DESIRED   CURRENT   READY   AGE
replicaset.apps/argocd-applicationset-controller-579f778f57   1         1         1       50s
replicaset.apps/argocd-dex-server-7d99b44d96                  1         1         1       49s
replicaset.apps/argocd-notifications-controller-57dd69d5d9    1         1         1       50s
replicaset.apps/argocd-redis-9ff9dddb8                        1         1         1       49s
replicaset.apps/argocd-repo-server-56dbf9bd9                  1         1         1       49s
replicaset.apps/argocd-server-5d56b98664                      1         1         1       49s

NAME                                             READY   AGE
statefulset.apps/argocd-application-controller   1/1     49s

NAME                                 STATUS     COMPLETIONS   DURATION   AGE
job.batch/argocd-redis-secret-init   Complete   1/1           3s         53s
Keep in mind that the 'argocd-server' service is configured as the ClusterIP type, meaning it is accessible only from within the cluster.
Configure Argo CD access
To use Argo CD for application deployments, the Argo CD service must be accessible from outside the MKS cluster. This can be achieved through several methods, including port forwarding, NodePort or LoadBalancer type services, or a manual virtual private network (VPN) setup.
In this blog, I show an alternative approach: exposing the Argo CD service to the public Internet using Tailscale. For background on Tailscale and the service-exposure workflow, refer to the blog post Exposing Grafana service using Tailscale for MKS monitoring in HPE Private Cloud Enterprise.
Follow the steps below to expose the Argo CD service endpoint using Tailscale.
- Update the Argo CD service type from ClusterIP to LoadBalancer.
$ kubectl edit svc/argocd-server -n argocd
service/argocd-server edited
- Confirm that the service type has been updated successfully.
$ kubectl get svc -n argocd
NAME                               TYPE           CLUSTER-IP      EXTERNAL-IP     PORT(S)                      AGE
argocd-applicationset-controller   ClusterIP      172.30.219.75   <none>          7000/TCP                     2m47s
argocd-dex-server                  ClusterIP      172.30.32.229   <none>          5556/TCP,5557/TCP            2m47s
argocd-redis                       ClusterIP      172.30.65.186   <none>          6379/TCP                     2m47s
argocd-repo-server                 ClusterIP      172.30.1.116    <none>          8081/TCP                     2m47s
argocd-server                      LoadBalancer   172.30.64.166   172.20.20.242   80:30147/TCP,443:31601/TCP   2m47s
- Create an Ingress YAML manifest and apply it to the cluster.
$ cat ingress-argocd.yaml
apiVersion: networking.k8s.io/v1
kind: Ingress
metadata:
  name: ingress-argocd
  namespace: argocd
  annotations:
    tailscale.com/funnel: "true"
spec:
  defaultBackend:
    service:
      name: argocd-server
      port:
        number: 443
  ingressClassName: tailscale
  tls:
    - hosts:
        - argocd

$ kubectl apply -f ingress-argocd.yaml
ingress.networking.k8s.io/ingress-argocd created
- Verify that the Ingress resource 'ingress-argocd' has been created and assigned an address.
$ kubectl get ingress -n argocd
NAME             CLASS       HOSTS   ADDRESS                    PORTS     AGE
ingress-argocd   tailscale   *       argocd.qilin-beta.ts.net   80, 443   8s
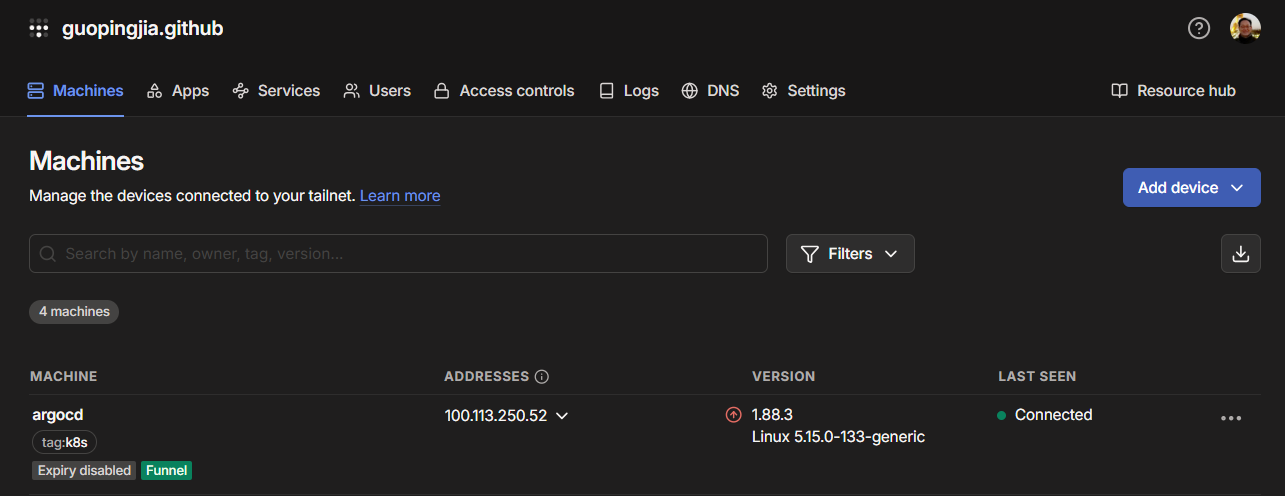
- In the Tailscale admin console, a new machine named 'argocd' should appear under the Machines tab.
- Open a browser and point to the Argo CD Funnel URL, e.g., 'argocd.qilin-beta.ts.net '.
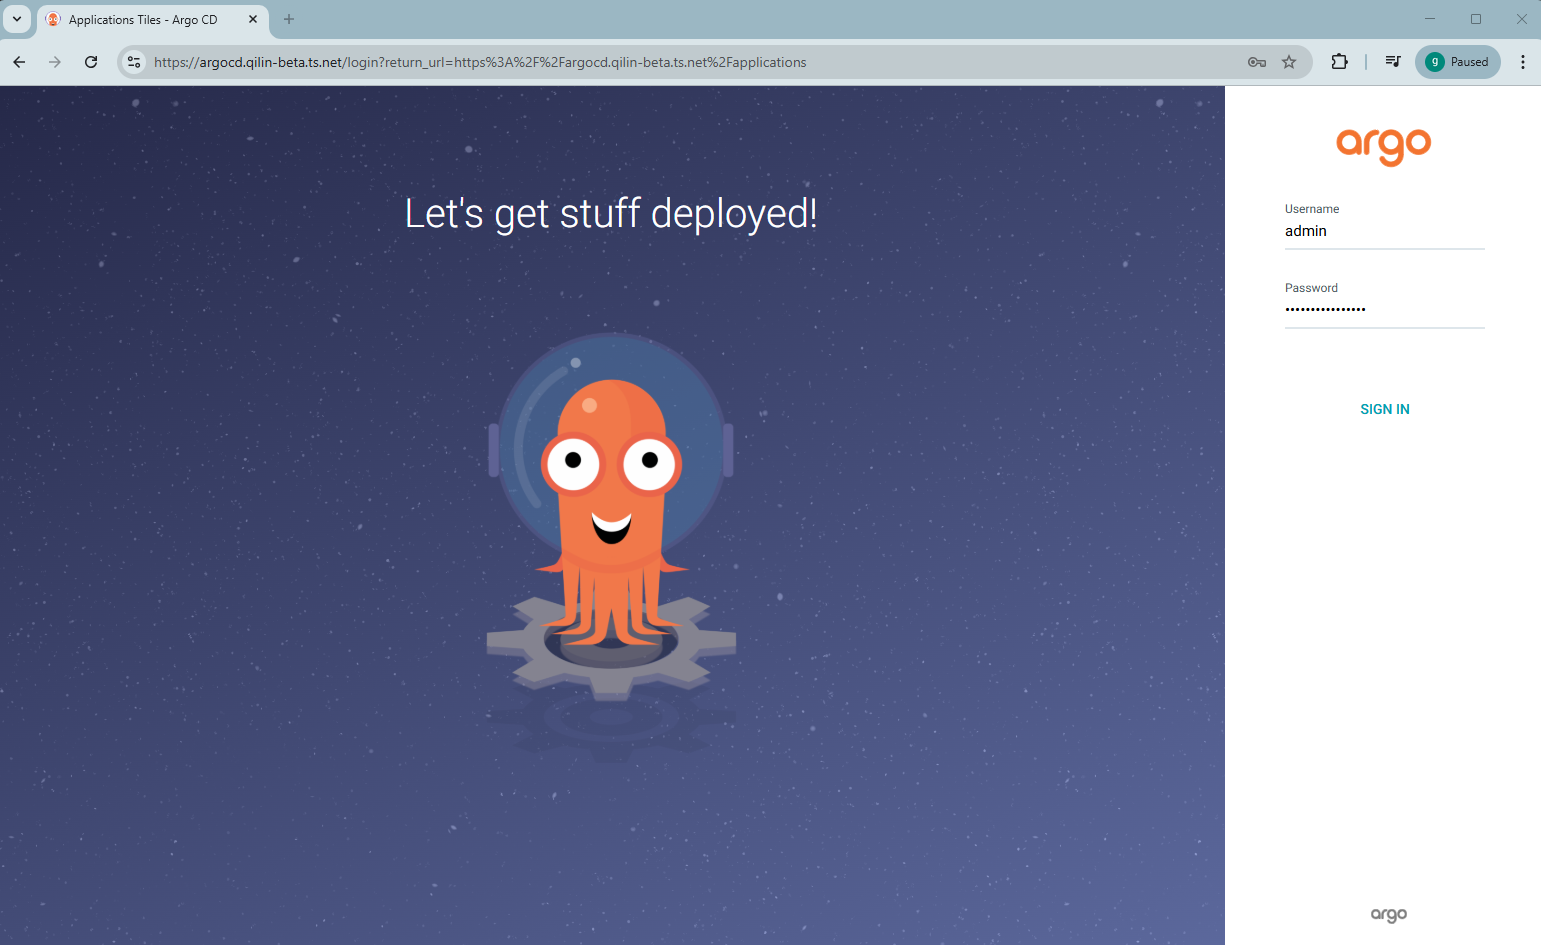
Log in using the username 'admin'. Run the following command to retrieve the admin password.
$ kubectl get secret -n argocd argocd-initial-admin-secret -o jsonpath="{.data.password}" | base64 -d
Deploy applications using Argo CD
You can now use the Argo CD service endpoint to connect your application's code repository and begin deploying applications to the MKS cluster.
Connect application repository
The sample WordPress application's Helm charts are available in the GitHub repository helm-demo.
In this section, I will outline the steps for connecting that repository to Argo CD.
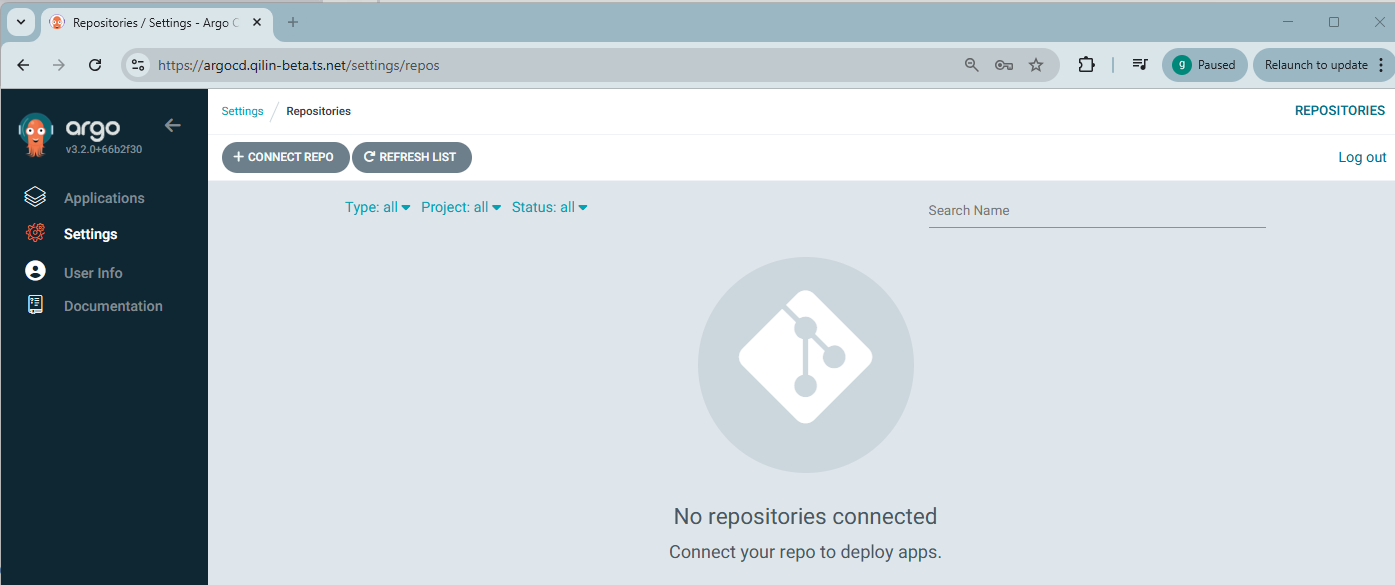
- In the Argo CD UI, navigate to Settings -> Repository. Click + CONNECT REPO.
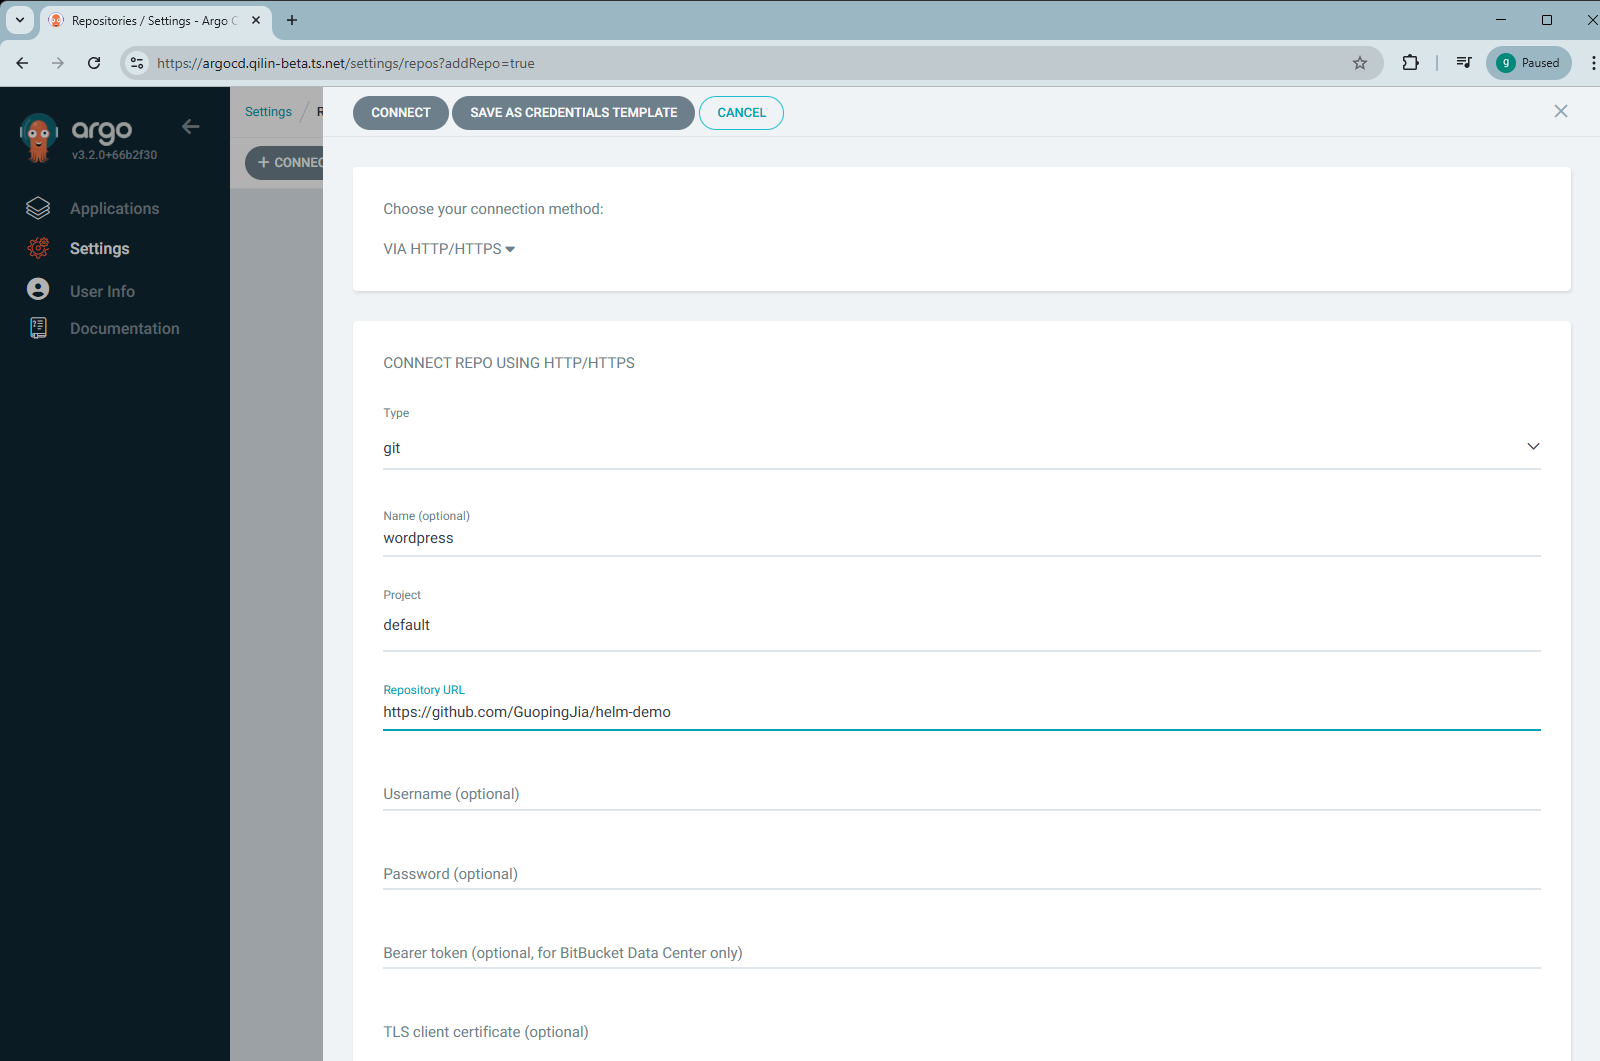
- Select VIA HTTP/HTTPS as the connection method, choose git as Type, set Project to default, optional name as wordpress, and enter Repository URL, e.g., https://github.com/GuopingJia/helm-demo. Click CONNECT.
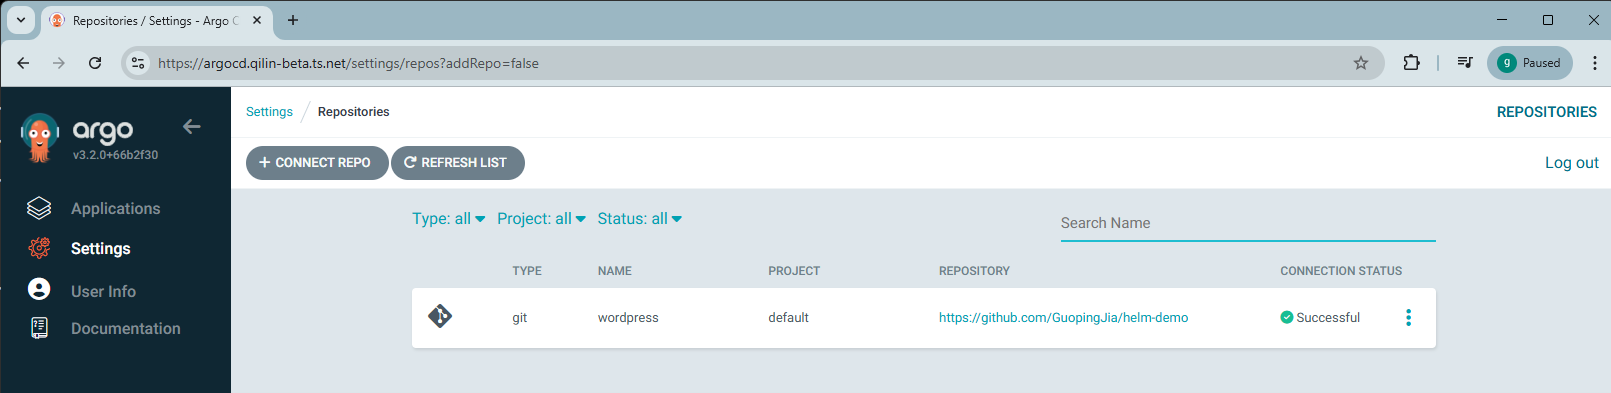
- After a few moments, the repository's CONNECTION STATUS should display as Successful.
Create application
Follow the steps below to create a new application for deployment.
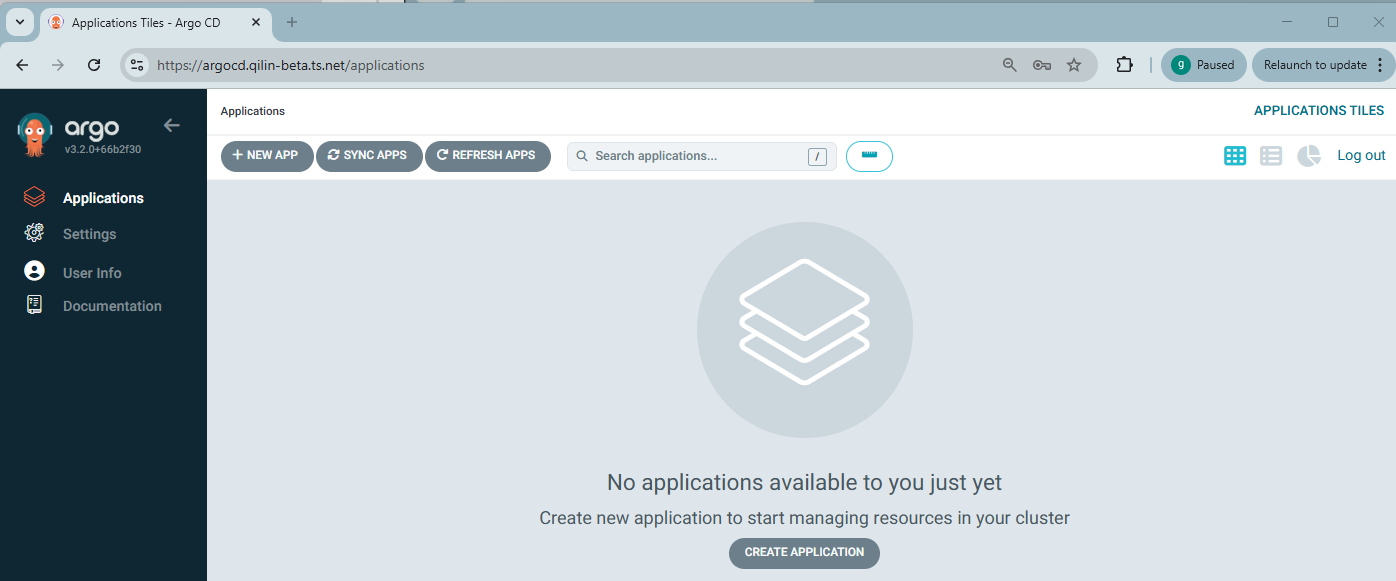
- In the Argo CD UI, navigate to Applications. Click CREATE APPLICATION.
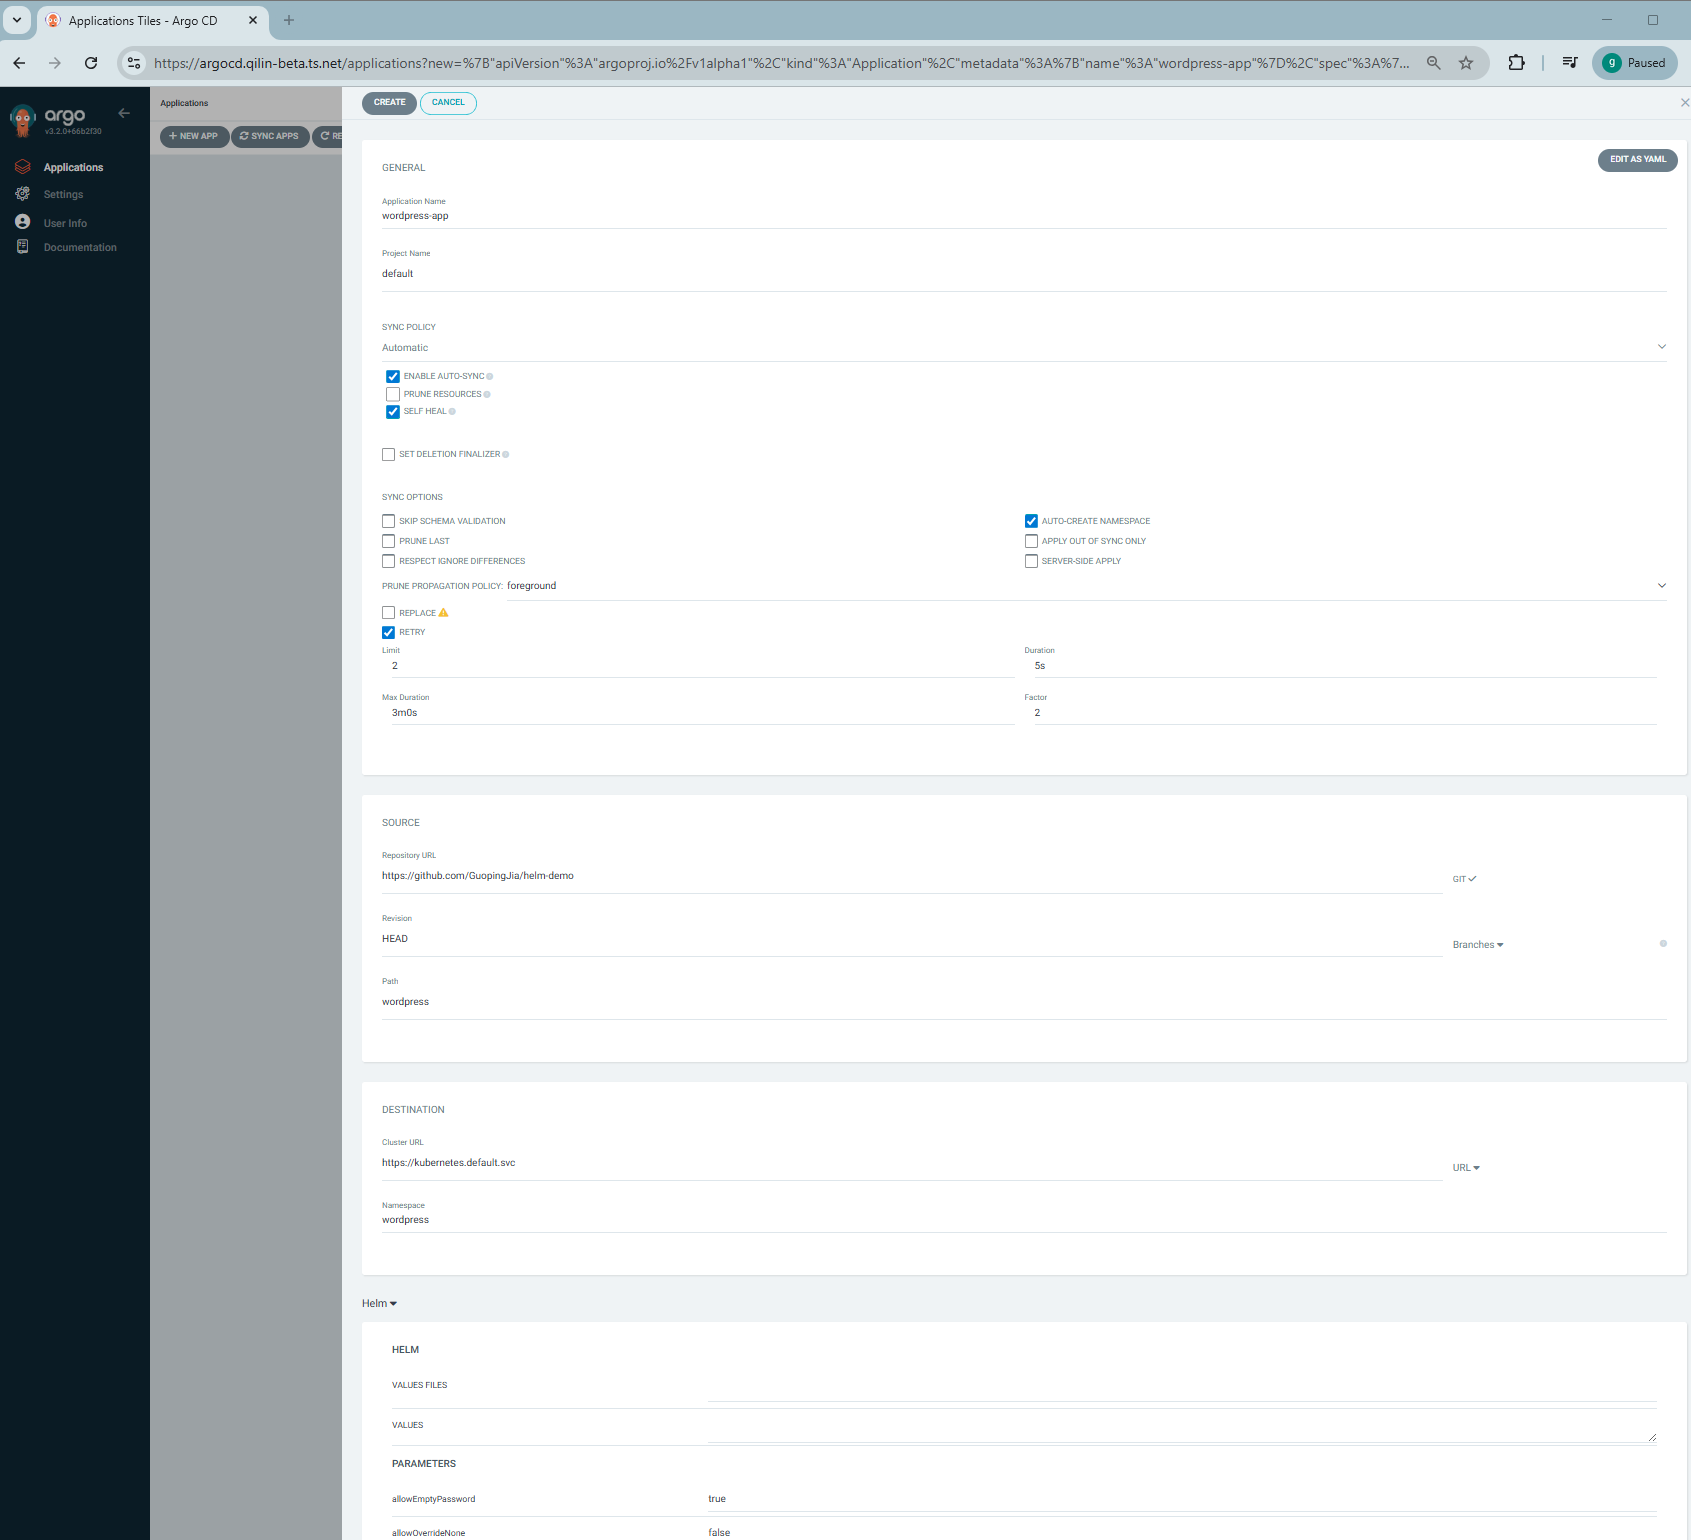
- Enter Application Name as wordpress-app, set Project Name to default and choose Automatic for SYNC POLICY. For SOURCE, select Repository URL, set Revision to HEAD, and specify Path as wordpress. For DESTINATION, choose Cluster URL as https://kubernetes.default.svc and set Namespace to wordpress. Enable additional options such as ENABLE AUTO-SYNC, SELF HEAL, AUTO-CREATE NAMESPACE and RETRY. Click CREATE.
Note: If you choose Manual under SYNC POLICY, Argo CD will detect the changes in the Git repository but will not apply them automatically. You must manually click SYNC on Applications page to apply updates.
- The wordpress-app deployment will begin immediately.
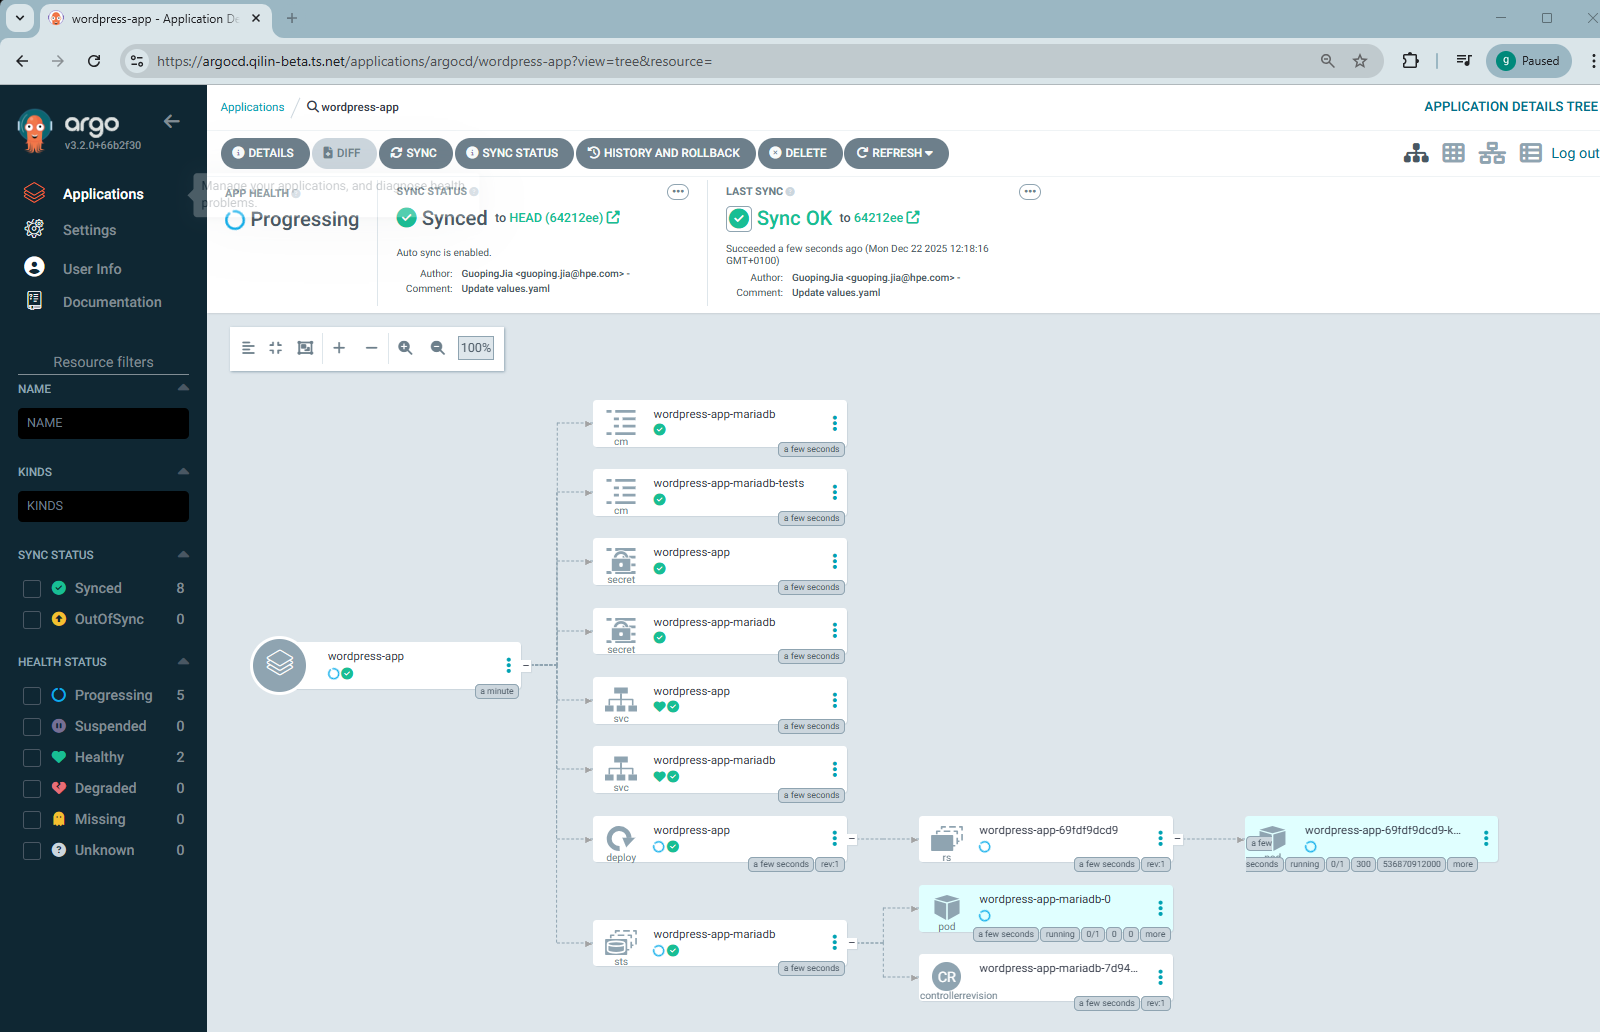
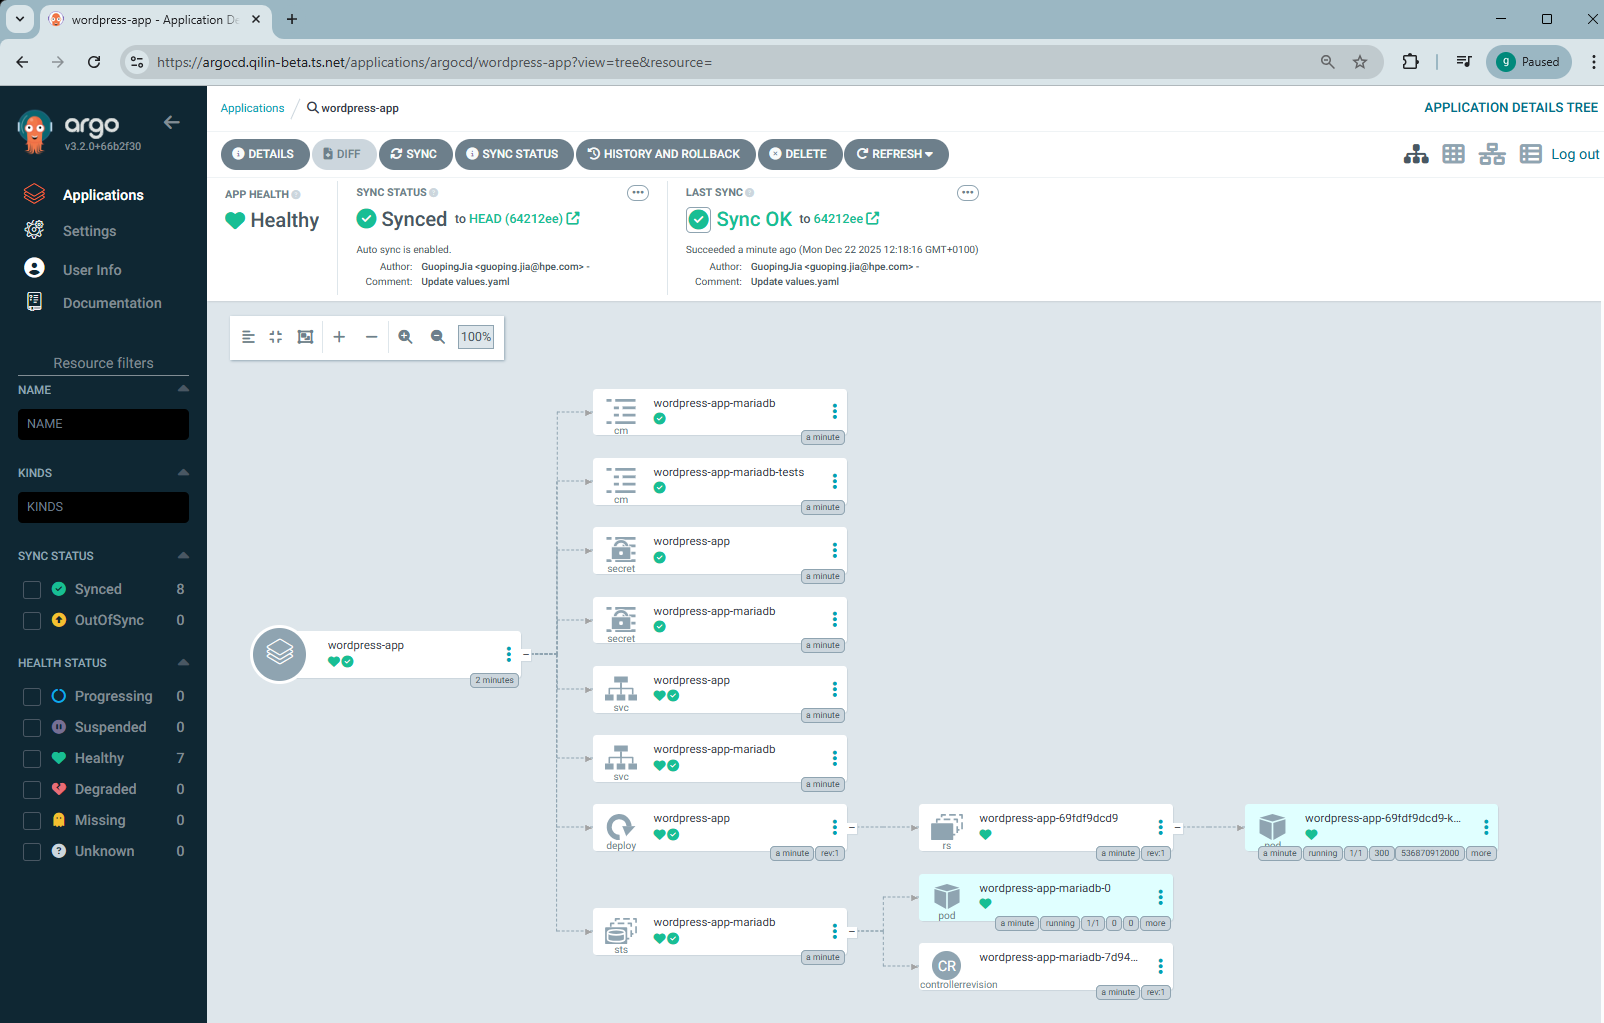
- After a short time, the application should complete deployment with APP HEALTH showing Healthy and SYNC STATUS showing Synced.
Make changes to application repository
Now let’s update the application repository by increasing the number of replicas for the WordPress application from the default value of 1 to 2.
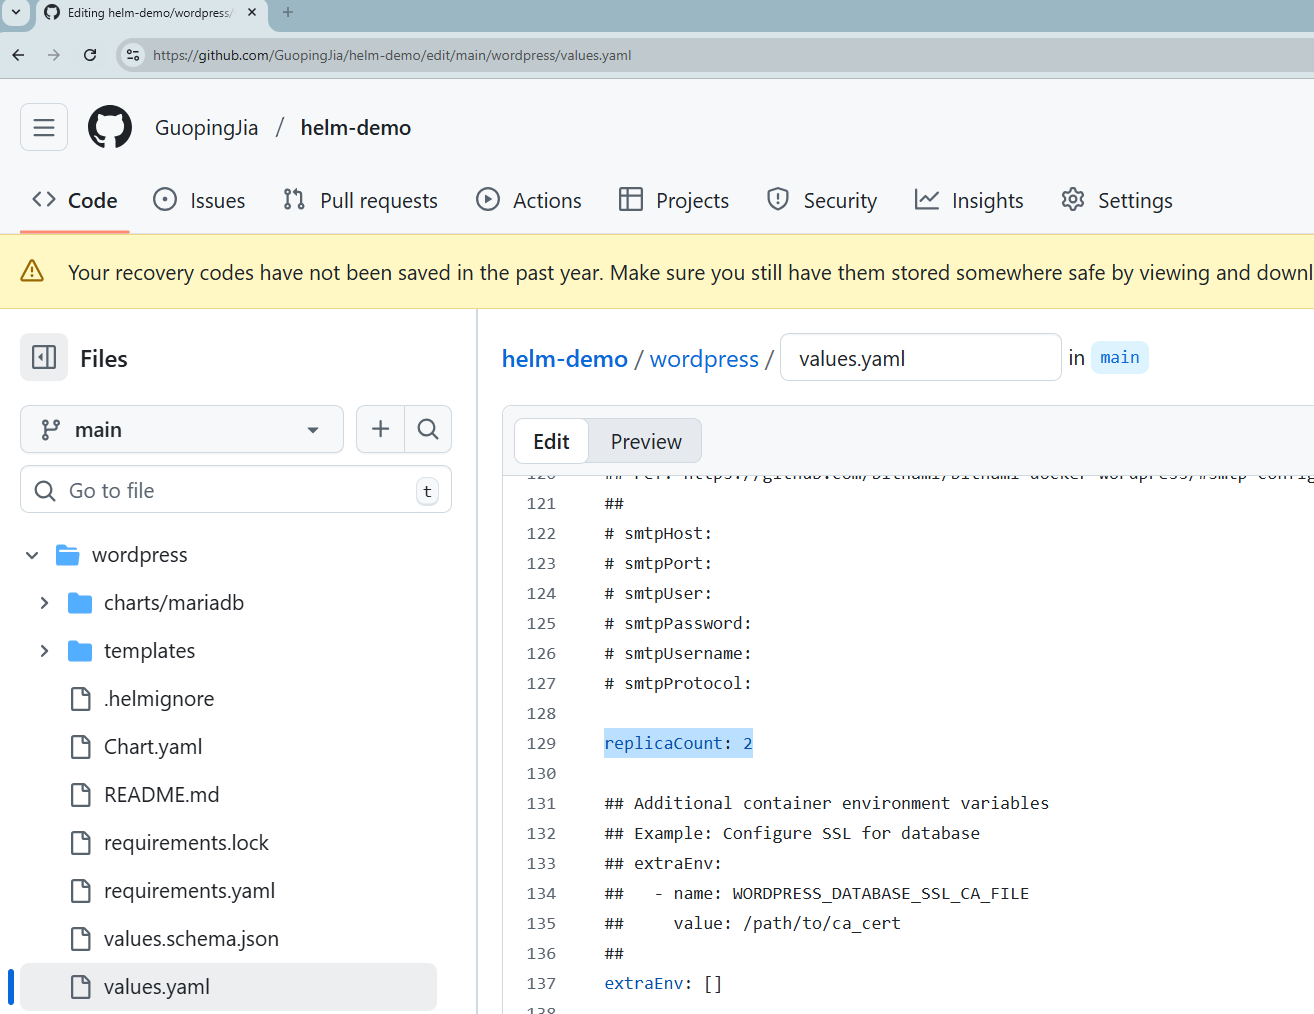
Once the change is committed, Argo CD will detect the update and automatically begin synchronizing it to the MKS cluster.
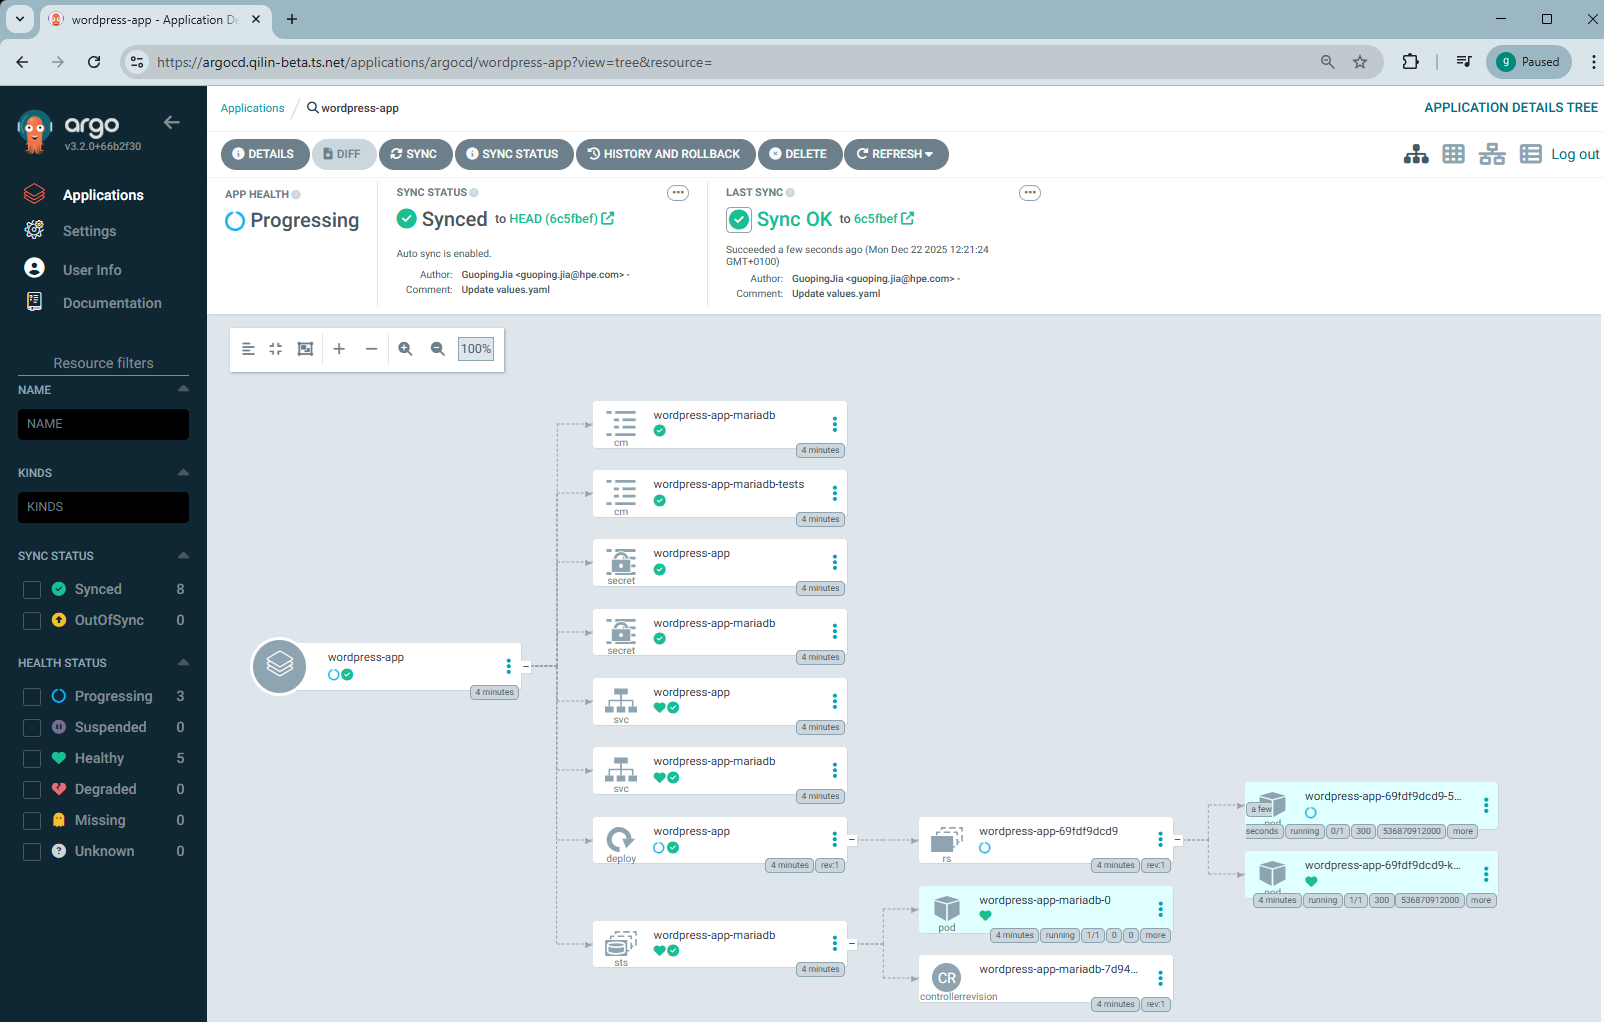
After the sync completes, run the following command to verify that WordPress is now running with 2 PODs in the cluster.
$ kubectl get all -n wordpress
NAME                                READY   STATUS    RESTARTS   AGE
pod/wordpress-app-df478fc99-gwffz   1/1     Running   0          23s
pod/wordpress-app-df478fc99-qrrg4   1/1     Running   0          22s
pod/wordpress-app-mariadb-0         1/1     Running   0          162m

NAME                            TYPE           CLUSTER-IP      EXTERNAL-IP     PORT(S)                      AGE
service/wordpress-app           LoadBalancer   172.30.18.82    172.20.20.243   80:30704/TCP,443:32092/TCP   162m
service/wordpress-app-mariadb   ClusterIP      172.30.18.199   <none>          3306/TCP                     162m

NAME                            READY   UP-TO-DATE   AVAILABLE   AGE
deployment.apps/wordpress-app   2/2     2            2           162m

NAME                                       DESIRED   CURRENT   READY   AGE
replicaset.apps/wordpress-app-69fdf9dcd9   0         0         0       162m
replicaset.apps/wordpress-app-df478fc99    2         2         2       23s

NAME                                     READY   AGE
statefulset.apps/wordpress-app-mariadb   1/1     162m
Access WordPress application
You can expose the WordPress application using Tailscale.
- Create an Ingress YAML manifest.
$ cat ingress-wordpress.yaml
apiVersion: networking.k8s.io/v1
kind: Ingress
metadata:
  name: ingress-wordpress
  namespace: wordpress
  annotations:
    tailscale.com/funnel: "true"
spec:
  defaultBackend:
    service:
      name: wordpress-app
      port:
        number: 443
  ingressClassName: tailscale
  tls:
    - hosts:
        - wordpress
- Apply the Ingress to the namespace wordpress.
$ kubectl apply -f ingress-wordpress.yaml
ingress.networking.k8s.io/ingress-wordpress created
- Verify that the Ingress resource 'ingress-wordpress' has been created and assigned an address, e.g., 'wordpress.qilin-beta.ts.net'.
$ kubectl get ingress -n wordpress
NAME                CLASS       HOSTS   ADDRESS                       PORTS     AGE
ingress-wordpress   tailscale   *       wordpress.qilin-beta.ts.net   80, 443   7s
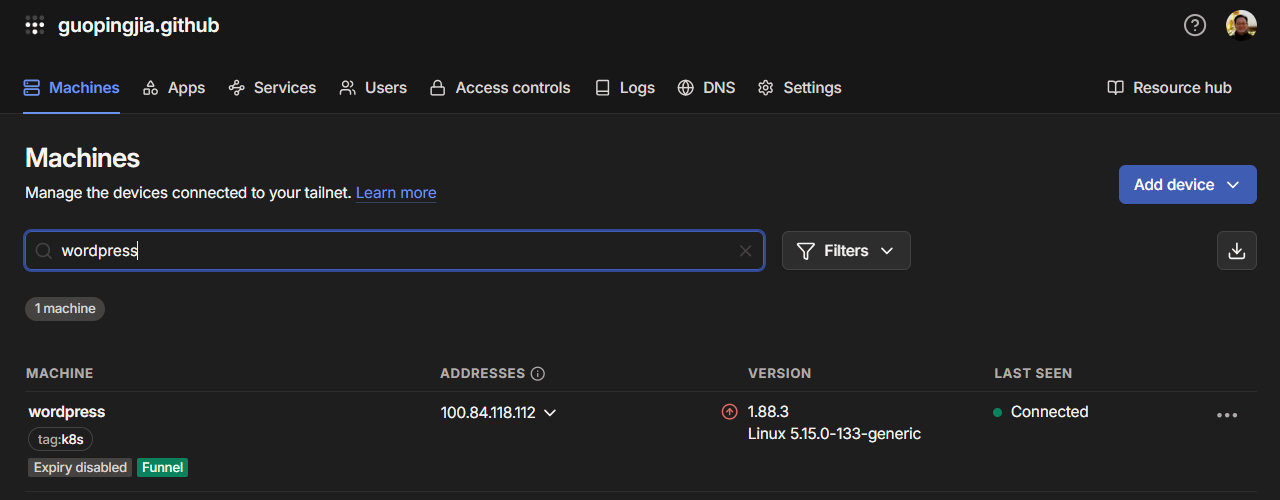
- In the Tailscale admin console, a new machine named 'wordpress' should appear under the Machines tab.
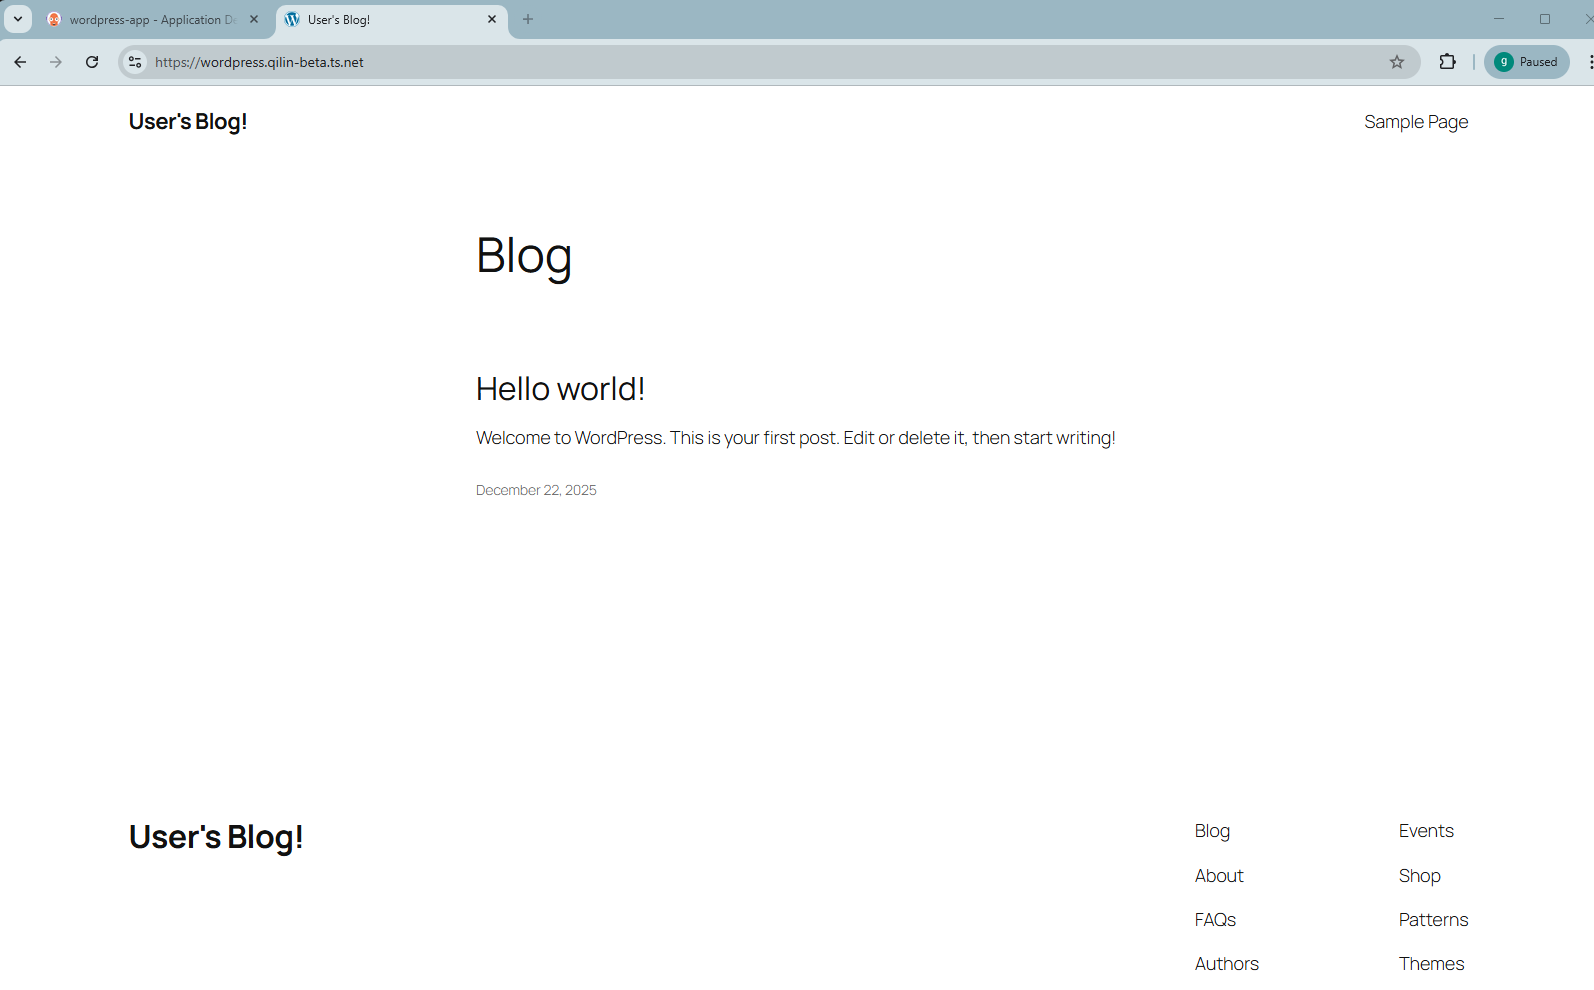
You can now access the WordPress application by opening its Tailscale Funnel URL in a browser.
Conclusion
This blog post provided a detailed walkthrough of how to automate application deployments to MKS clusters using a GitOps workflow with Argo CD. HPE Private Cloud Enterprise was selected as the example environment for this demonstration. It covered the process of deploying Argo CD through a Morpheus task executed on the MKS master node in the cluster, configuring application deployments via a publicly accessible Argo CD endpoint exposed with Tailscale, and monitoring the real-time state of applications running in the MKS cluster.
It's important to remember that while Argo CD manages continuous delivery (CD), it still relies on a separate continuous integration (CI) pipeline. The CI pipeline is responsible for testing and building the application whenever developers update the source code. During this phase, the application is validated, container images are built and pushed to an image registry, and the CI system can update the configuration repository, often a separate repository from the application's source code and connected to Argo CD. These updates then trigger Argo CD to synchronize the desired state with the cluster. This workflow represents a common GitOps pattern used across many organizations. By integrating seamlessly with existing CI/CD systems, Argo CD helps teams implement GitOps practices effectively.
Please keep coming back to the HPE Developer Community blog to learn more about HPE Private Cloud Enterprise and get more ideas on how you can use it in your everyday operations.
Tags
Related
Exposing Grafana service using Tailscale for MKS monitoring in HPE Private Cloud Enterprise
Oct 3, 2025Provisioning K3s clusters using custom cluster layouts in HPE Private Cloud Enterprise
Sep 26, 2025GitOps: The next step in cloud-native development
Sep 25, 2023
Accessing HPE Ezmeral Data Fabric Object Storage from Spring Boot S3 Micro Service deployed in K3s cluster
Sep 13, 2021
Deep Learning Model Training – A First-Time User’s Experience with Determined - Part 1
Apr 14, 2022Deep Learning Model Training – A First-Time User’s Experience with Determined – Part 2
May 3, 2022Provisioning Kubernetes clusters using app blueprint with Ansible integration in HPE Private Cloud Enterprise
Oct 3, 2025